This page looks best with JavaScript enabled

GitHub Actions: Build a ChatOps System in Three Steps

 ·  ☕ 6 min read

In the previous post, Using ChatOps to Improve the R&D Process, providing preview links for Pull Requests through ChatOps improved our agility. This post describes how to implement this feature quickly.

1. Step One: Configure a Trigger

1.1 Choose a Trigger

GitHub has three kinds of Workflow triggers: scheduled, manual, and automatic. We need to choose an automatic trigger to fire the execution logic. The automatic triggers currently supported by GitHub Actions are check_run, check_suite, create, delete, deployment, deployment_status, fork, gollum, issue_comment, issues, label, milestone, page_build, project, project_card, project_column, public, pull_request, pull_request_review, pull_request_review_comment, pull_request_target, push, registry_package, release, status, watch, workflow_run.

In the workflows.yaml file, add the trigger under the on keyword:

1
2
3
on:
  issue_comment:
    types: [created]

Here we choose issue_comment, which triggers the Actions run when an Issue or Pull Request is commented on.

1.2 Define a Trigger Keyword

Keywords are defined to associate the operation logic — mainly matching and filtering, linking /deploy to deploy-script and /clear to clear-script.

Below is a workflows.yaml snippet that triggers on the specified trigger keyword /deploy.

 1
 2
 3
 4
 5
 6
 7
 8
 9
10
11
12
13
14
15
16
17
18
19
20
21
22
23
jobs:
  deploy-check:
    runs-on: ubuntu-latest
    steps:
      - name: acknowledge request to commenter
        id: check
        uses: khan/pull-request-comment-trigger@master
        with:
          trigger: "/deploy"
          reaction: rocket
        env:
          GITHUB_TOKEN: "${{ secrets.GITHUB_TOKEN }}"
    outputs:
      triggered: ${{ steps.check.outputs.triggered }}

  deploy-script:
    if: needs.deploy-check.outputs.triggered == 'true'
    runs-on: ubuntu-latest
    needs: deploy-check
    steps:
      - name: script
        run: |
                    echo "start"

2. Step Two: Run Custom Commands

This step mainly runs the corresponding steps that modify the infrastructure — updating services, deploying applications, deleting files, and so on — with a high degree of freedom.

Here we mainly need to deploy a new service and provide an externally accessible address. For previews of static projects, using the preview service that netlify provides is better. But for most projects you still need to remote into a server to operate.

Below is an example that remotes into a specified server as the root user to create and expose a service.

 1
 2
 3
 4
 5
 6
 7
 8
 9
10
11
    - name: executing remote ssh commands
    id: deploy_console
    uses: appleboy/ssh-action@master
    with:
        host: ${{ secrets.IP }}
        username: root
        password: ${{ secrets.PASSWORD }}
        port: 22
        script: |
        kubectl run nginx --image=nginx
        kubectl expose deploy nginx --type=NodePort --port=80 --target-port=80        

You can fill the script with custom commands according to your needs.

3. Step Three: Feed Back the Result

Finally, you need to feed back the result — clearly indicate that the task has completed and tell the user the outcome in some way. There are mainly two ways here: a comment reply and a Slack notification.

3.1 Comment Reply

Adding the relevant Job implements the ability to reply to a specified Issue/Pull Request. At the same time, in the comment body we can reference built-in variables to make the reply more detailed and the meaning more effectively conveyed.

1
2
3
4
5
6
7
    - name: Create comment
    uses: peter-evans/create-or-update-comment@v1
    with:
        issue-number: ${{ github.event.issue.number }}
        body: |
        Congratulations! Deployment succeeded.
        reactions: heart, hooray, laugh        

3.2 Slack Notification

In a previous post I already shared How to Configure Slack Notifications and won’t repeat it here.

 1
 2
 3
 4
 5
 6
 7
 8
 9
10
11
12
13
14
15
    - uses: 8398a7/action-slack@v3
    with:
        status: custom
        fields: workflow,job,commit,repo,ref,author,took
        custom_payload: |
        {
            username: 'action-slack',
            icon_emoji: ':octocat:',
            attachments: [{
            color: '${{ job.status }}' === 'success' ? 'good' : '${{ job.status }}' === 'failure' ? 'danger' : 'warning',
            text: `Congratulations! Deployment succeeded.`,
            }]
        }        
    env:
        SLACK_WEBHOOK_URL: ${{ secrets.SLACK_WEBHOOK_URL }}

Just add the snippet above to your workflows.

4. Some GitHub Actions Tips

4.1 Switching the Code to the Pull Request’s Branch

In a Pull Request flow there are usually two branches, upstream and developer. The workflows’ on targets the current branch, so in the upstream repository you cannot directly check out the branch of the developer repository that submitted the Pull Request.

The snippet below switches the code to the developer branch pending merge.

 1
 2
 3
 4
 5
 6
 7
 8
 9
10
11
12
13
- name: get pull request ref
  id: get_pull_request_ref
  uses: octokit/request-action@v2.x
  with:
    route: GET /repos/:repository/pulls/:issue_id
    repository: ${{ github.repository }}
    issue_id: ${{ github.event.issue.number }}
  env:
    GITHUB_TOKEN: "${{ secrets.GITHUB_TOKEN }}"
- uses: actions/checkout@v2
  with:
    repository: ${{ fromJson(steps.get_pull_request_ref.outputs.data).head.repo.full_name }}
    ref: ${{ fromJson(steps.get_pull_request_ref.outputs.data).head.ref }}

4.2 Using Deployment to Track Deployment State

GitHub provides an object called Deployment for managing deployment events and state. Below is a sequence diagram:

 1
 2
 3
 4
 5
 6
 7
 8
 9
10
11
12
13
14
15
16
17
18
19
20
21
22
23
24
+---------+             +--------+            +-----------+        +-------------+
| Tooling |             | GitHub |            | 3rd Party |        | Your Server |
+---------+             +--------+            +-----------+        +-------------+
     |                      |                       |                     |
     |  Create Deployment   |                       |                     |
     |--------------------->|                       |                     |
     |                      |                       |                     |
     |  Deployment Created  |                       |                     |
     |<---------------------|                       |                     |
     |                      |                       |                     |
     |                      |   Deployment Event    |                     |
     |                      |---------------------->|                     |
     |                      |                       |     SSH+Deploys     |
     |                      |                       |-------------------->|
     |                      |                       |                     |
     |                      |   Deployment Status   |                     |
     |                      |<----------------------|                     |
     |                      |                       |                     |
     |                      |                       |   Deploy Completed  |
     |                      |                       |<--------------------|
     |                      |                       |                     |
     |                      |   Deployment Status   |                     |
     |                      |<----------------------|                     |
     |                      |                       |                     |

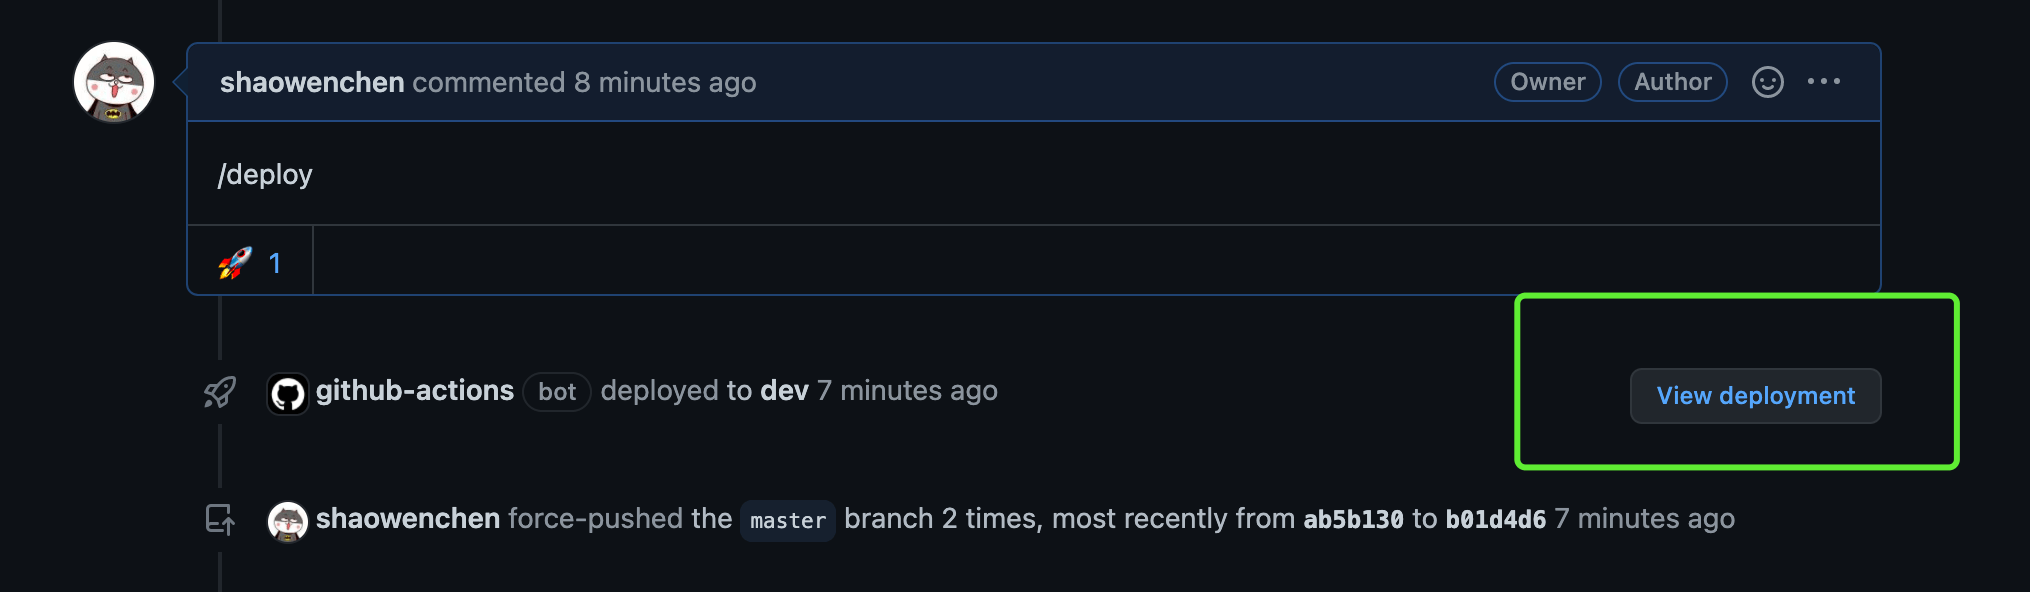
It looks like this on the page:

For how to use it, refer to the links at the end of this post.

The reason I ultimately did not adopt this approach: under a Pull Request, when the developer’s PR branch does not exist in upstream, the page cannot find the Deployment. OK, I know you don’t get it, but that’s fine — I recommend managing Deployments this way, give it a try.

4.3 How to Debug Variables

GitHub Actions has many built-in variables, and using third-party Actions yields many more. During debugging, if you are unsure whether a variable exists or what its value is, you can just print it and look.

Here is an example:

1
2
3
- name: echo
  run: |
        echo ${{ steps.get_pull_request_ref.outputs.data }}

Part of the printed output looks like this:

 1
 2
 3
 4
 5
 6
 7
 8
 9
10
11
12
13
14
{
    "url": "https://api.github.com/repos/***/console/pulls/7",
    "id": 548619025,
    "node_id": "MDExOlB1bGxSZXF1ZXN0NTQ4NjE5MDI1",
    "html_url": "https://github.com/***/console/pull/7",
    "diff_url": "https://github.com/***/console/pull/7.diff",
    "patch_url": "https://github.com/***/console/pull/7.patch",
    "issue_url": "https://api.github.com/repos/***/console/issues/7",
    "number": 7,
    "state": "open",
    "locked": false,
    "title": "Feat/workspace group",
    ...
}

Debugging is very time-consuming throughout this process; we need to master certain methods to get twice the result with half the effort.

4.4 Passing Variables Between Steps with Output

Both Output and Env can pass variables between Steps; here we use Output as an example:

 1
 2
 3
 4
 5
 6
 7
 8
 9
10
11
- name: set SERVICE_PORT
  id: set_port
  run: |
        echo "::set-output name=SERVICE_PORT::$(sshpass  -p "${{ secrets.QING_PASSWORD }}" ssh -o StrictHostKeyChecking=no root@${{ secrets.EIP }} "kubectl get svc ${{ env.SERVICE_NAME }} -o json | jq .spec.ports[].nodePort")"
- name: Create comment
  uses: peter-evans/create-or-update-comment@v1
  with:
    issue-number: ${{ github.event.issue.number }}
    body: |
            Congratulations! Deployment succeeded. This is the [preview link](http://${{ secrets.EIP }}:${{ steps.set_port.outputs.SERVICE_PORT }}/) .
    reactions: heart, hooray, laugh

First, run the sshpass command to obtain the service’s port and set it as an output variable. Then, in other Steps, reference the cross-Step variable value with ${{ steps.set_port.outputs.SERVICE_PORT }}.

5. References


微信公众号
WRITTEN BY
微信公众号