1. Create a ChatGPT Account
- Visit https://chat.openai.com/ to test your network
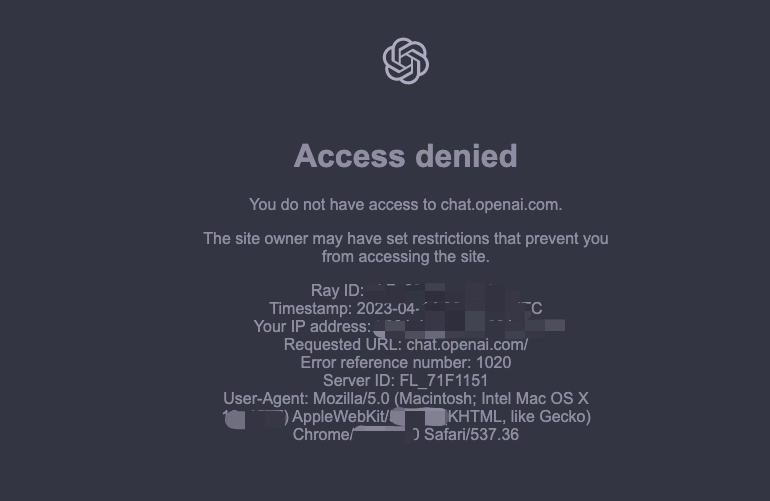
If you see the following page, your network does not support ChatGPT
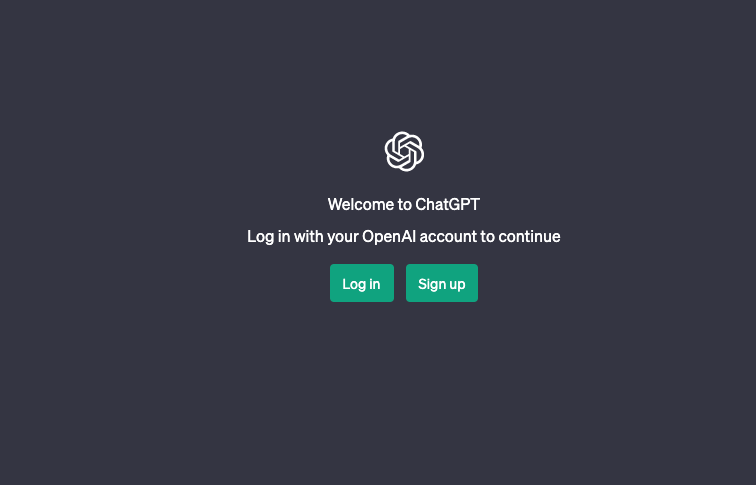
Normally you should see this page
The solution is to switch networks. Fortunately, the company network supports it, so I registered my account on the company network.
- Find an SMS verification platform
When registering an OpenAI account you need to enter a phone number, and OpenAI does not support domestic phone numbers, so you need to find an SMS verification platform.
I used https://smspva.com/; the minimum top-up is 1 US dollar, and Alipay is accepted.
In the Search service box on the left side of the page, search for ai and find OpenAI, as shown below.
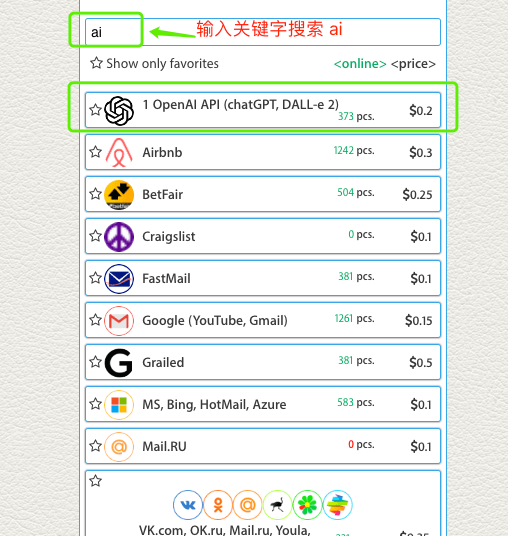
Click GET BUMBER to get a temporary phone number.
- Register an OpenAI account
Register the OpenAI account with the phone number above; the verification code can be obtained on the smspva page.
Once registration is complete you can visit https://chat.openai.com/ directly. Although there are all kinds of proxy services and browser-extension integrations, the direct web-version experience is still quite good.
- Get the API Key
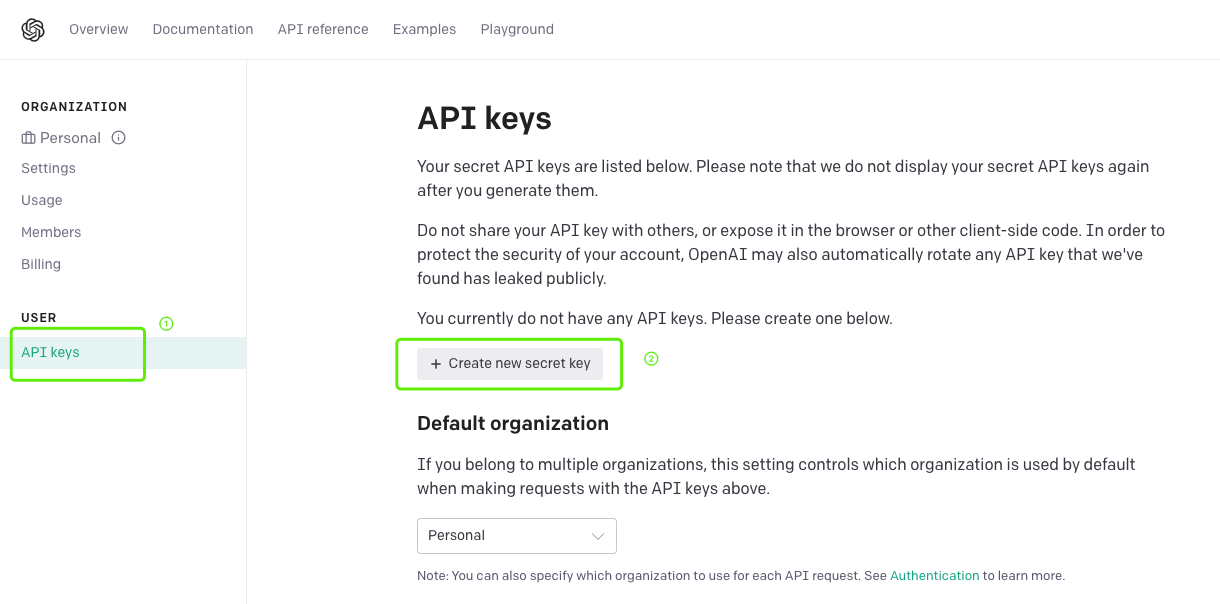
Visit https://platform.openai.com/account/api-keys, click Create new secret key to obtain the API Key, as shown below:
2. Create Cloudflare Workers
- Point the domain’s Nameserver to Cloudflare
To use Cloudflare’s free plan, you need to point your domain’s Nameserver to Cloudflare.
- Create a Service
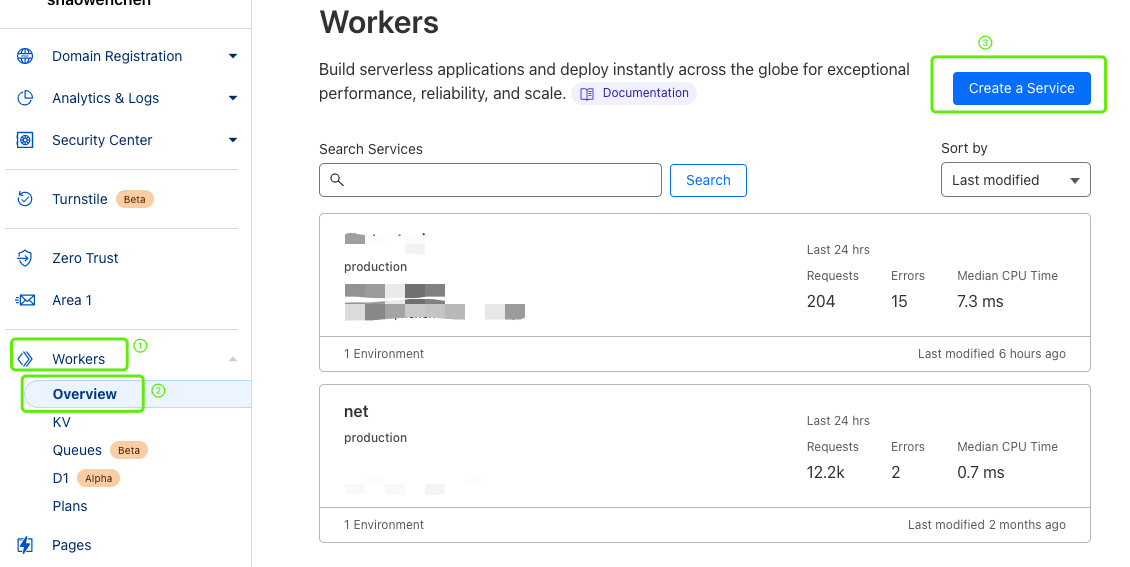
As shown above, click Workers -> Overview -> Create a Service
Use the default configuration for everything and save.
- Configure the Service
Open the Service you just created and click Quick edit.
Copy index.mini.js from the https://github.com/ilyydy/cf-openai/releases page into the input box and click Save and deploy.
I used v0.3.0; you can also finish the configuration quickly by just reading the project’s README.md.
- Add a KV
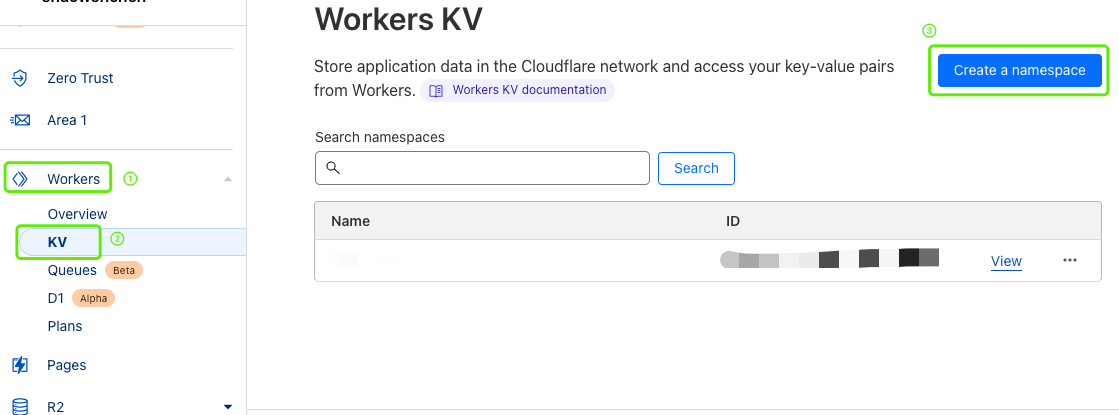
As shown above, create a new KV. The name is arbitrary; I used chatgpt.
- Add environment variables and bind the KV
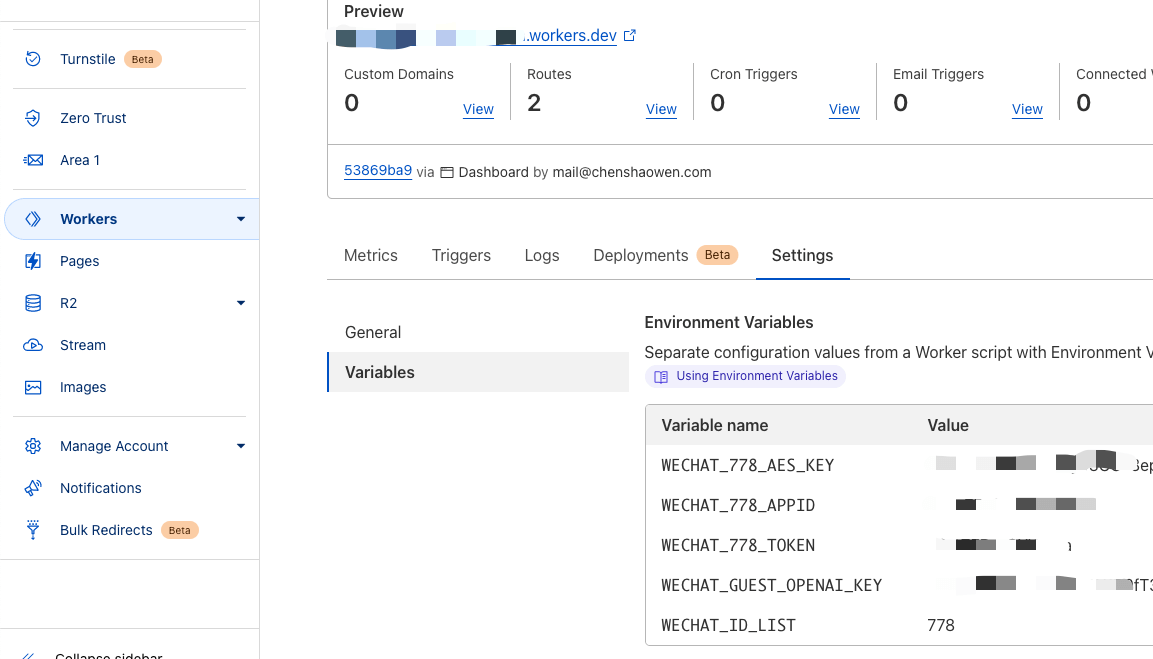
As shown above, open the Service you just created, click Settings->Variables, and add the following environment variables:
WECHAT_ID_LIST = MP
WECHAT_GUEST_OPENAI_KEY, fill in the API Key obtained above
WECHAT_MP_TOKEN, obtain from the WeChat Official Account backend
WECHAT_MP_APPID, obtain from the WeChat Official Account backend
WECHAT_MP_AES_KEY, obtain from the WeChat Official Account backend
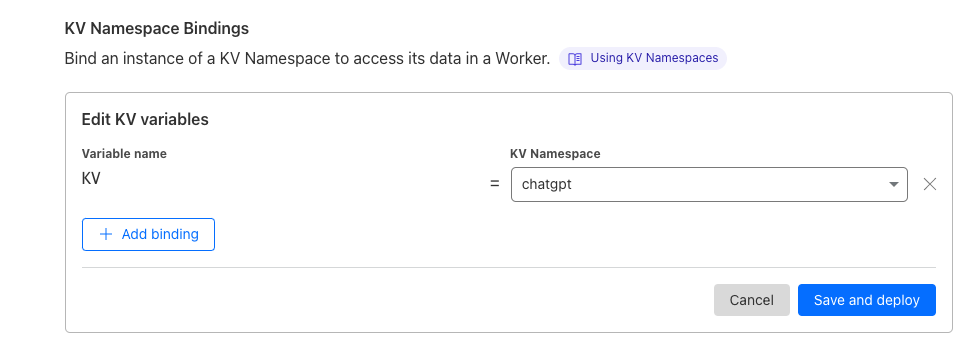
On this page you also need to bind the KV you just created, as shown below:
- Configure the Workers route
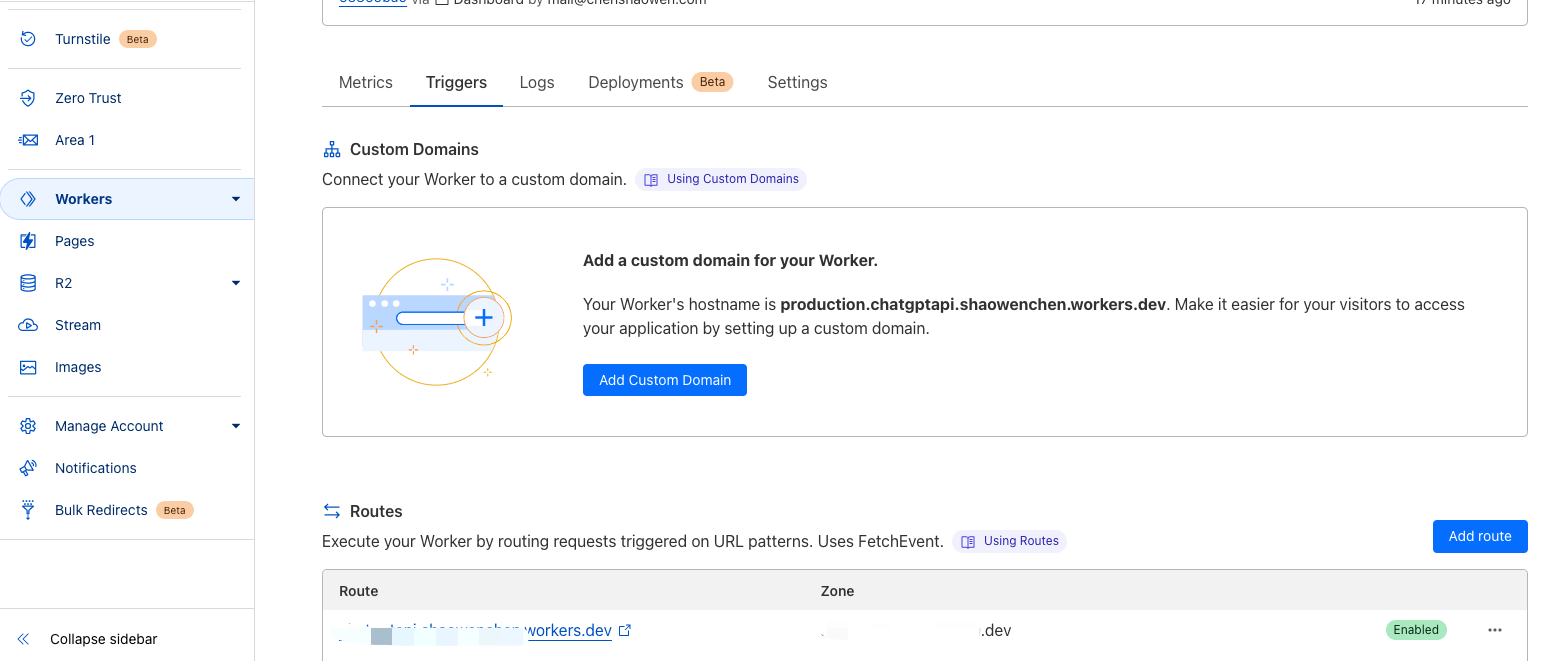
On the Trigger page of the Service you just created, click Add route, fill in xxx.chenshaowen.com/* for Route, and save.
But at this point xxx.chenshaowen.com does not yet point to this Service; you need to configure a CNAME on Cloudflare’s DNS page.
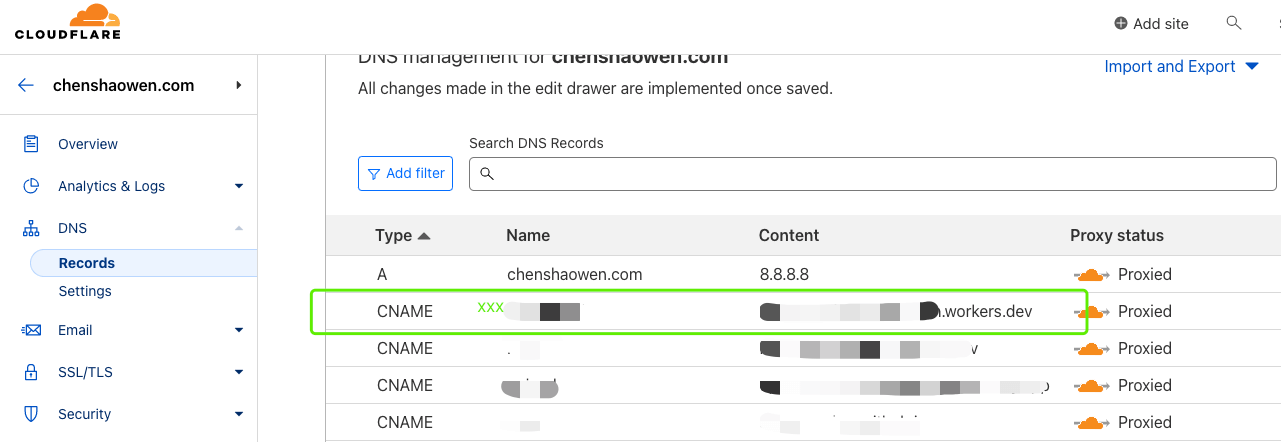
3. Integrate Cloudflare Workers into the WeChat Official Account
- Log in to the WeChat Official Account backend
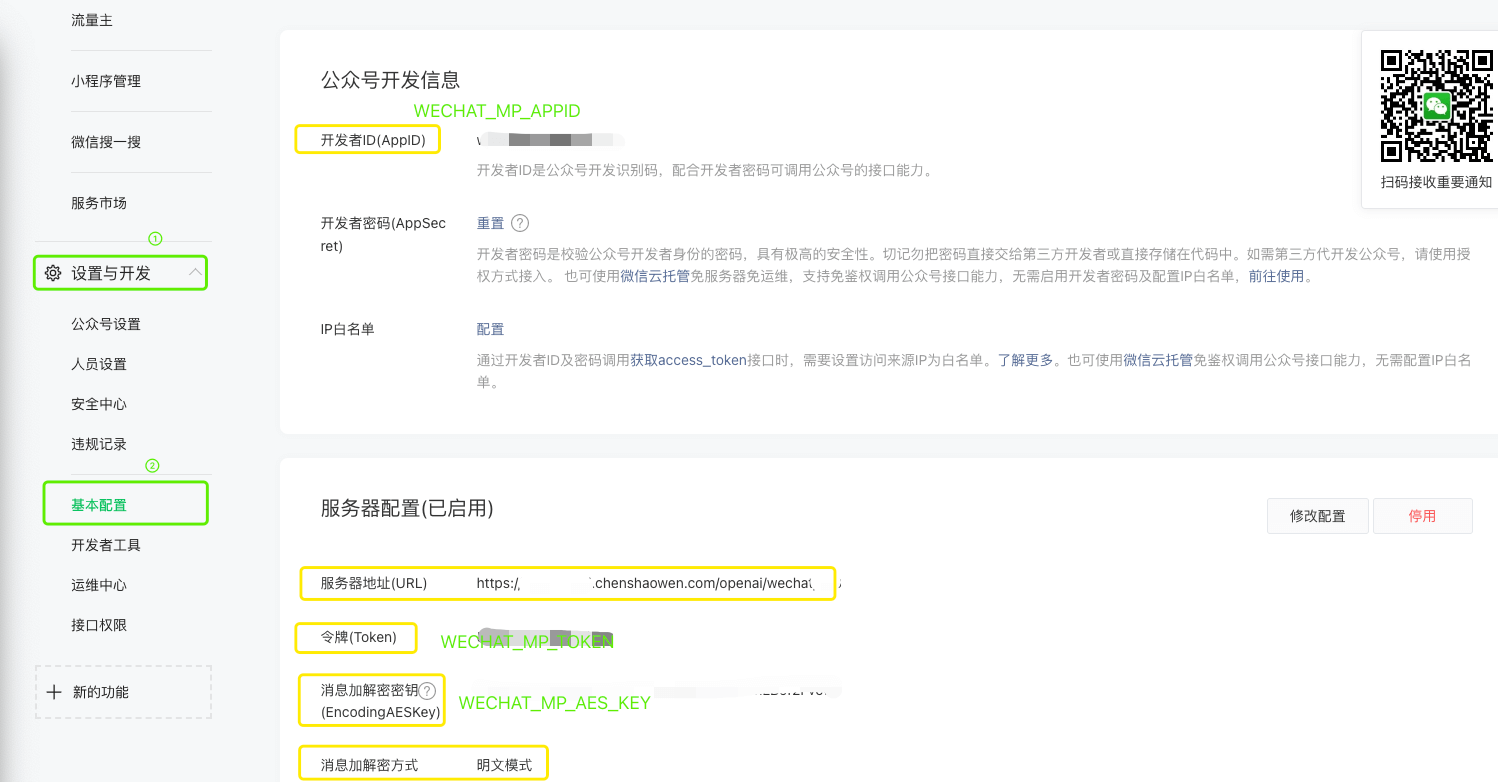
- Configure the server address
Below is the Cloudflare Workers address https://xxx.chenshaowen.com/openai/wechat/MP , where xxx.chenshaowen.com is your domain and MP is the value of WECHAT_ID_LIST.
Finally, don’t forget to enable the server configuration.
4. Testing
- Common issues
WeChat requires a reply within 15 seconds, otherwise it reports an official-account service failure, and OpenAI may need more time to process. In that case this message is returned first:
| |
Afterwards, enter /retry 24072700431510021 to get the answer.
- Test results
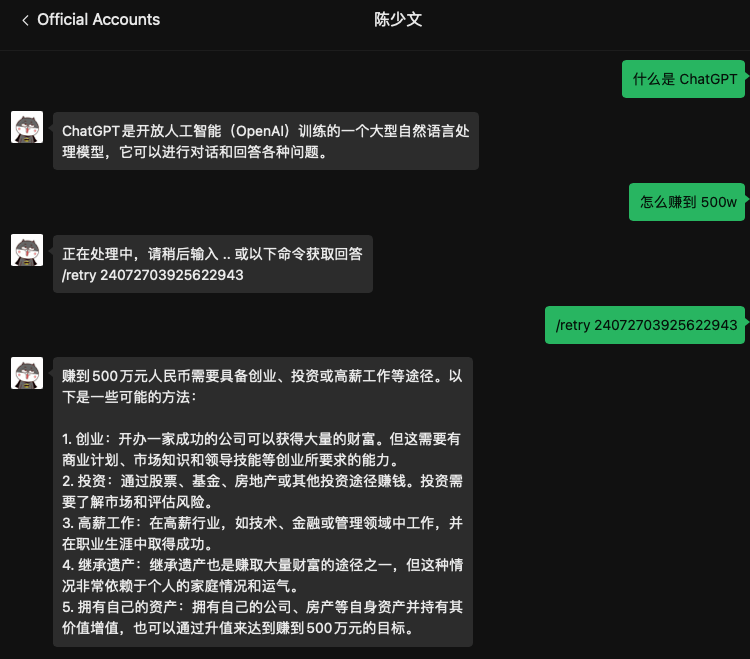
When a timeout occurs, you can get the answer by following the prompt. There are also some other commands you can view by entering /help in the chat box.
