This article also applies to connecting physical machines with ARM or MIPS architectures and FreeBSD or Windows systems. If Jenkins can reach the build machine, you can skip the Frp part.
1. The Problem
In scenarios where Kubernetes is the infrastructure, when Jenkins runs a build pipeline it creates a separate Pod for each pipeline for building. The container environment inside the Pod can be customized as needed, which makes extension very convenient and satisfies the vast majority of requirements.
There is one exception: building applications in the Apple ecosystem, such as iOS and macOS apps. Since there is no macOS container image, you can only build on a physical machine. Another approach is to install macOS in a virtual machine and connect that VM to Jenkins for building; of course, you can also import a macOS VM shared by someone else.
Both approaches run into the same problem: Jenkins Master cannot directly access the macOS system, the network is not reachable, and the macOS build node cannot be added.
This article mainly uses Frp as the tunneling tool to open up the network and provide a Jenkins pipeline build solution for iOS and macOS apps.
2. The Solution
As shown in the figure below, Frp can open up the network between Jenkins and the physical machine.
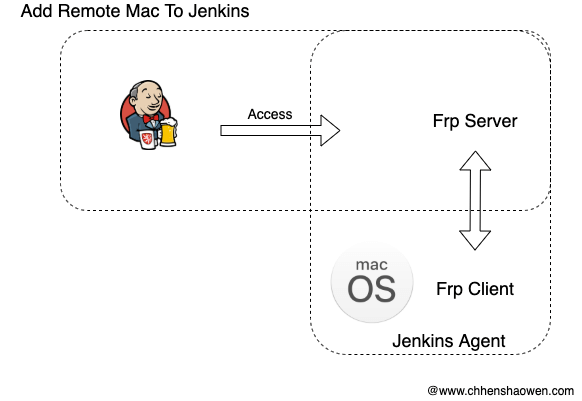
- The first step is to deploy the Frp server into an environment that Jenkins Master can directly access; such environments include physical machines, VMs, and container environments.
- The second step is to run the Frp client on the Mac physical machine, exposing macOS’s SSH service on the Frp server.
- The third step is to add a macOS node in Jenkins and use a Label to select the Mac machine for builds.
3. Configuring the Relevant Components
3.1 macOS System Configuration
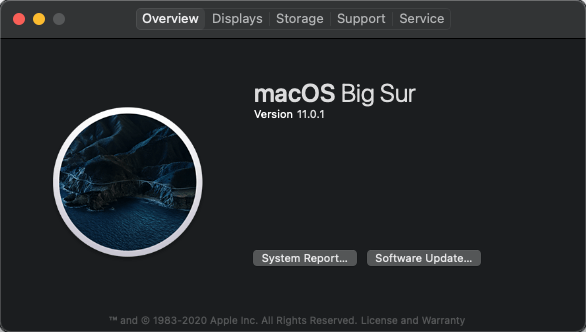
The figure below is the macOS version I tested:
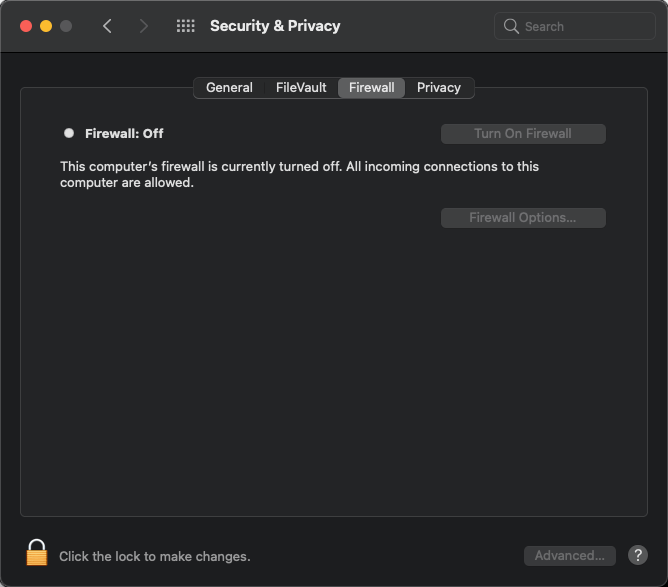
- Disable the firewall
- In System Settings, find [Sharing] and turn on
Remote Login.
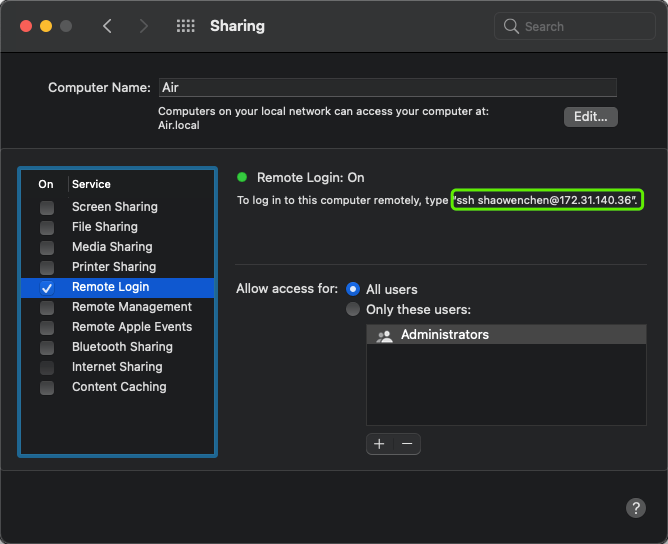
This step is so that Jenkins Master can log in to macOS remotely. The 172.31.140.36 here is an internal-network IP that Jenkins cannot access directly.
3.2 Setting Up and Configuring the Frp Service
For the Frp server and client configuration, please refer to Using frp to Publish a Local Service to the Public Network.
The client configuration is pasted below:
| |
This maps the local macOS port 22 to the public address 139.198.120.81:2222.
Run the command to start the Frp client. In a production environment, this service needs to be supervised.
| |
After startup, an error dialog pops up, as shown in the screenshot below:
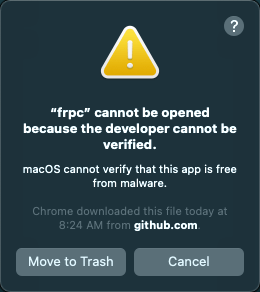
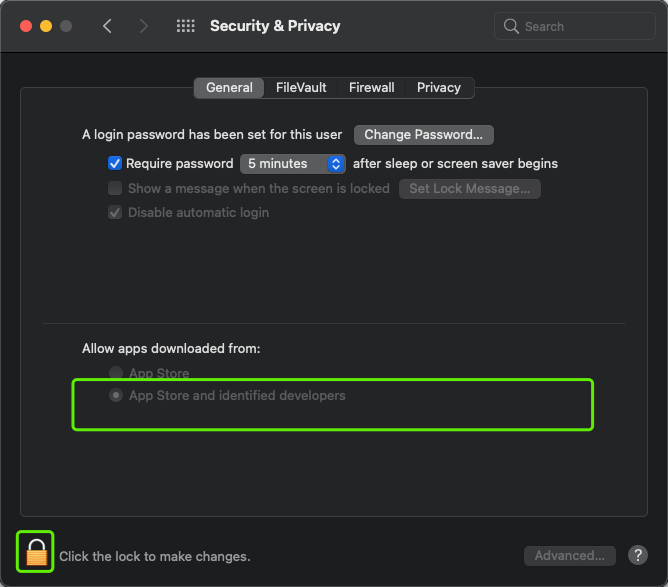
You need to go to System Settings -> Security & Privacy and unlock the execution permission before running Frp. In the figure below, it has already been allowed, so no Frp-related prompt appears.
Run ./frpc -c ./frpc.ini again, and the dialog will show a new Open option.
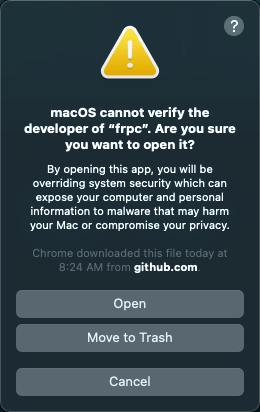
After clicking Open , you can see that the Frp client is now running normally.
| |
3.3 Adding a Node Configuration in Jenkins
The configuration in Jenkins mainly breaks down into the following steps:
- Go to the node management page in the Jenkins console
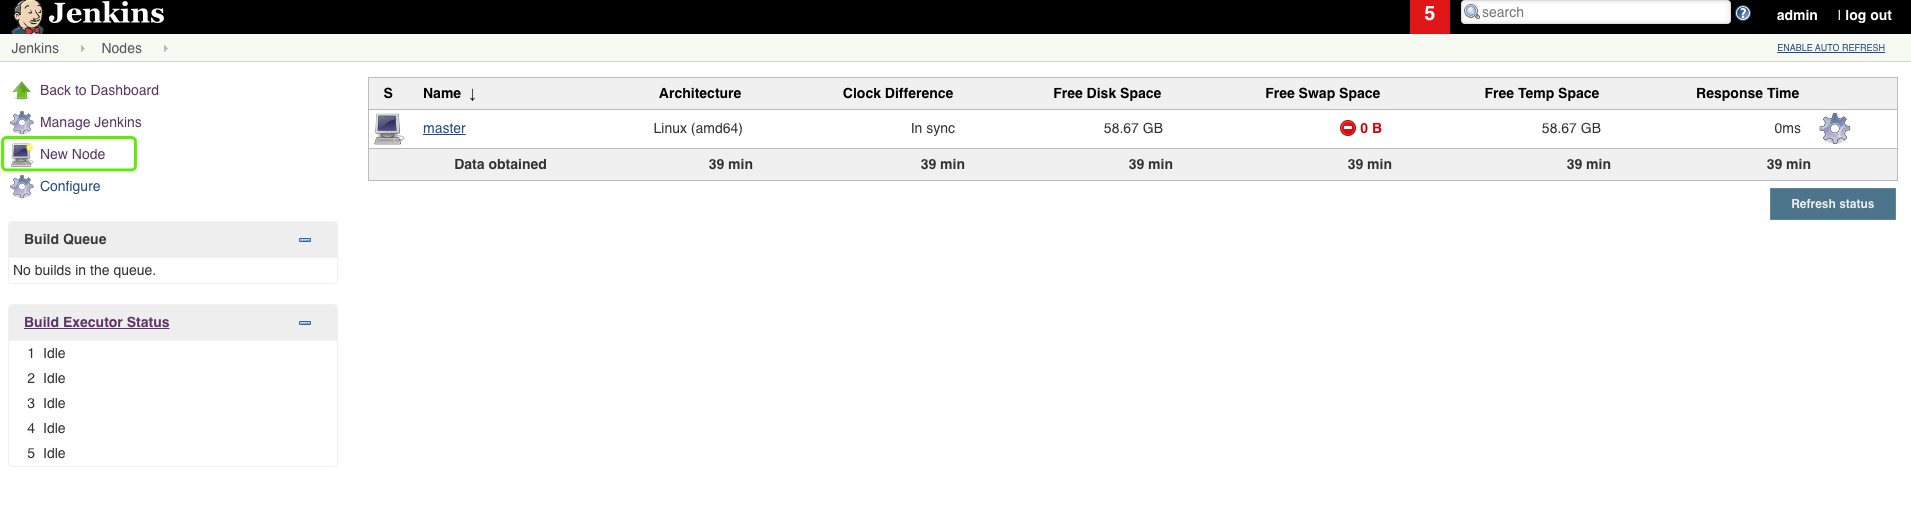
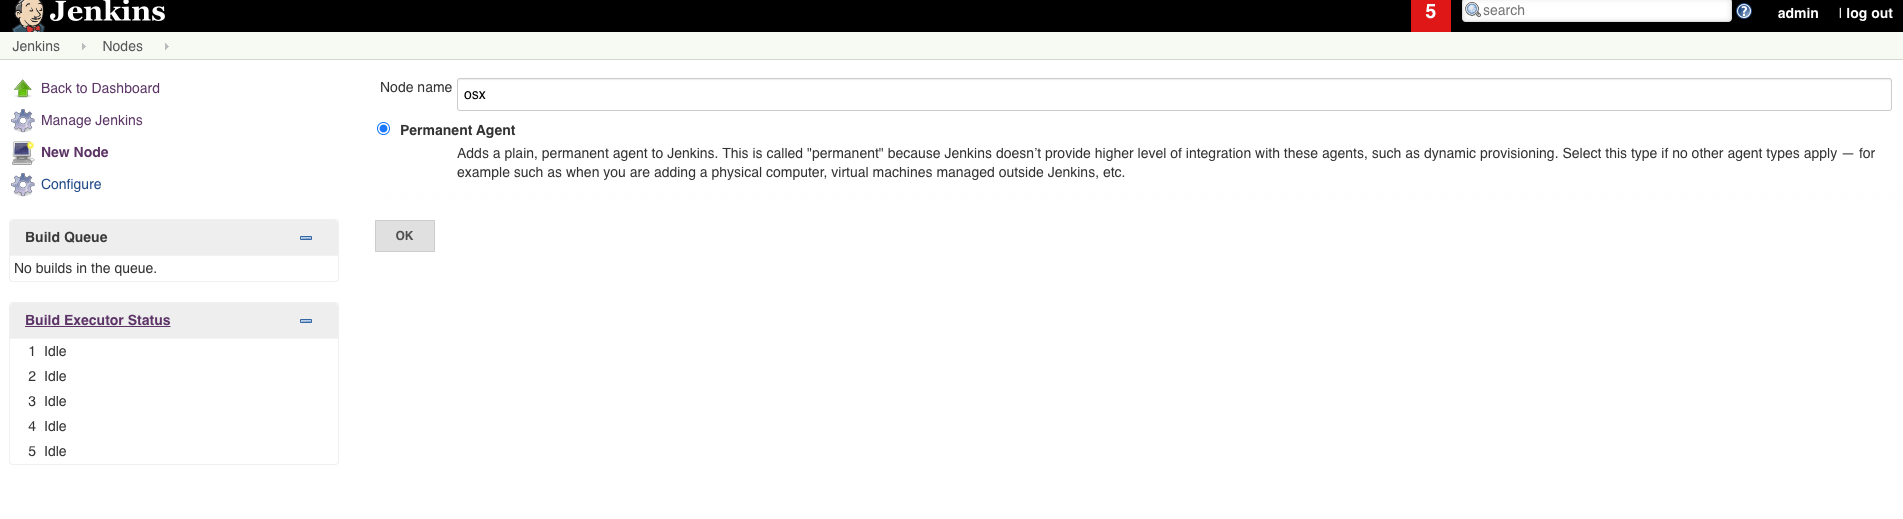
- Add an OSX node and check
Permanent Agent
- Configure the node information
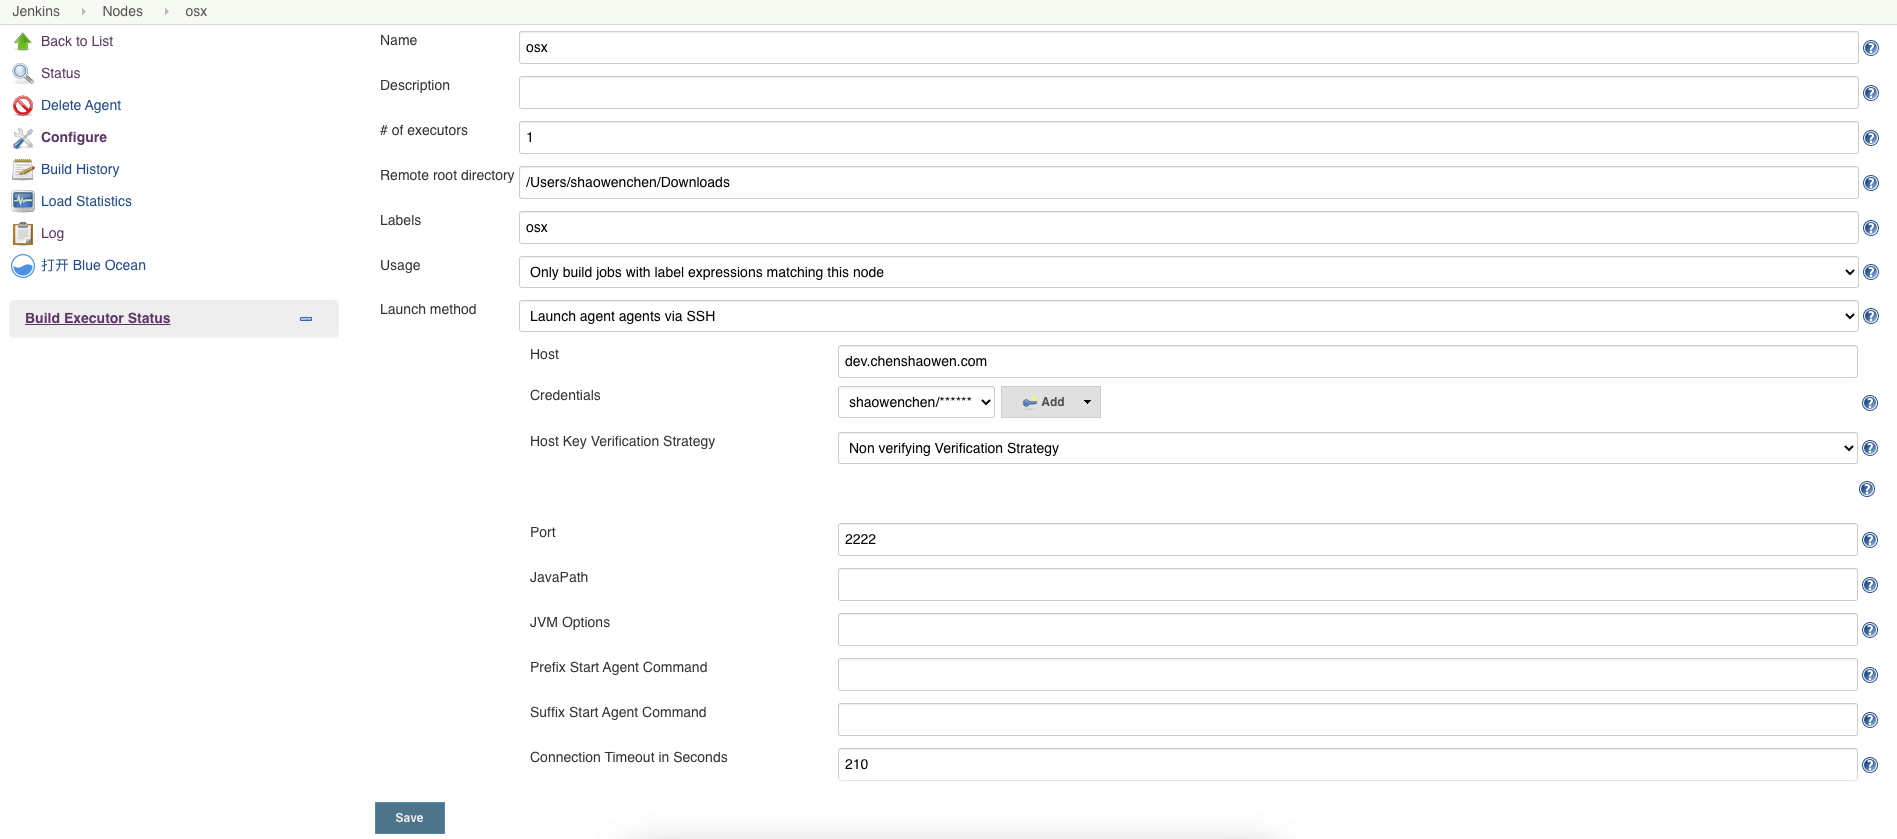
Configure as shown in the figure: set Host to the Frp server’s address, and click [Advanced] to configure the SSH port as 2222.
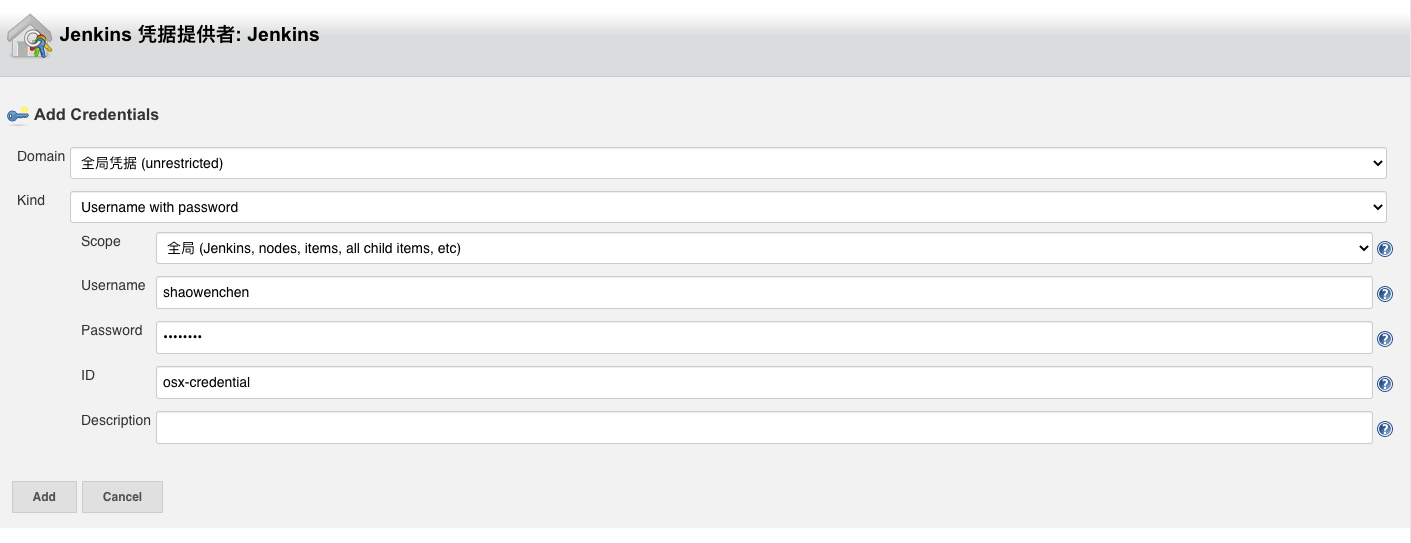
Here you need to add a credential to log in to macOS. For simplicity, I used the account and password directly. If you have higher security requirements, you can authenticate with an SSH key.
- Start the node and view the node list
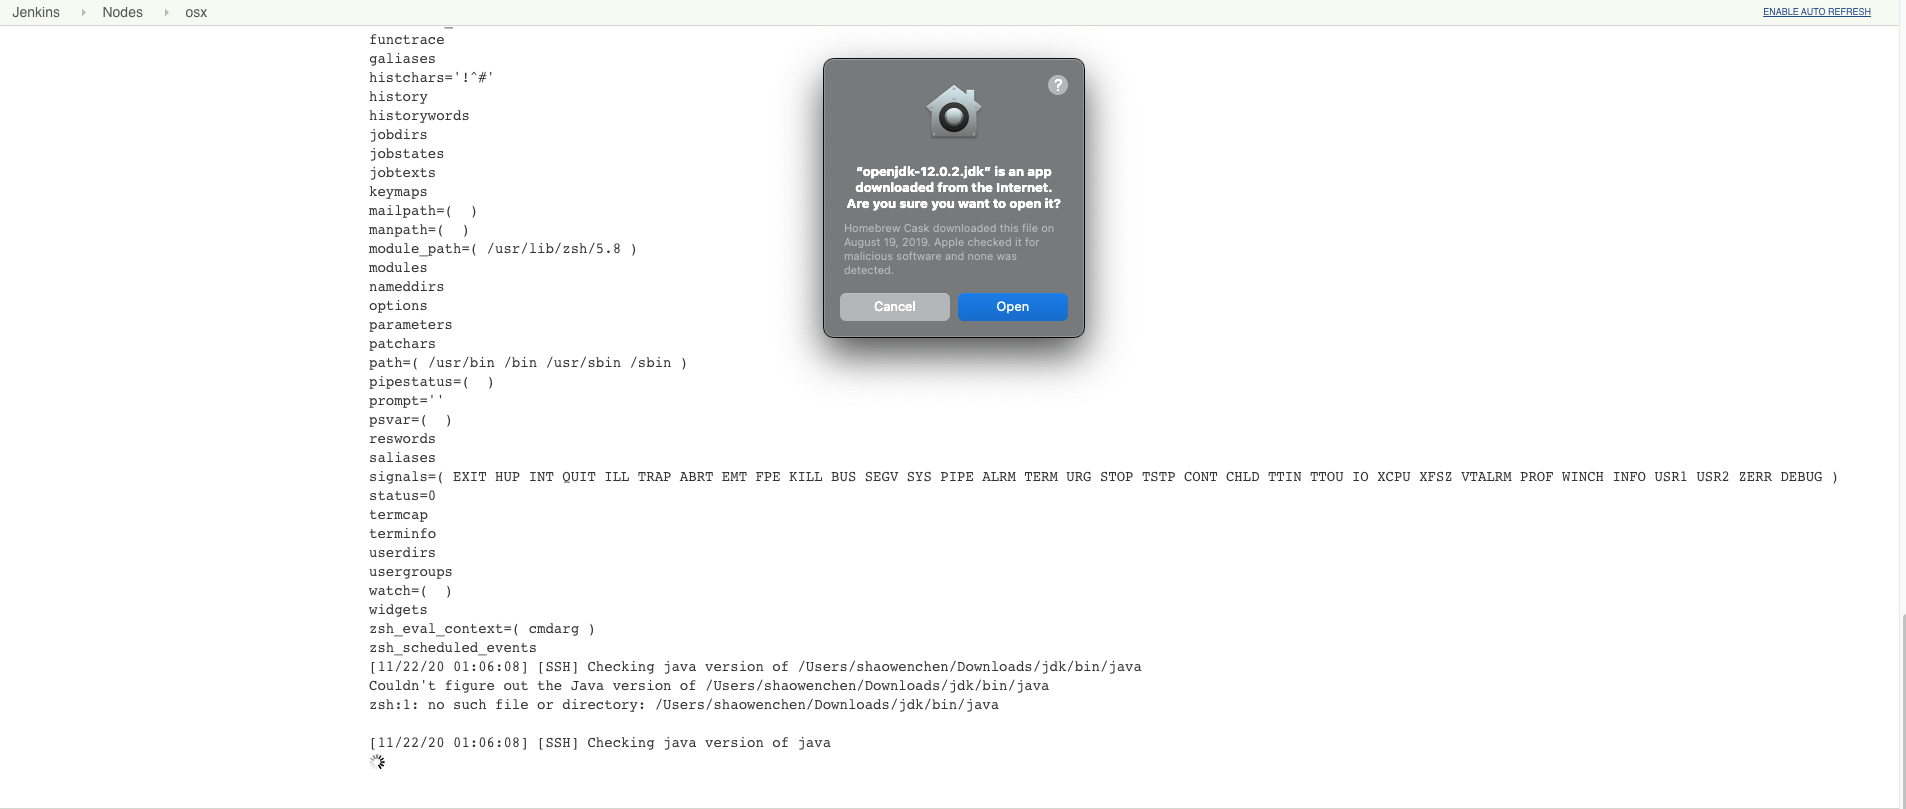
After the previous step completes, the node starts directly by default — that is, it initializes the node and runs a process to communicate with the Master.
During initialization, an authorization dialog appears on the macOS system. Click Open as shown in the figure below.
Return to the node list page and you will see the macOS node.
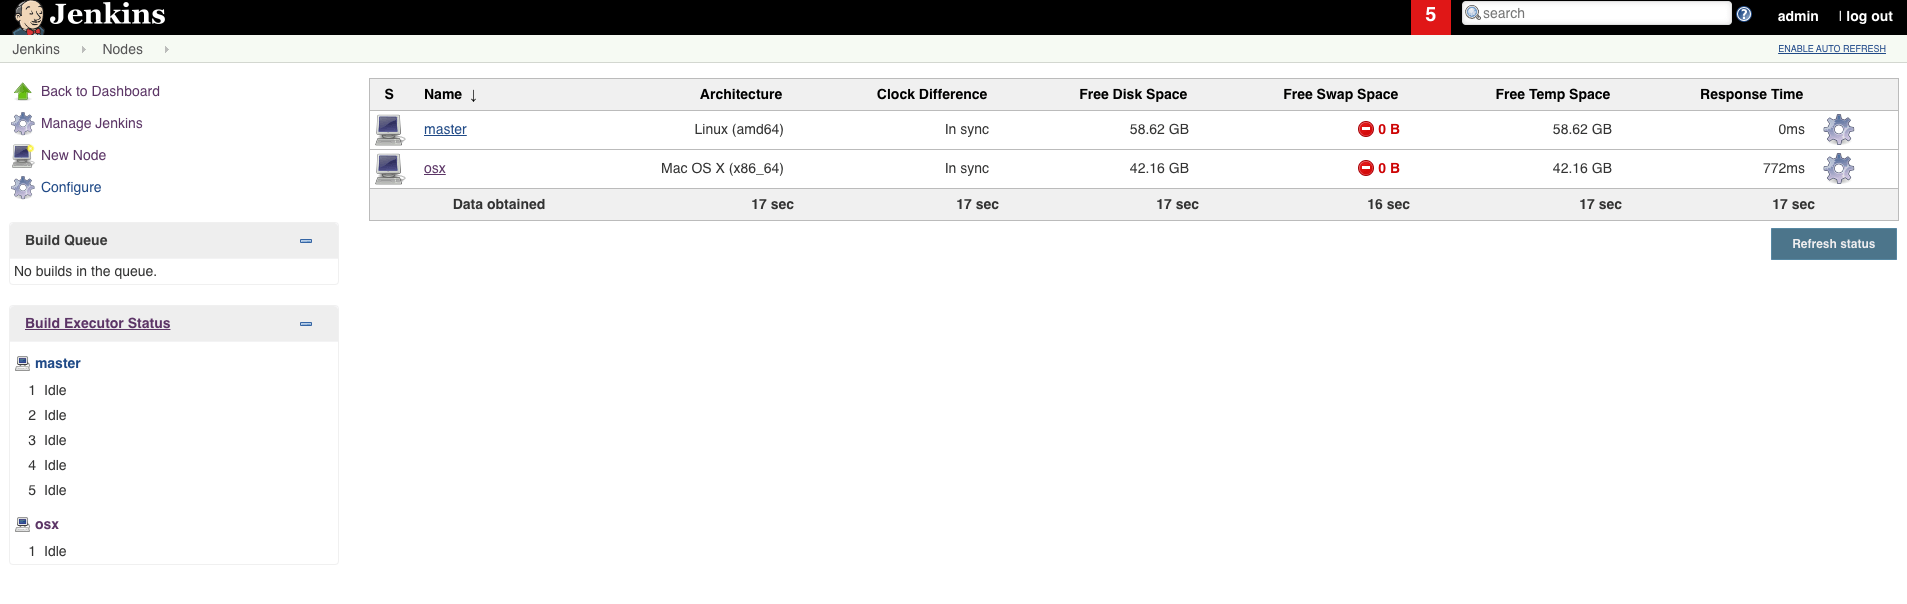
- View the initialization files on the Mac physical machine
Back on macOS, you can see that a series of files has been initialized under the working directory.
| |
4. Testing the Pipeline
Create a freestyle pipeline and paste the following content:
| |
After execution completes, you can see the following result:
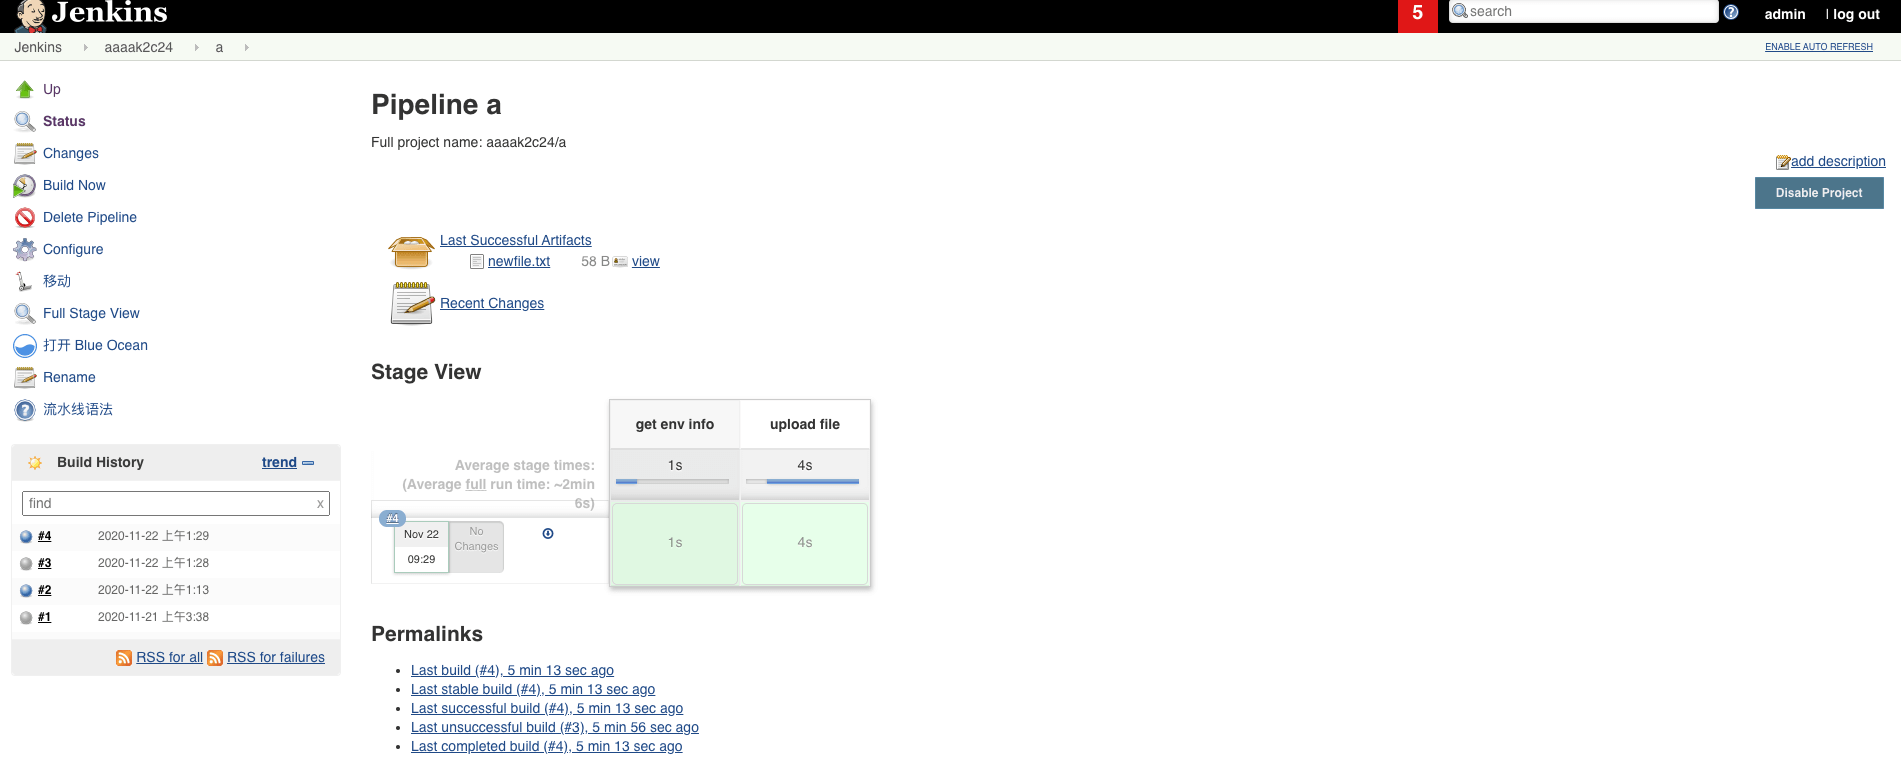
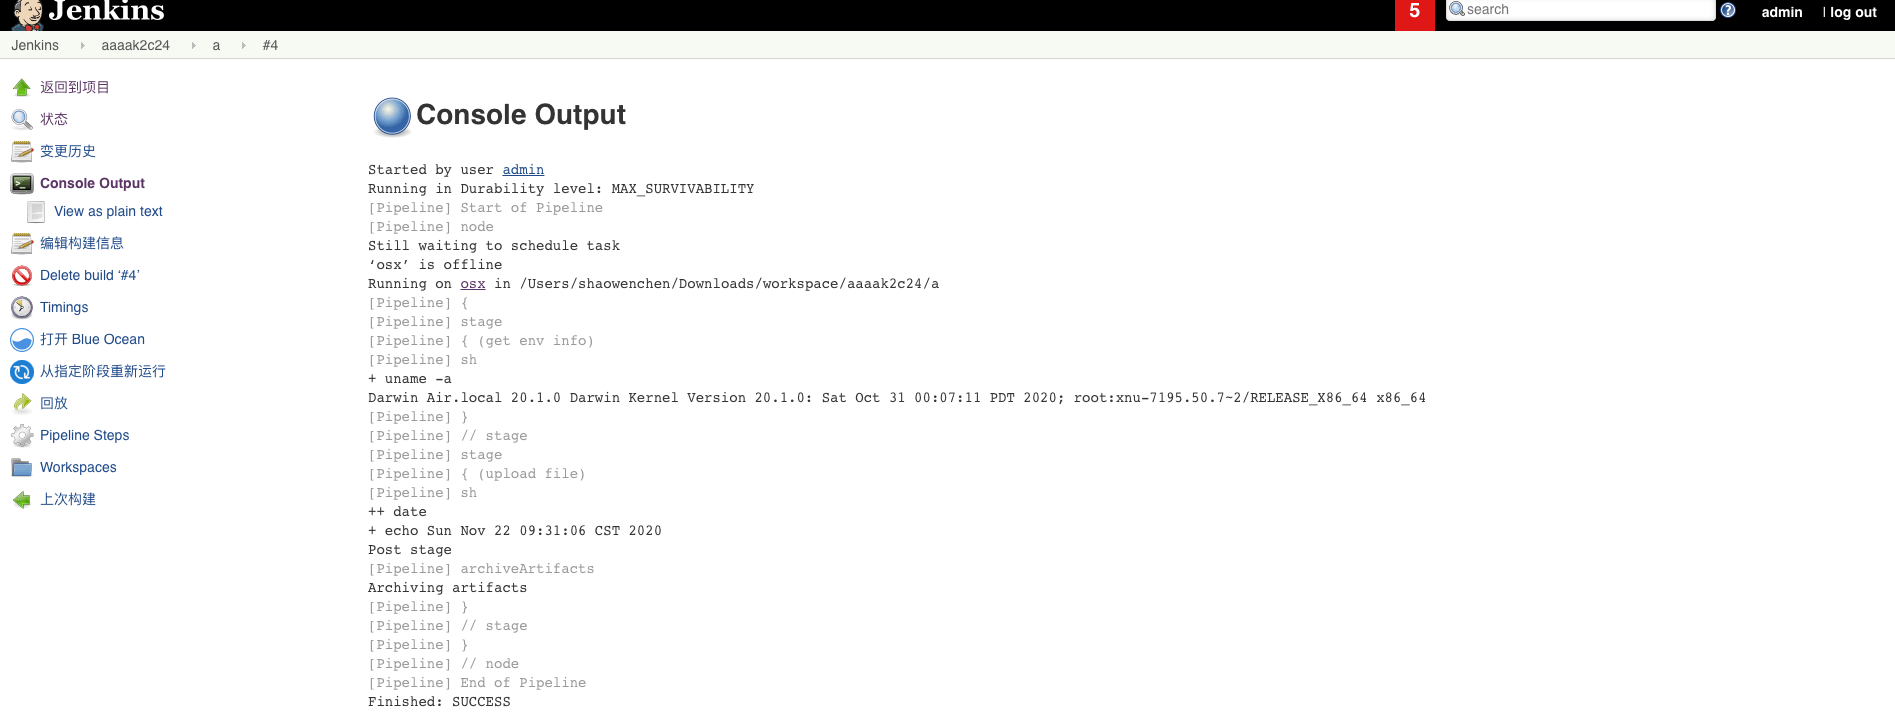
In the macOS working directory, you can inspect the relevant working directories and files:
| |
From the result, after the pipeline ran the command on macOS it archived the build artifact, which is as expected. For an iOS build, you only need to install the Xcode tool on the macOS system, run the build in the pipeline, and after archiving you can likewise download the iOS installation package.
