1. Why Dial Testing
For some of the critical services in a system, we usually set up monitoring. When a failure occurs, it can be detected as quickly as possible and a notification sent to the people who care. Once a failure has occurred, the failure process can be traced effectively.
Dial testing is an important part of a monitoring system: it can check the network quality of a service and provide real-time alerts.
On public clouds, cloud vendors provide dial testing services through widely distributed dial testing nodes. So how do you implement dial testing on Jenkins?
2. Setting Up a Mail Server
The mail service chosen here is Poste, with the mail domain mail.dev.chenshaowen.com.
- Domain configuration
- mail.dev.chenshaowen.com -> A record -> host IP
- mail.dev.chenshaowen.com -> TXT record -> v=spf1 +all
- _dmarc.mail.dev.chenshaowen.com -> TXT record -> v=DMARC1;p=none
- Running the service
- Create the data storage directory
| |
- Run poste.io in the background
| |
- Service configuration, set the IP whitelist
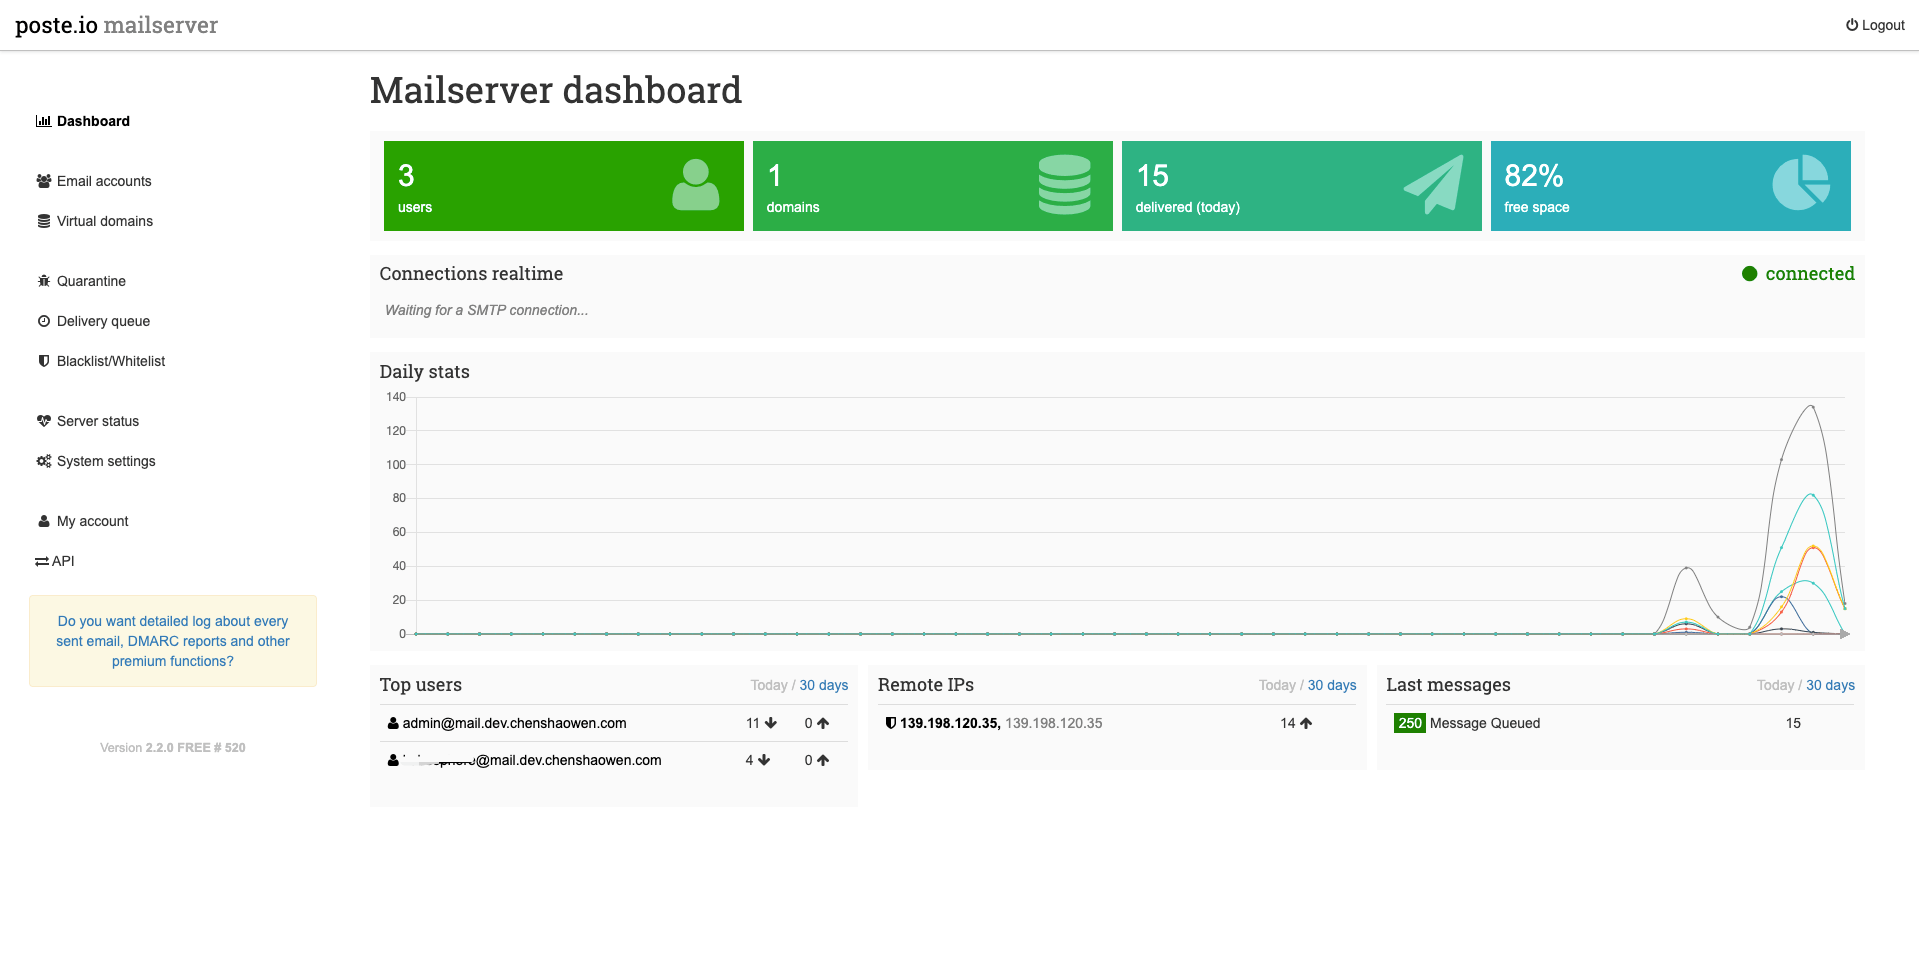
Open the page https://mail.dev.chenshaowen.com:443 and create a mail account. Once you enter the Poste home page, you will see the following page:
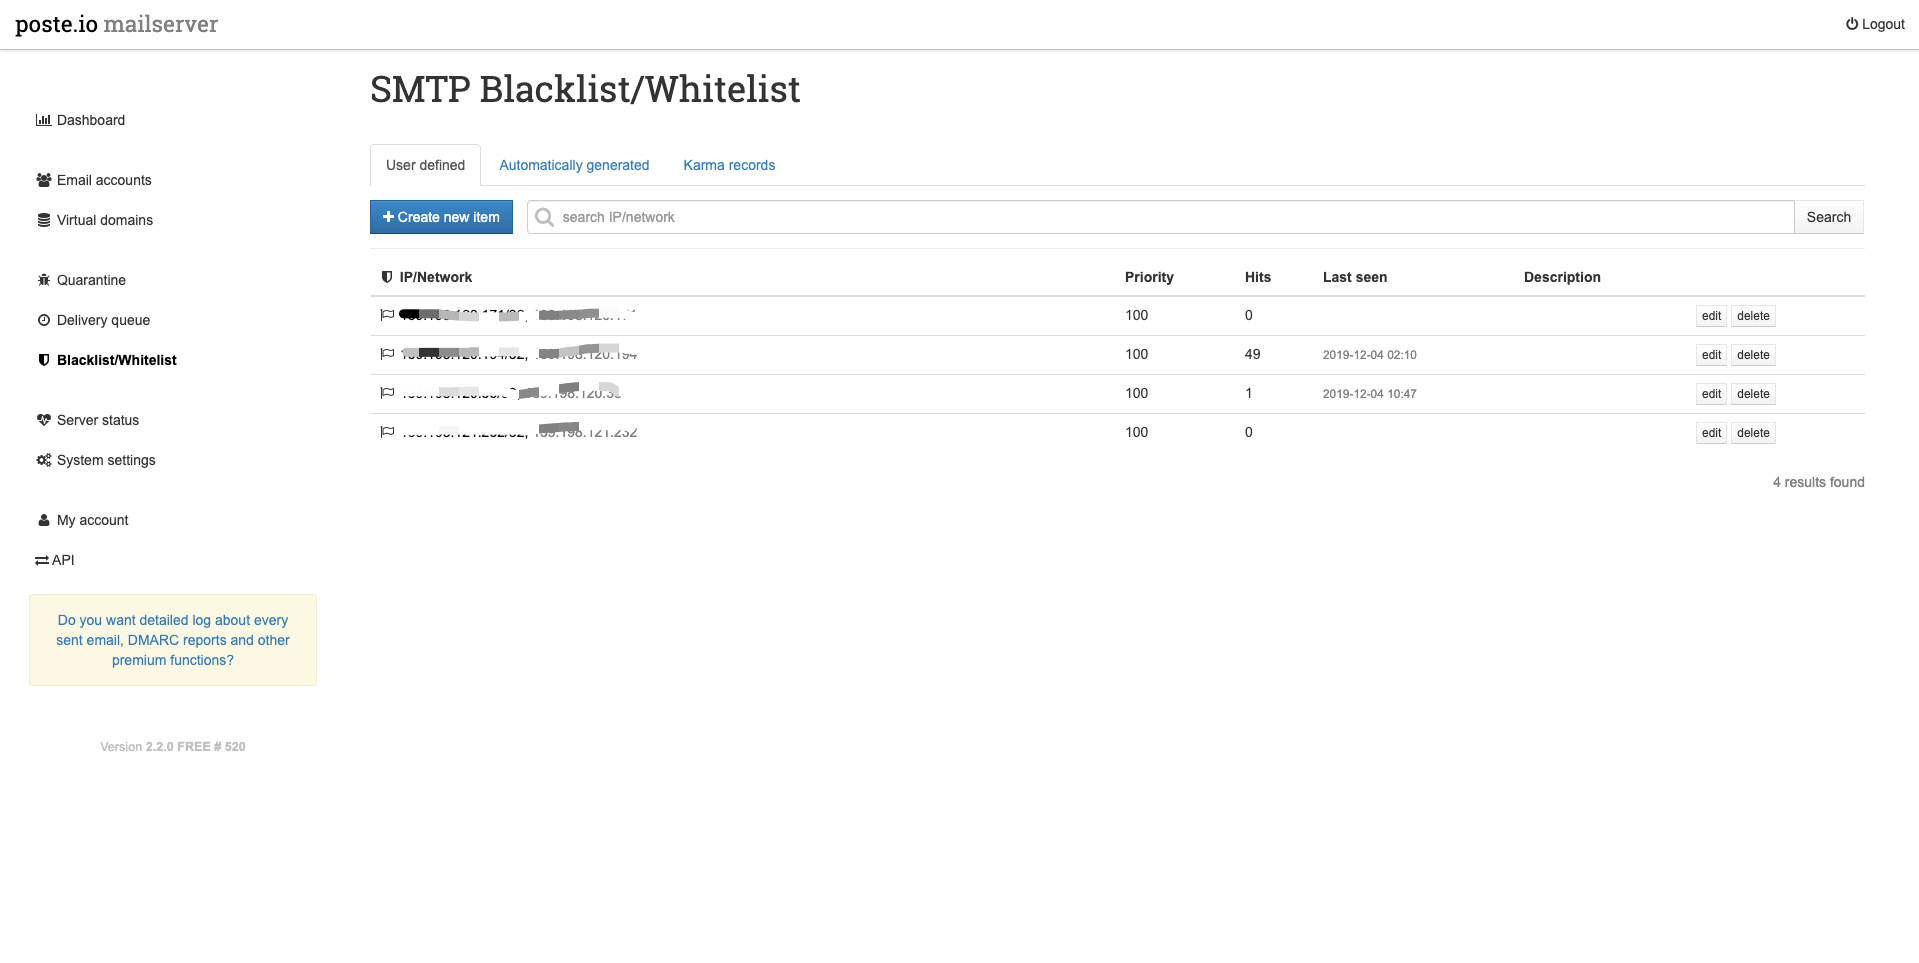
Here you need to add the IP of the host running Jenkins to the whitelist, otherwise you will get a 550 error.
In addition, under the /webmail/ route, users can use the mailbox features normally.
3. Dial Testing with Jenkins
For a quick Jenkins deployment, see the Docker Compose script.
The main features used are:
- Email notification
- Creating a pipeline
- Scheduled builds
3.1 Enabling Email Notification
In Jenkins, go to [Manage Jenkins] -> [Configure System] -> [E-mail Notification] and configure the email notification service, as shown below:
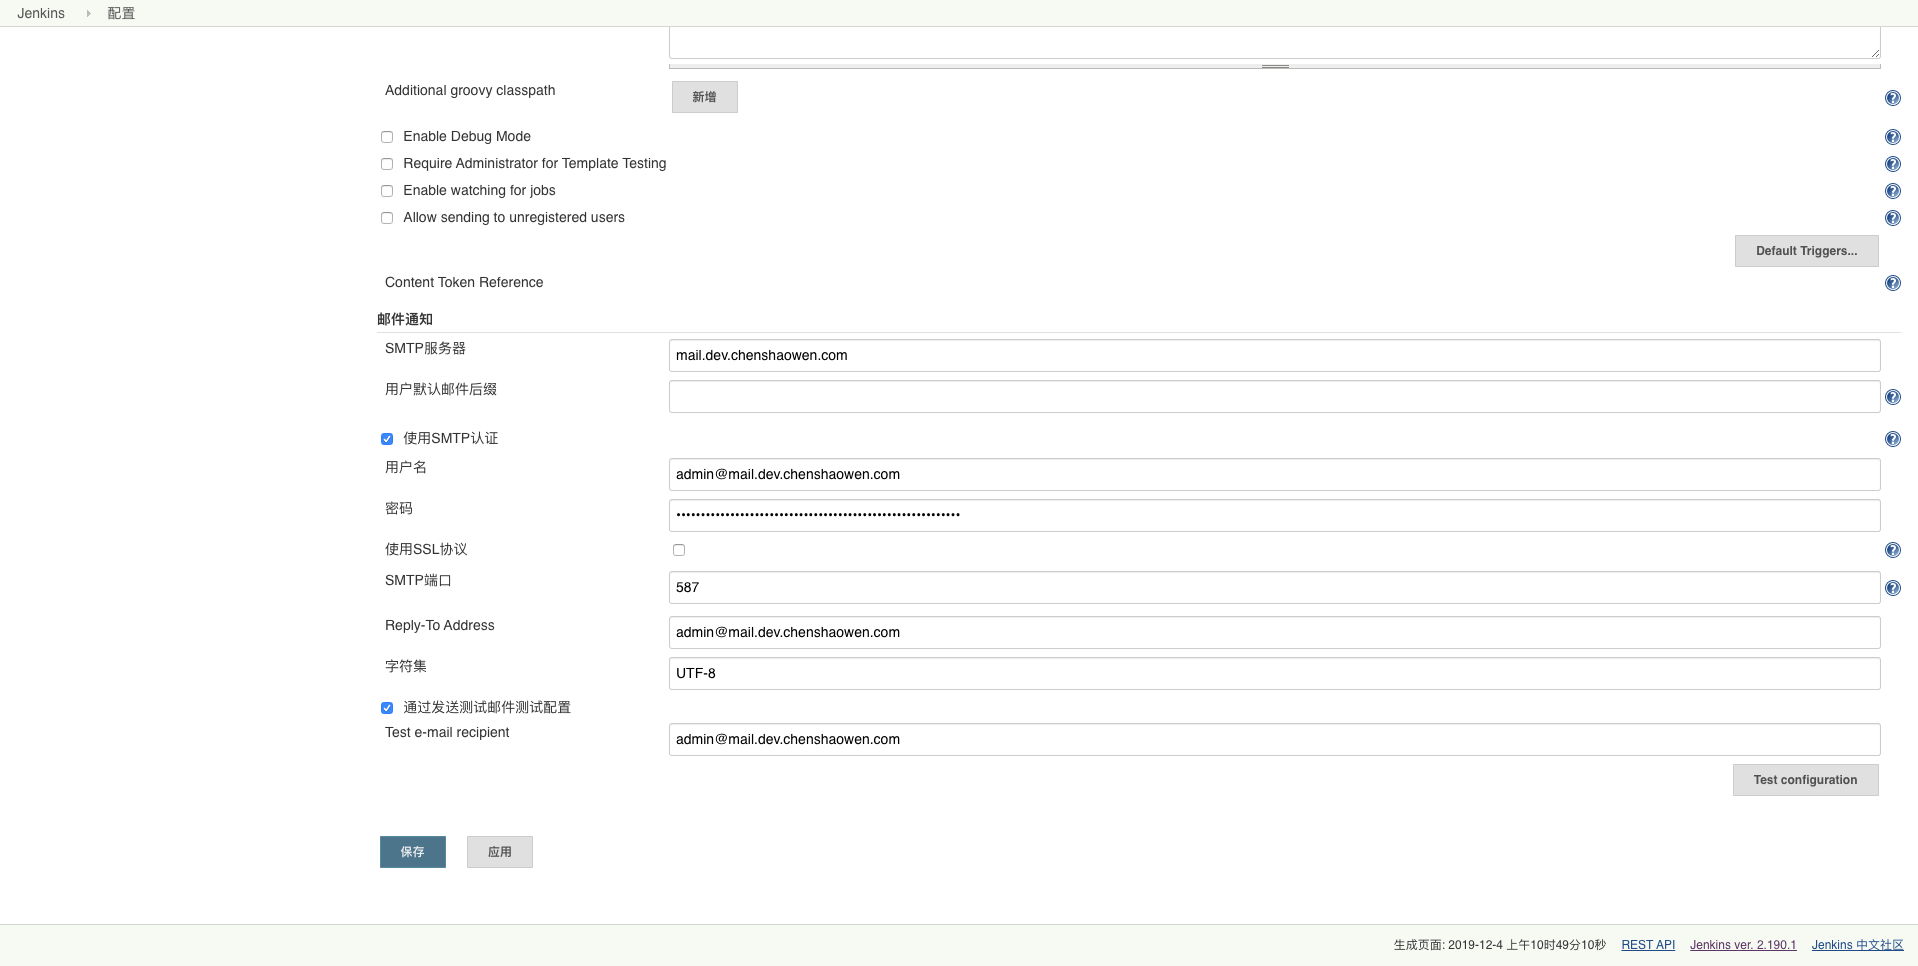
After filling in the service information, it is recommended to send a test email to make sure email works. Finally, just save.
3.2 Creating a Pipeline
The dial testing here is divided into two parts: the service status code and the response time, each forming one of two parallel stages.
The testing principle is to use the curl command to get the status code and response time of the service link, then compare them with the expected values. If the trigger conditions are met, an exception notification email is sent.
Below is the content of the Jenkinsfile:
| |
Create a [Pipeline] job, click [Configure], paste the Jenkinsfile content above into the script content of [Pipeline], and save.
3.3 Scheduled Builds
After the dial testing pipeline is created successfully, it can only be triggered manually. What dial testing needs is uninterrupted monitoring 24 hours a day. At this point, you need the scheduled build feature.
On the pipeline page, click [Configure] and find [Build Triggers]. Check scheduled build, set the pipeline to trigger every 5 minutes, and fill in the parameter:
| |
Finally, click [Apply] and save.
4. Testing the Dial Testing Feature
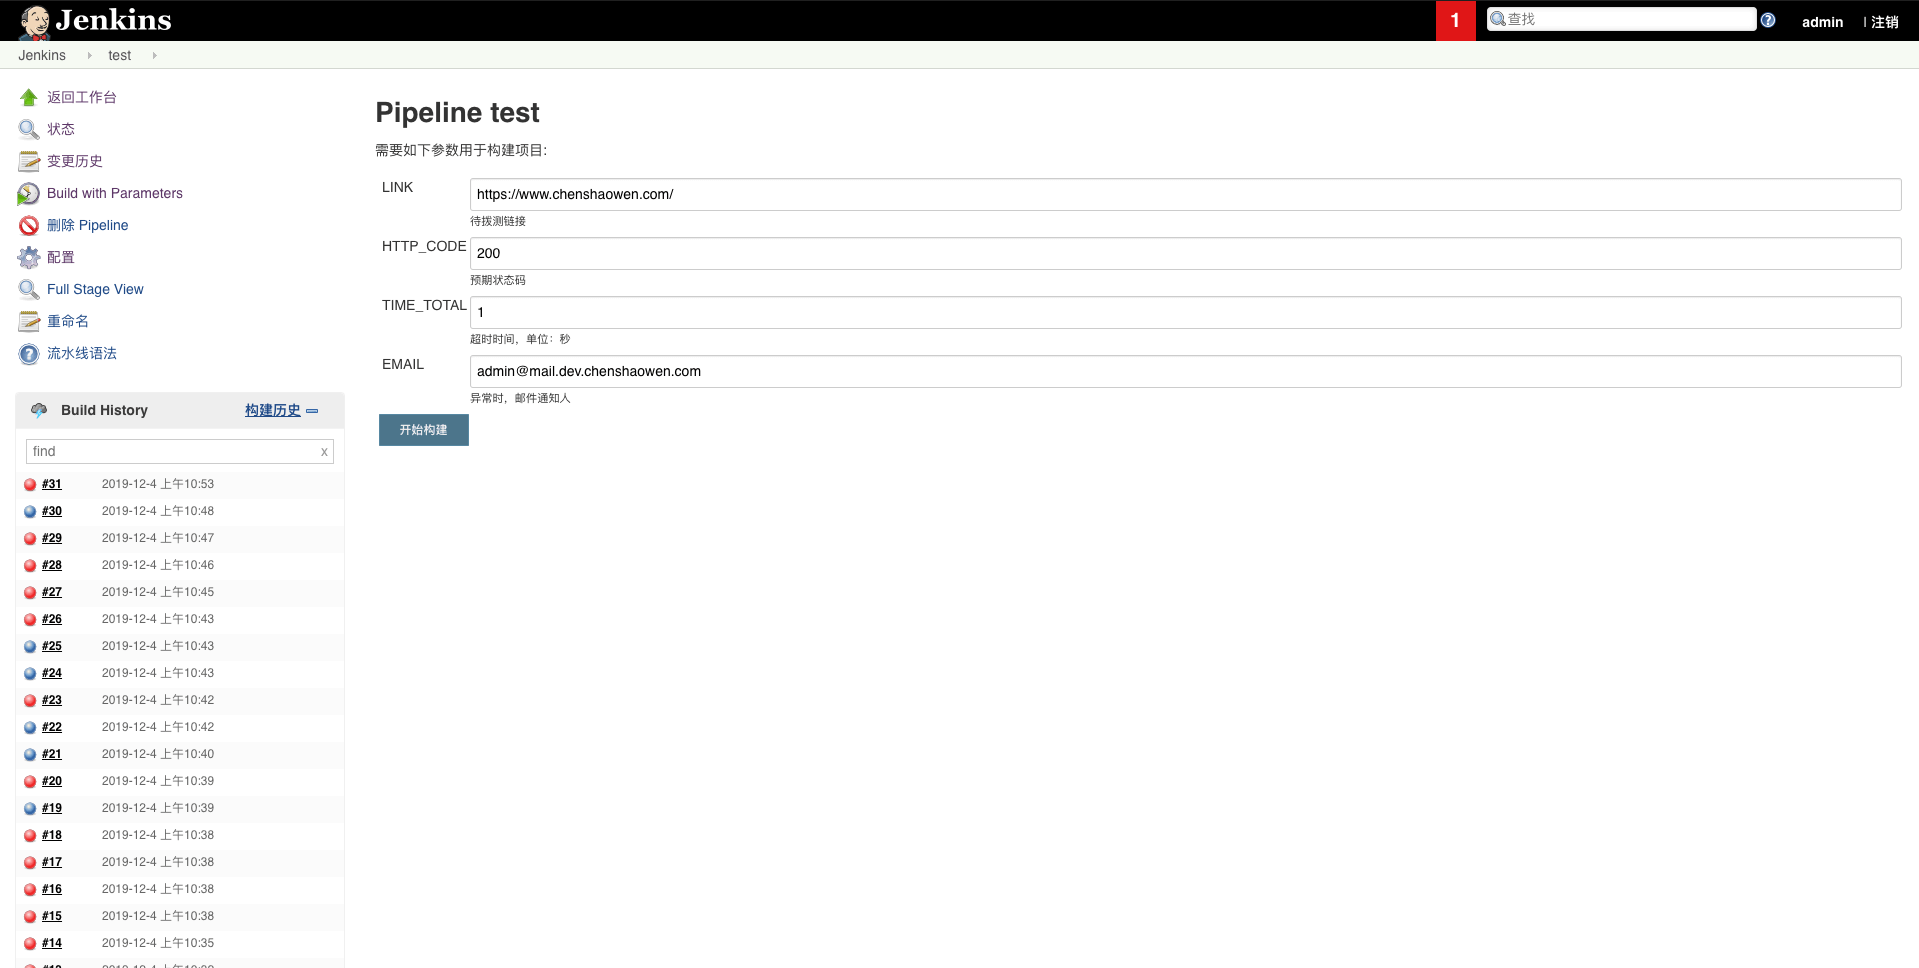
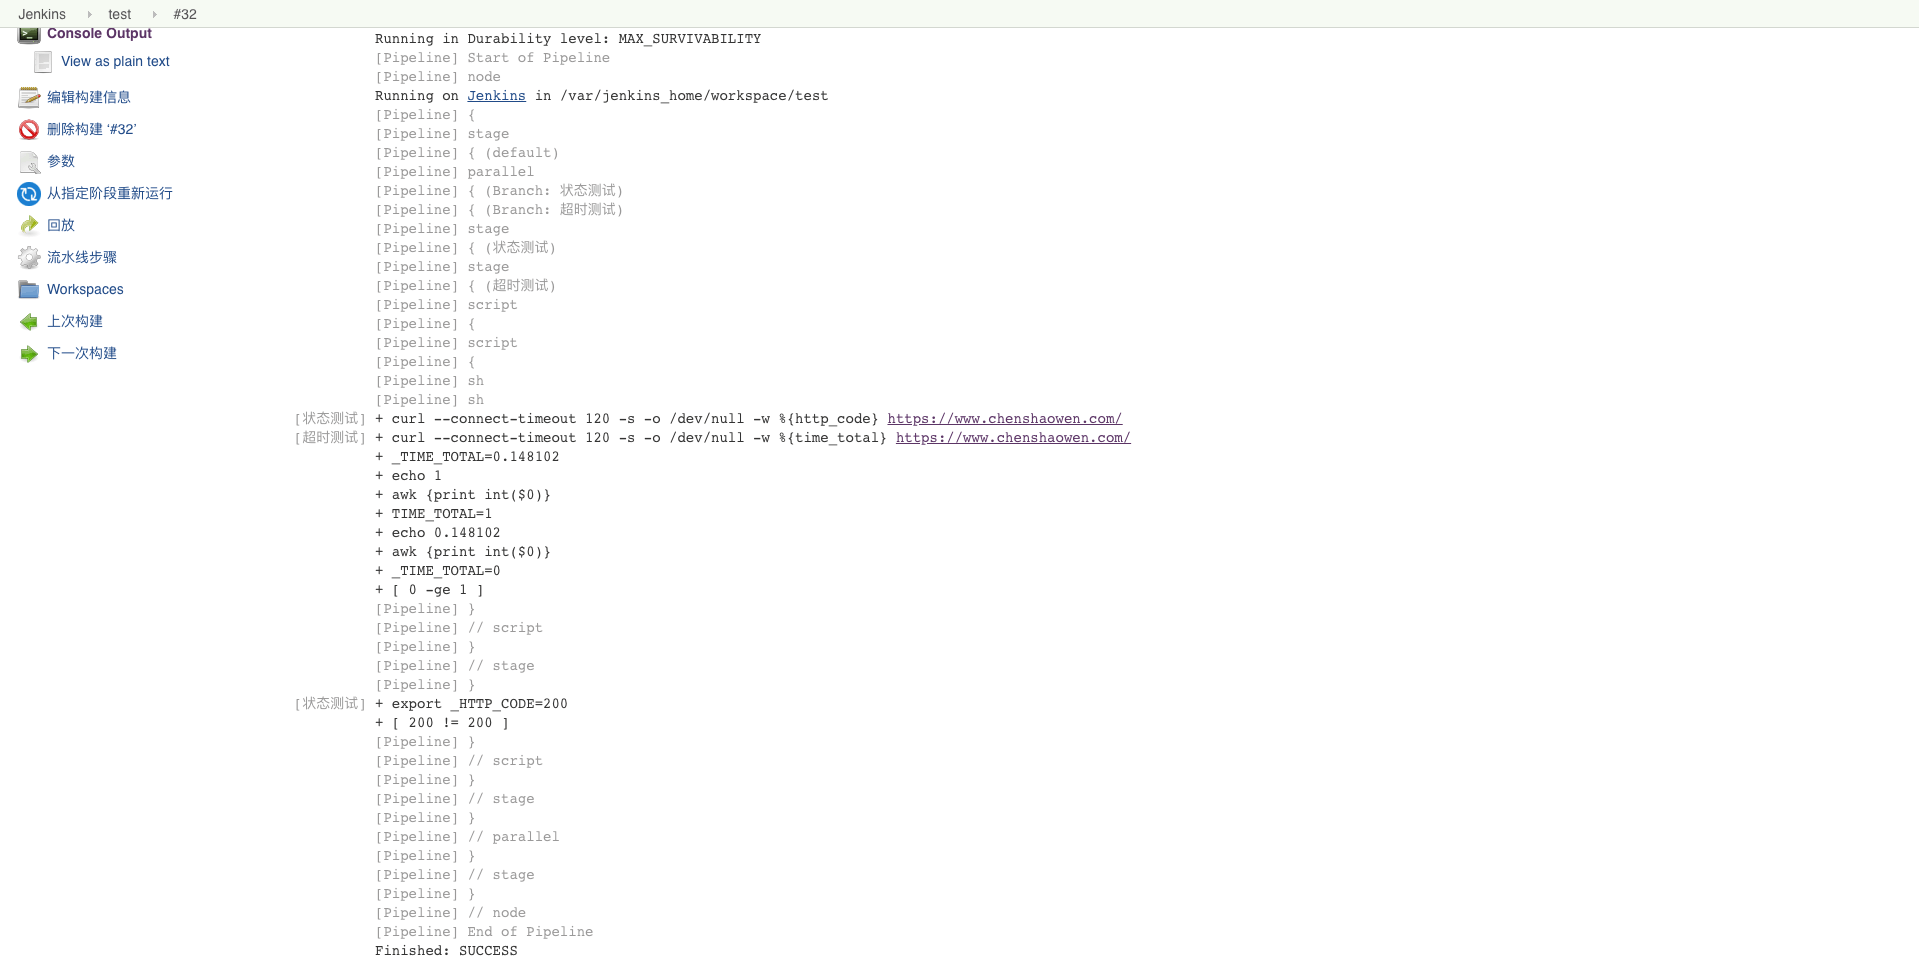
4.1 SUCCESS
In the pipeline, test directly with the expected parameters.
View the execution log:
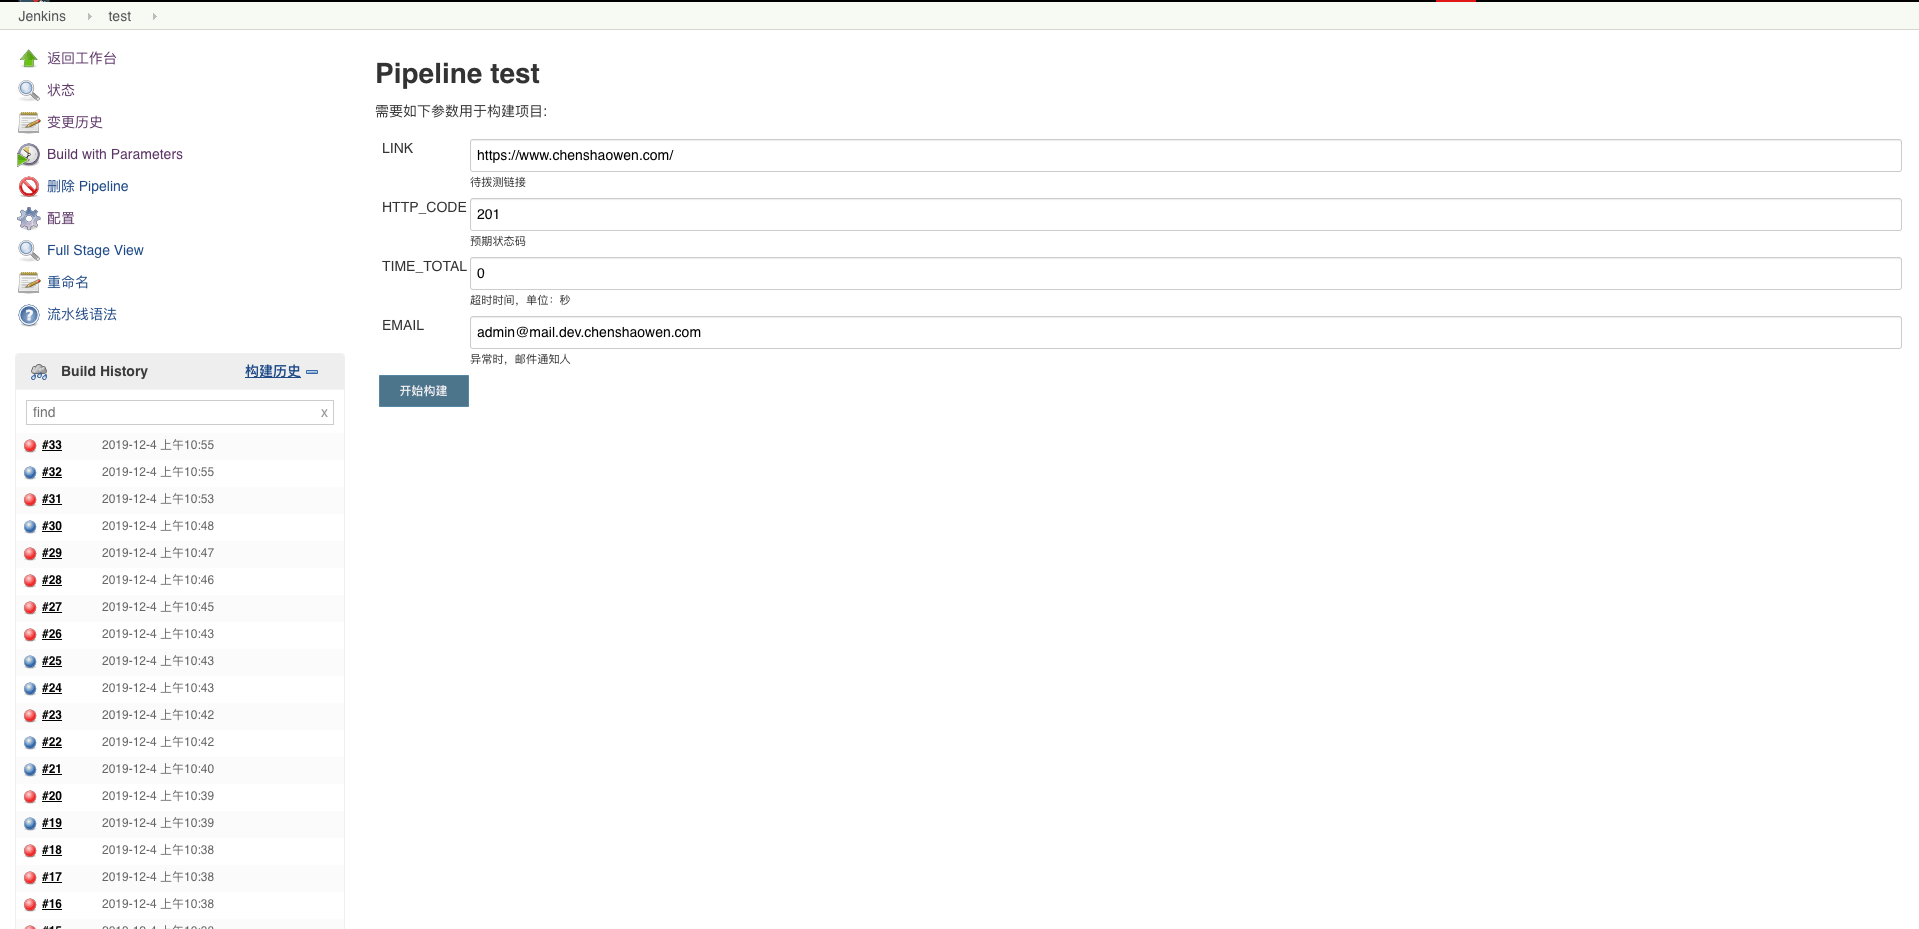
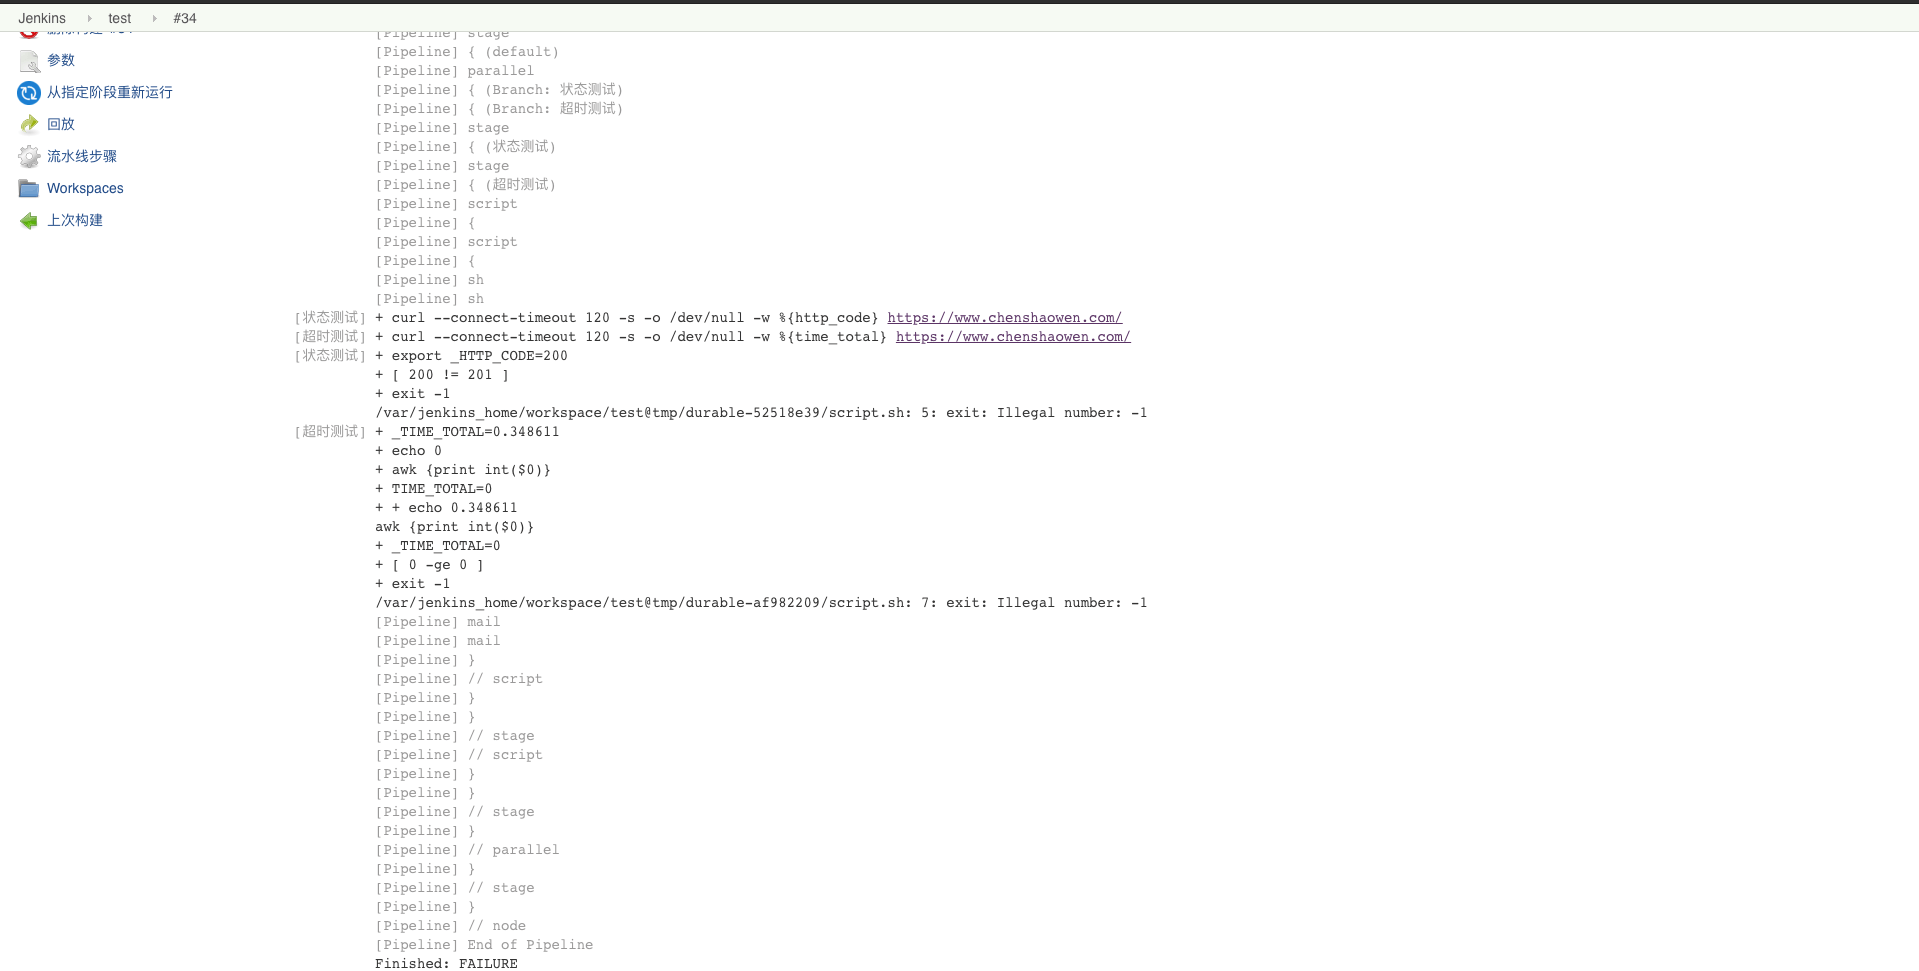
4.2 FAILURE
Here we deliberately set the status code to 201 and the timeout to 0 seconds, to trigger the notification logic after the check fails.
View the execution log:
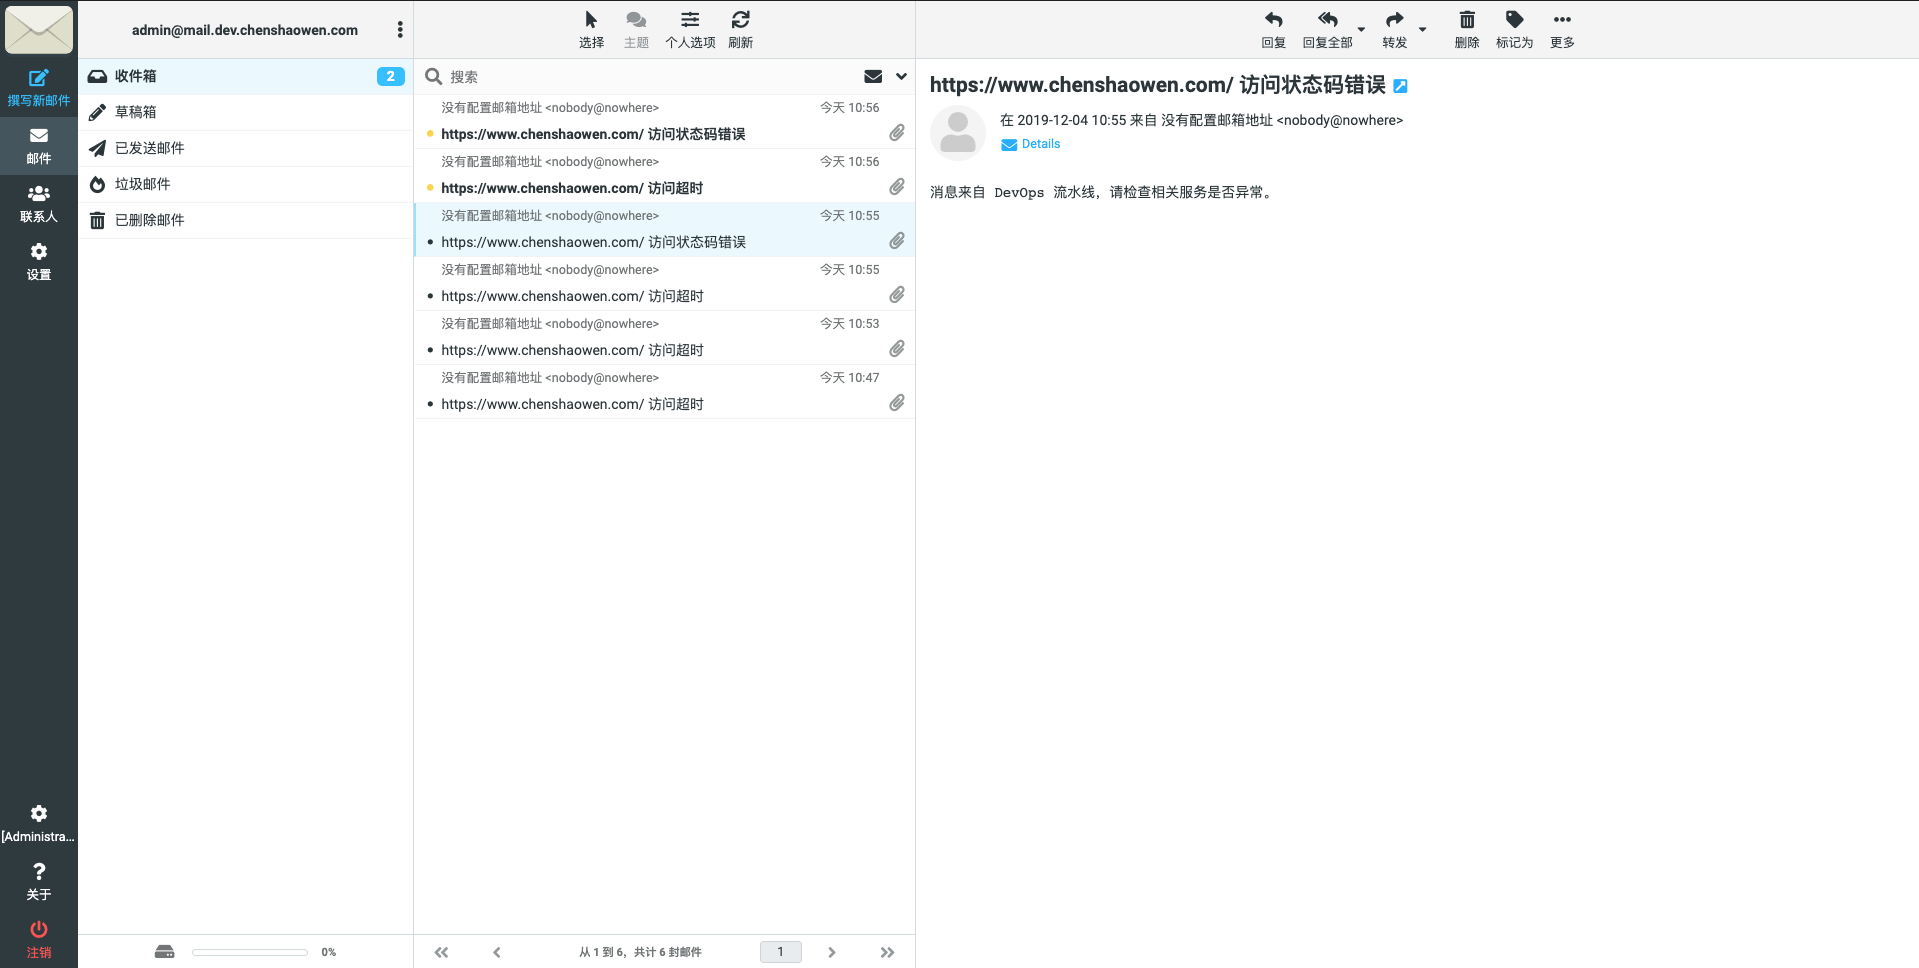
In the email, we can also see the alert email: