Using Jenkins always means dealing with all kinds of plugins. To practice DevOps better, we should also be capable of developing plugins ourselves, so the whole process can converge inside Jenkins.
1. Jenkins Plugins
1.1 The Plugin Ecosystem
Jenkins’ predecessor Hudson started in 2004, and 16 years on it is still a mainstream CI/CD engine. Besides the Master-Agent distributed build and Pipeline orchestration that Jenkins provides, another very important reason is its powerful plugin ecosystem.
The official plugin site shows that the number of plugins has reached 1500+, covering everything from pulling source code, building, testing, deploying, to tool integration.
These open-source plugins basically meet functional needs. But to integrate with certain custom systems, we have no choice but to develop new plugins. A new plugin can be open-sourced to the Jenkins community for others to use. In fact, that is how most plugins came to be.
1.2 The Plugin Lifecycle
Jenkins execution has its own lifecycle:
- checkout, check out the source code
- Pre-build, pre-compile
- Build wrapper, prepare the build environment, set environment variables, etc.
- Builder runs, run the build, for example calling Ant, Make and so on
- Recording, record the output, such as test results
- Notification, notify members
Developing a plugin means using Jenkins’ lifecycle as the entry point and extending it.
In terms of implementation, first find the class to extend in the Jenkins Packages documentation, according to the functionality you need to extend. Then, in the plugin’s main class, extends the extension class:
1
2
3
4
5
6
7
8
9
| package mygroup.myauth;
import hudson.Extension;
import jenkins.security.BasicHeaderAuthenticator;
@Extension
public class MyAuthenticator extends BasicHeaderAuthenticator {
}
|
Then just implement your own business logic in MyAuthenticator.
After development and testing are done, you need to host the plugin online. This can be a private Nexus Server, or the public repository Jenkins officially provides. If you want to host it in the official Jenkins repository, follow the documentation and create an issue at https://issues.jenkins-ci.org/browse/HOSTING following the template. For any problem you hit during development, you can discuss it in the jenkinsci-dev@googlegroups.com mailing list. Next let’s look at the plugin development flow.
2. Setting Up the Basic Environment
Most Jenkins plugins are built with Maven. Maven 3.3 and above requires JDK 1.7 or later. Below we install on CentOS 7 as an example.
1
| yum install -y java-1.8.0-openjdk
|
Maven download page; here we download version 3.6.3.
1
2
| wget https://mirrors.tuna.tsinghua.edu.cn/apache/maven/maven-3/3.6.3/binaries/apache-maven-3.6.3-bin.tar.gz -P /tmp
tar xf /tmp/apache-maven-3.6.3-bin.tar.gz -C /opt
|
Edit /etc/profile and add the following content:
1
2
3
4
5
6
7
8
9
| M2_HOME="/opt/apache-maven-3.6.3"
export M2_HOME
M2="$M2_HOME/bin"
MAVEN_OPTS="-Xms256m -Xmx512m"
export M2 MAVEN_OPTS
PATH=$M2:$PATH
export PATH
|
source it to make it take effect.
1
2
| source /etc/profile
mvn -version
|
3. Generating the Plugin Skeleton
 1
 2
 3
 4
 5
 6
 7
 8
 9
10
11
12
13
14
15
16
17
18
19
20
21
22
23
24
25
26
27
28
29
| mvn -U archetype:generate -Dfilter="io.jenkins.archetypes:"
…
Choose archetype:
1: remote -> io.jenkins.archetypes:empty-plugin (Skeleton of a Jenkins plugin with a POM and an empty source tree.)
2: remote -> io.jenkins.archetypes:global-configuration-plugin (Skeleton of a Jenkins plugin with a POM and an example piece of global configuration.)
3: remote -> io.jenkins.archetypes:global-shared-library (Uses the Jenkins Pipeline Unit mock library to test the usage of a Global Shared Library)
4: remote -> io.jenkins.archetypes:hello-world-plugin (Skeleton of a Jenkins plugin with a POM and an example build step.)
5: remote -> io.jenkins.archetypes:scripted-pipeline (Uses the Jenkins Pipeline Unit mock library to test the logic inside a Pipeline script.)
Choose a number or apply filter (format: [groupId:]artifactId, case sensitive contains): : 4
Choose io.jenkins.archetypes:hello-world-plugin version:
1: 1.1
2: 1.2
3: 1.3
4: 1.4
5: 1.5
6: 1.6
Choose a number: 6: 6
…
[INFO] Using property: groupId = unused
Define value for property 'artifactId': demo
Define value for property 'version' 1.0-SNAPSHOT: :
[INFO] Using property: package = io.jenkins.plugins.sample
Confirm properties configuration:
groupId: unused
artifactId: demo
version: 1.0-SNAPSHOT
package: io.jenkins.plugins.sample
Y: : y
|
The package and groupId can be filled in as needed; artifactId is the plugin’s ID.
Finally you will see the prompt:
 1
 2
 3
 4
 5
 6
 7
 8
 9
10
11
12
13
14
15
16
| [INFO] ----------------------------------------------------------------------------
[INFO] Using following parameters for creating project from Archetype: hello-world-plugin:1.6
[INFO] ----------------------------------------------------------------------------
[INFO] Parameter: groupId, Value: unused
[INFO] Parameter: artifactId, Value: demo
[INFO] Parameter: version, Value: 1.0-SNAPSHOT
[INFO] Parameter: package, Value: io.jenkins.plugins.sample
[INFO] Parameter: packageInPathFormat, Value: io/jenkins/plugins/sample
[INFO] Parameter: package, Value: io.jenkins.plugins.sample
[INFO] Parameter: version, Value: 1.0-SNAPSHOT
[INFO] Parameter: groupId, Value: unused
[INFO] Parameter: artifactId, Value: demo
[INFO] Project created from Archetype in dir: /root/java/demo
[INFO] ------------------------------------------------------------------------
[INFO] BUILD SUCCESS
[INFO] ------------------------------------------------------------------------
|
Following the interactive prompts, it is easy to create a plugin skeleton. Now let’s look at the generated files:
 1
 2
 3
 4
 5
 6
 7
 8
 9
10
11
12
13
14
15
16
17
18
19
20
21
22
23
24
25
26
27
28
29
30
31
32
33
34
35
36
37
38
39
40
41
42
43
44
45
46
47
48
49
50
51
52
53
54
55
56
57
58
59
60
61
62
63
| tree demo/
demo/
├── pom.xml
└── src
├── main
│ ├── java
│ │ └── io
│ │ └── jenkins
│ │ └── plugins
│ │ └── sample
│ │ └── HelloWorldBuilder.java
│ └── resources
│ ├── index.jelly
│ └── io
│ └── jenkins
│ └── plugins
│ └── sample
│ ├── HelloWorldBuilder
│ │ ├── config_de.properties
│ │ ├── config_es.properties
│ │ ├── config_fr.properties
│ │ ├── config_it.properties
│ │ ├── config.jelly
│ │ ├── config.properties
│ │ ├── config_pt_BR.properties
│ │ ├── config_sv.properties
│ │ ├── config_tr.properties
│ │ ├── config_zh_CN.properties
│ │ ├── help-name_de.html
│ │ ├── help-name_es.html
│ │ ├── help-name_fr.html
│ │ ├── help-name.html
│ │ ├── help-name_it.html
│ │ ├── help-name_pt_BR.html
│ │ ├── help-name_sv.html
│ │ ├── help-name_tr.html
│ │ ├── help-name_zh_CN.html
│ │ ├── help-useFrench_de.html
│ │ ├── help-useFrench_es.html
│ │ ├── help-useFrench_fr.html
│ │ ├── help-useFrench.html
│ │ ├── help-useFrench_it.html
│ │ ├── help-useFrench_pt_BR.html
│ │ ├── help-useFrench_sv.html
│ │ ├── help-useFrench_tr.html
│ │ └── help-useFrench_zh_CN.html
│ ├── Messages_de.properties
│ ├── Messages_es.properties
│ ├── Messages_fr.properties
│ ├── Messages_it.properties
│ ├── Messages.properties
│ ├── Messages_pt_BR.properties
│ ├── Messages_sv.properties
│ ├── Messages_tr.properties
│ └── Messages_zh_CN.properties
└── test
└── java
└── io
└── jenkins
└── plugins
└── sample
└── HelloWorldBuilderTest.java
|
You can also run the verify command to validate the plugin.
 1
 2
 3
 4
 5
 6
 7
 8
 9
10
11
12
13
14
15
16
17
18
| cd demo
mvn verify
[INFO] Fork Value is true
[INFO] Done SpotBugs Analysis....
[INFO]
[INFO] <<< spotbugs-maven-plugin:3.1.12.2:check (spotbugs) < :spotbugs @ demo <<<
[INFO]
[INFO]
[INFO] --- spotbugs-maven-plugin:3.1.12.2:check (spotbugs) @ demo ---
[INFO] BugInstance size is 0
[INFO] Error size is 0
[INFO] No errors/warnings found
[INFO] ------------------------------------------------------------------------
[INFO] BUILD SUCCESS
[INFO] ------------------------------------------------------------------------
[INFO] Total time: 05:10 min
[INFO] ------------------------------------------------------------------------
|
From the Java class you can tell that this Hello World plugin extends Builder. This can be further confirmed in the code:
1
2
3
4
5
| public class HelloWorldBuilder extends Builder implements SimpleBuildStep {
private final String name;
private boolean useFrench;
}
|
We won’t modify the Hello World plugin here; let’s just run it.
4. Running and Debugging
The Maven Hpi Plugin provides a very convenient debugging method. In the demo directory run:
It runs a Jenkins service with the plugin, accessible at http://127.0.0.1:8080/jenkins . With the parameters -Djetty.port=1000 -Djenkins.version=2.176.2 -Djenkins.install.runSetupWizard=true you can specify the port to access, the Jenkins version, whether the plugin installation wizard is needed, and so on.
If you need breakpoint debugging, you can run the following command:
or
1
2
| export MAVEN_OPTS="-Xdebug -Xrunjdwp:transport=dt_socket,server=y,address=8000,suspend=n"
mvn hpi:run
|
This sets up a listener on port 8000; you can add a debug session on port 8000 in your IDE to debug.
Finally, to generate the hpi package, run the command:
1
2
3
| mvn package
[INFO] Generating hpi /root/java/demo/target/demo.hpi
|
After compilation finishes you get an hpi file, which is the plugin; it can be uploaded and installed directly from the Jenkins UI.
Of course, you can also install the plugin locally.
1
2
3
| mvn clean install
[INFO] Installing /root/java/demo/target/demo.hpi to /root/.m2/repository/io/jenkins/plugins/demo/1.0-SNAPSHOT/demo-1.0-SNAPSHOT.hpi
|
On the http://127.0.0.1:8080 page,
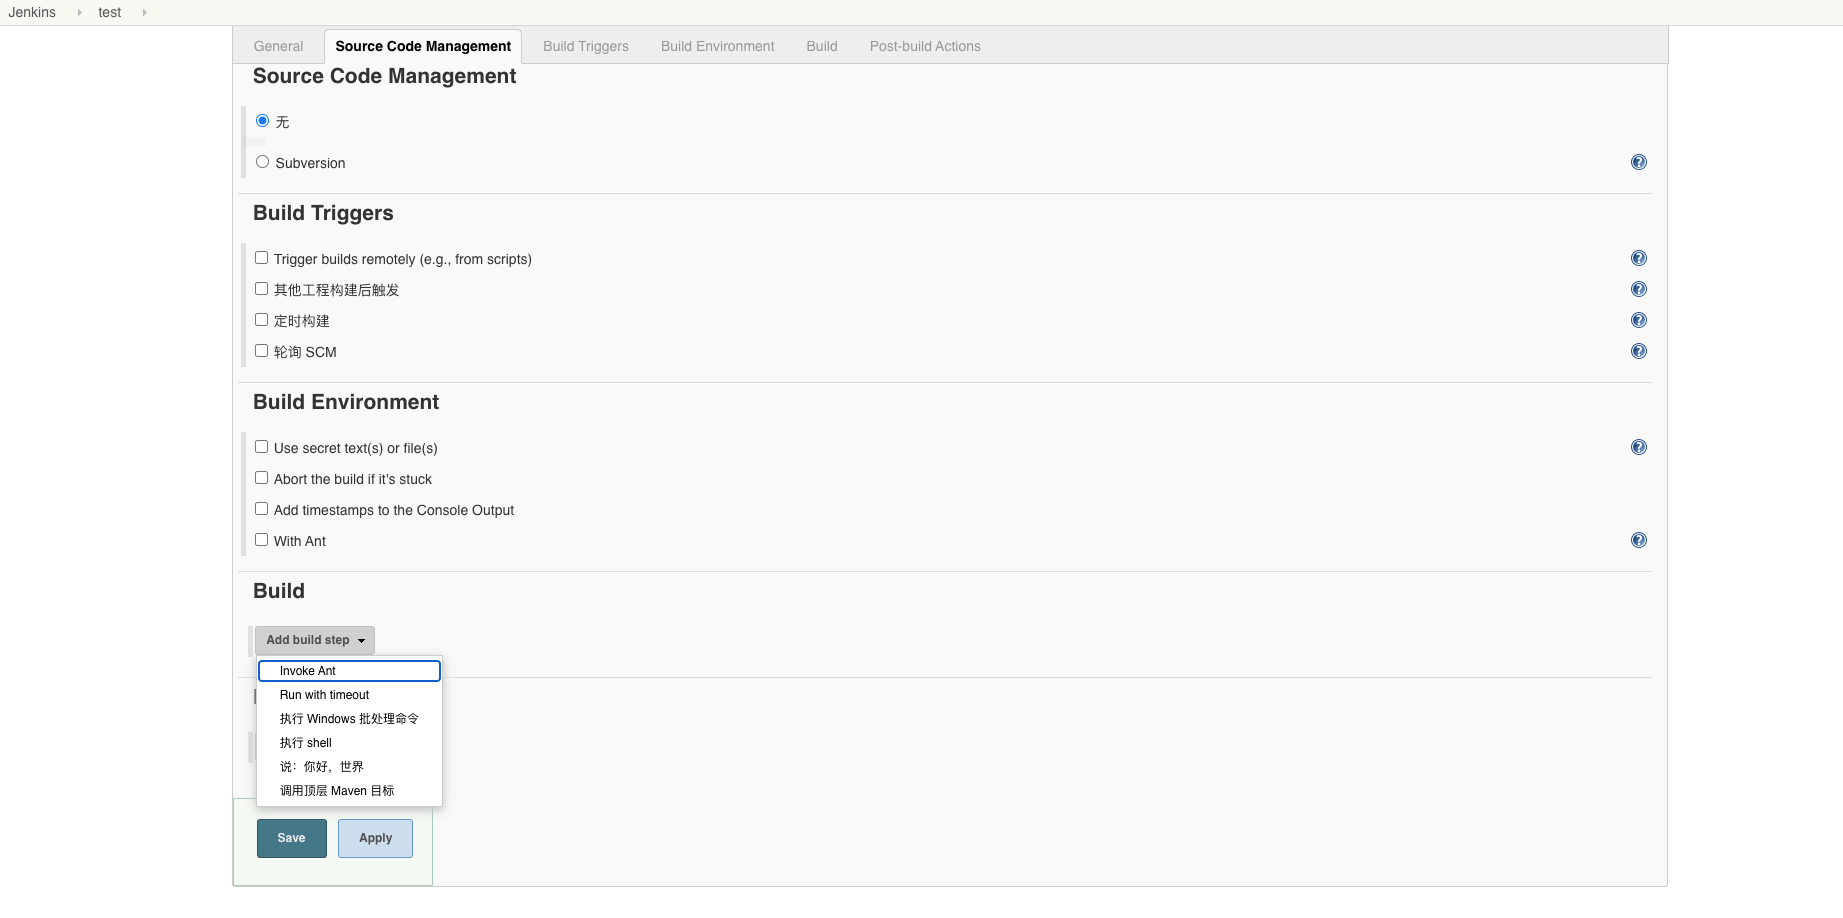
create a new Pipeline; you can see that a new Step has been added under Build, Hello World.
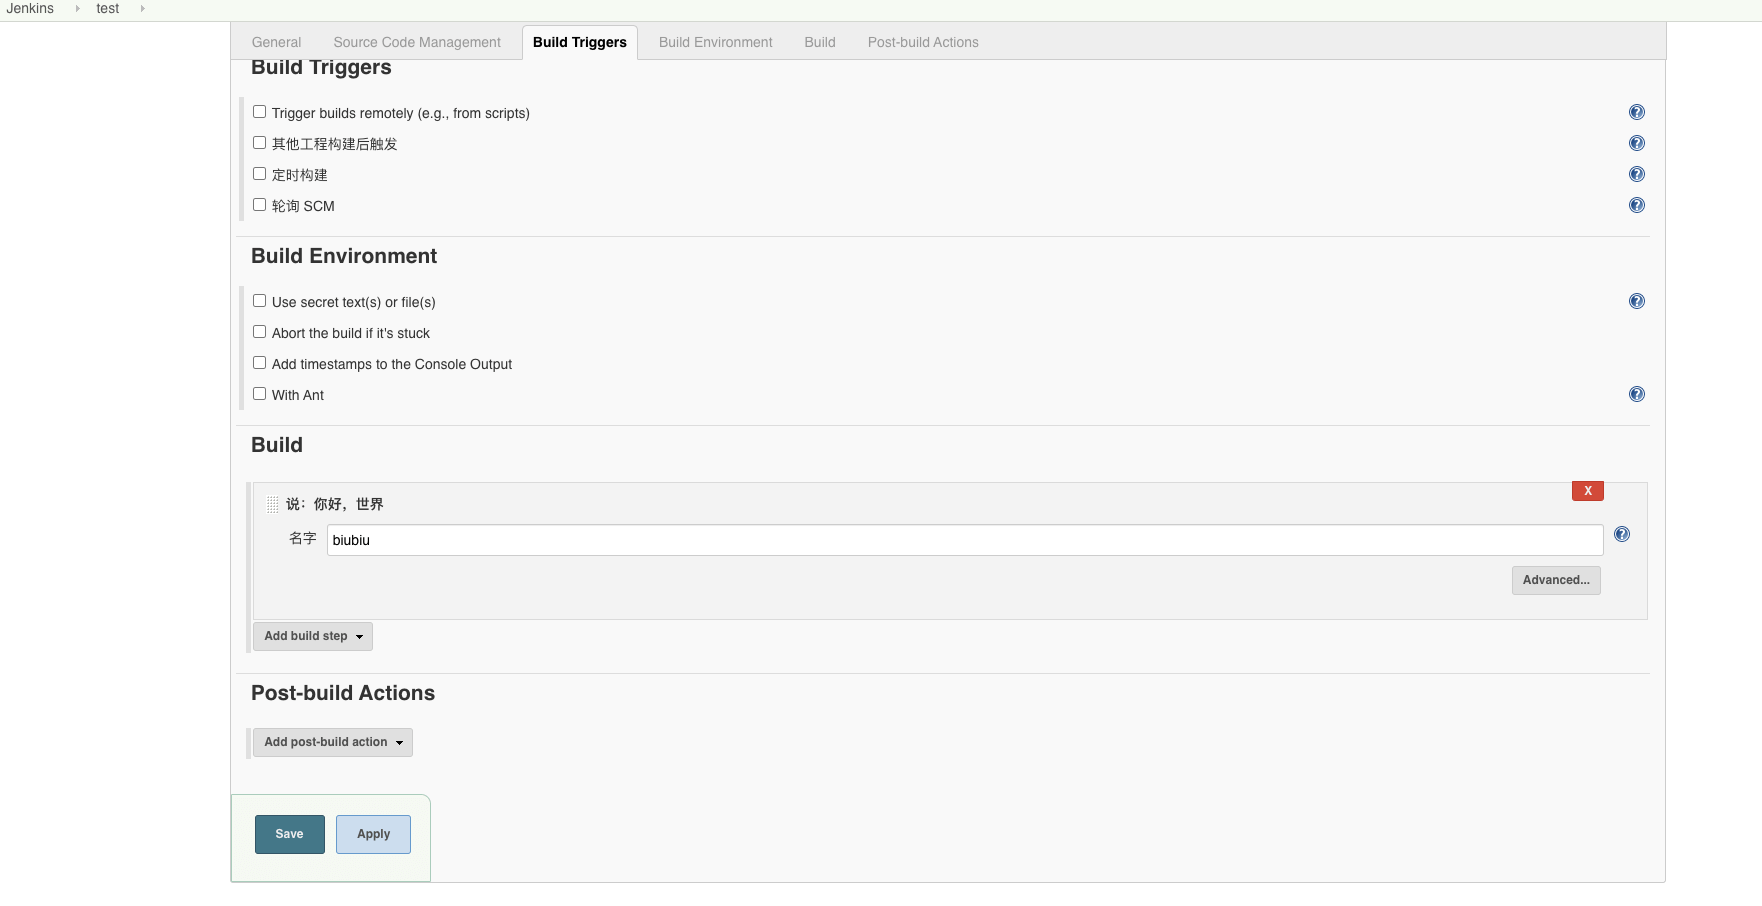
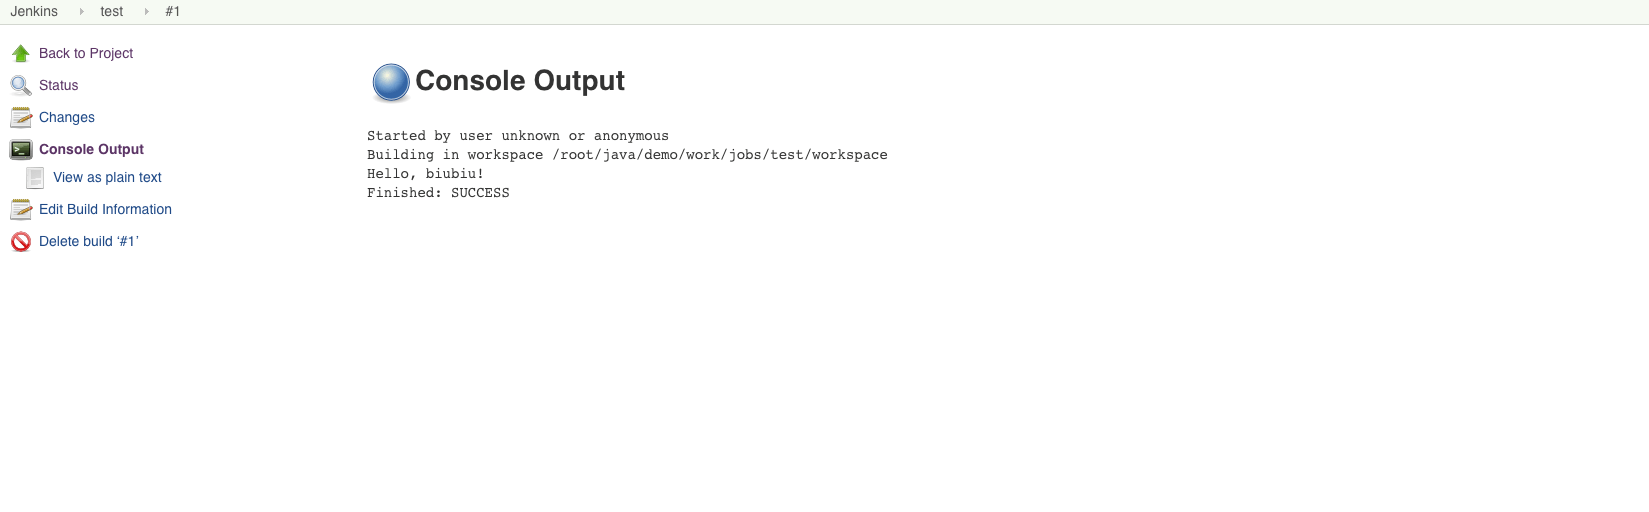
Run output: Hello, biubiu!
5. References
