1. Deploying Jumpserver
You need a StorageClass ready in advance to store Jumpserver’s data. Besides the database mentioned below, each component — jms-core, jms-web, jms-koko, jms-lion, jms-chen — also needs a PV for storage.
1.1 Deploying MySQL
Refer to https://github.com/shaowenchen/ops-hub/blob/main/database/mysql8.yaml to deploy MySQL.
You need to adjust the StorageClass field to a value available in your cluster.
1.2 Deploying Redis
Refer to https://github.com/shaowenchen/ops-hub/blob/main/database/redis7.yaml to deploy Redis.
You need to adjust the StorageClass field to a value available in your cluster.
3. Deploying Jumpserver
- Add the Helm repository
| |
- Modify values.yaml
https://github.com/jumpserver/helm-charts/blob/main/charts/jumpserver/values.yaml
| |
The main things to change here are global.storageClass, externalDatabase, and externalRedis.
If your cluster restricts access to Docker Hub, you also need to modify imageRegistry and imageOwner. Alternatively, you can download the latest release from https://github.com/jumpserver/helm-charts/releases and, after extracting it, change the image addresses to your own private registry.
- Install Jumpserver
| |
Uninstall command
| |
- Add an access entry point
If you access it via NodePort, then besides changing jumpserver-jms-web to the NodePort type, you also need to add the environment variable DOMAINS to jumpserver-jms-core to allow the new access entry point; otherwise you will see the following message:
| |
Edit jumpserver-jms-core:
| |
Add the environment variable:
| |
- First access
On first access you need to reset the admin user’s password, which is ChangeMe. After logging in, you will be prompted to change the password.
2. Importing Resources
2.1 Adding a Node
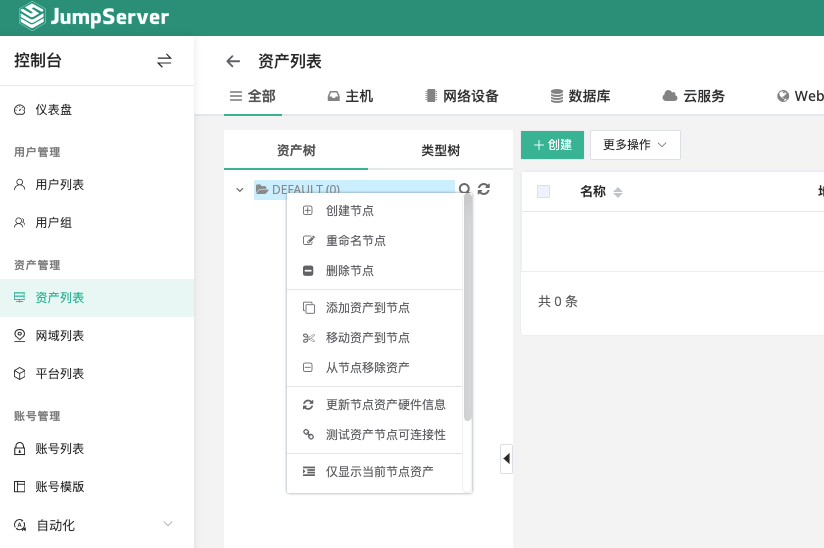
Click 【Asset Management - Asset List】 on the left side of the page, right-click the root node Default, and create a new node.
A node is really just a way to group assets. Here we create a new node and name it worker.
2.2 Creating an Account for Accessing Hosts
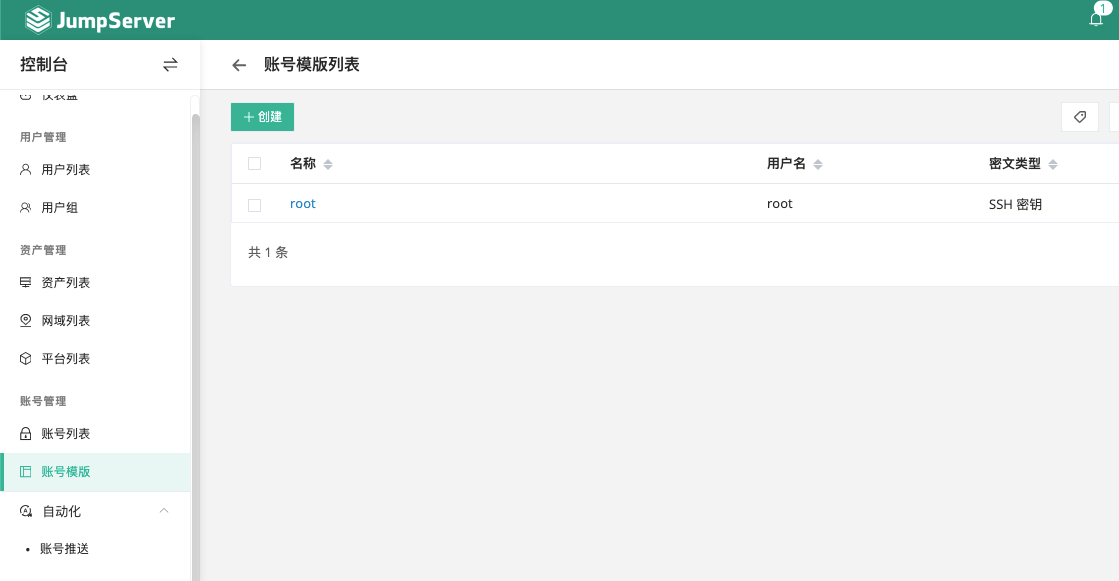
Click 【Account Templates】 on the left side of the page to create a privileged user root.
2.3 Adding Hosts with a Script
- Set environment variables
| |
- Get the Token
| |
- Set the Token
| |
- Set the group and template account to import
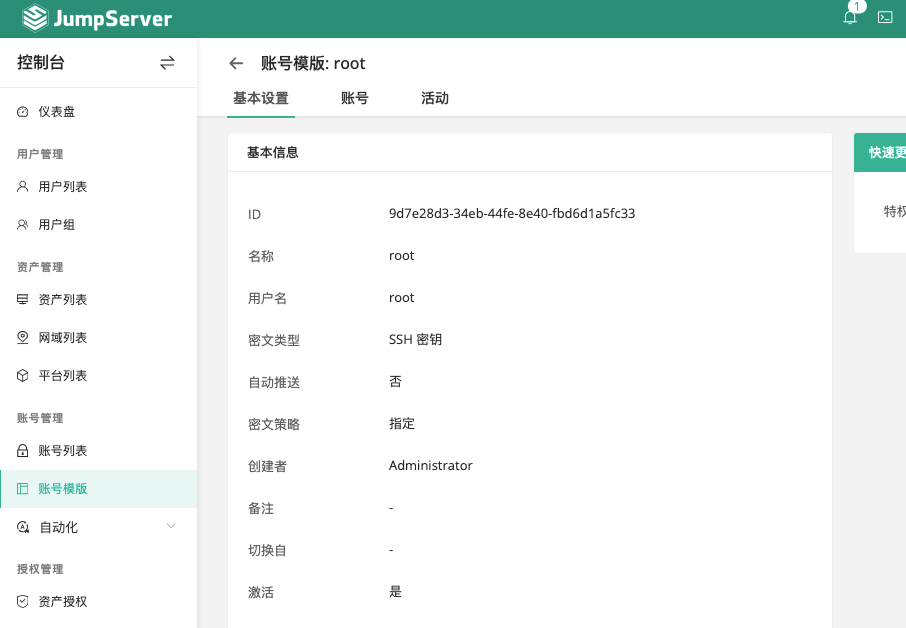
Click 【Account Templates】 on the left side of the page, find the root account, and click into it to see the account template’s id.
| |
| |
Set GROUP_ID
| |
- Write the script
| |
- Create a host
| |
2.4 Adding Hosts in Bulk
| |
2.5 Resetting the admin Password
- Enter the jumpserver core container
| |
- Reset the password
| |
| |
3 Granting Users Access
Three objects are involved here:
- Users
- Assets — hosts, databases, clusters, and other resources
- Authorization rules between users and assets
To authorize a single user, proceed as follows:
- Add the user under 【User Management - User List】
- Add an authorization rule under 【Authorization Management - Asset Authorization】
When creating an authorization rule, just select a user and select an asset.
To authorize multiple users, create a user group, add the users to it, and then authorize the group.
To authorize a large batch of resources, put those resources under a single node and then authorize the user for that node.
