1. What GitHub Actions Is
In an earlier post I put the CI capabilities GitLab provides into practice — click here to see. The advantages of using GitLab are that it can be deployed privately, it allows an unlimited number of private repositories, its CI configuration is simple, and it can connect to self-hosted Runners. But as GitHub becomes more and more open, these advantages of GitLab are gradually being lost.
From the CICD perspective, the closer a feature is to the Git repository, the closer it is to developers. In the future developer market, SaaS platforms like GitHub, GitLab, Coding, and Gitee will have remarkable staying power.
GitHub Actions is a service similar to GitLab CI. GitLab uses the .gitlab-ci.yml file by default to describe the CICD pipeline, while GitHub uses yaml files under the .github/workflows directory. The biggest difference is that GitHub provides an Actions marketplace, and developers can use these atoms to orchestrate pipelines quickly.
In the post Deploying Hexo Static Pages with an Image, I used the following yaml configuration to build and push the image:
| |
After every code push, Actions runs automatically, as shown below:
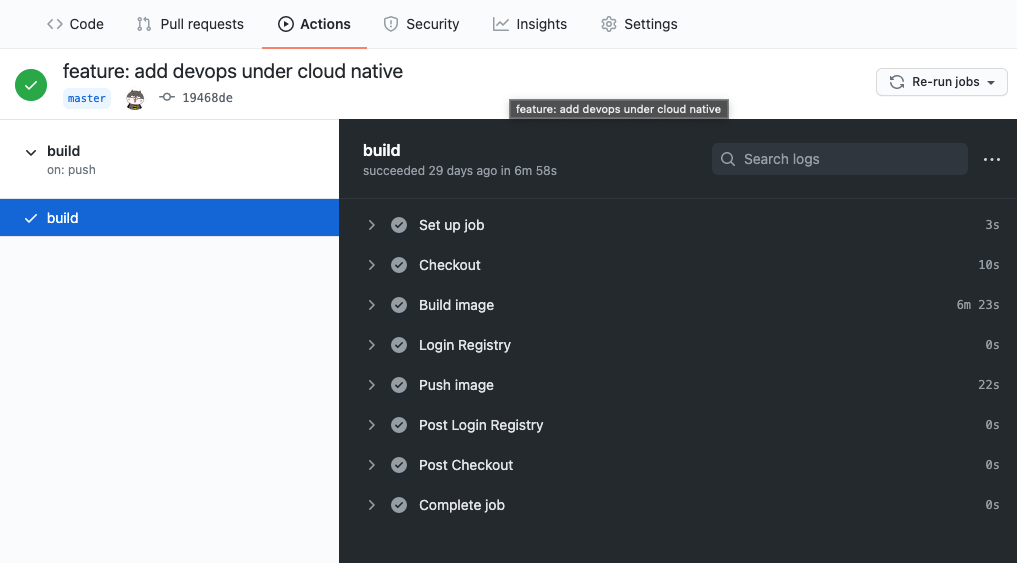
This approach is very developer-friendly, and when the network is smooth, GitHub Actions can meet the CICD needs of many teams.
2. When You Need to Connect Your Own Runner
2.1 Requirements on the Build Machine
Currently, GitLab only provides the following kinds of runtime environments:
- windows
- ubuntu
- macos
But not every version of each system is supported — you can only use the specified versions, and you cannot specify the CPU architecture.
On the other hand, during the build process the build machines GitHub provides also have physical resource limits. The configuration of the build VM is as follows:
- 2 core CPUs
- 7 GB of RAM memory
- 14 GB of SSD disk space
These physical resource configurations may improve in the future, but there will always be limits. When you need to build certain large projects, especially C++ projects, this kind of physical resource configuration cannot meet the requirements.
2.2 Private Repositories Need a Lot of Builds
The figure below shows GitHub’s official build pricing:
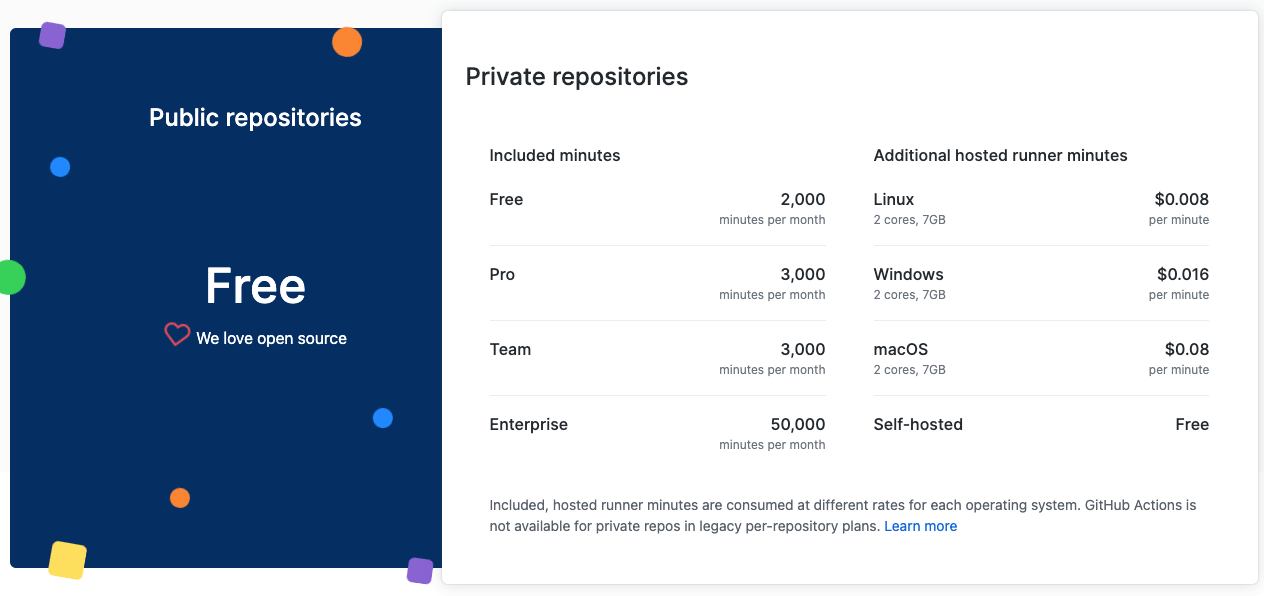
Fortunately, public repositories are free to use; only private repositories have quota limits. Users on different paid tiers get different build minutes. Note that the duration here refers to Linux build time. One minute on Windows counts as two minutes of Linux; one minute on MacOS counts as ten minutes of Linux.
For projects with heavy build demands on private repositories, using the build machines GitHub Actions provides is not cost-effective.
3. Adding a Host Runner
The Runner here refers to the execution environment for GitHub Actions — that is, the environment in which the instructions in the yaml files under the .github/workflows folder run. Here we mainly add a host Runner; to add a container or Kubernetes Runner you need to package actions-runner into an image and then run it to connect to GitHub Actions — there is no other difference.
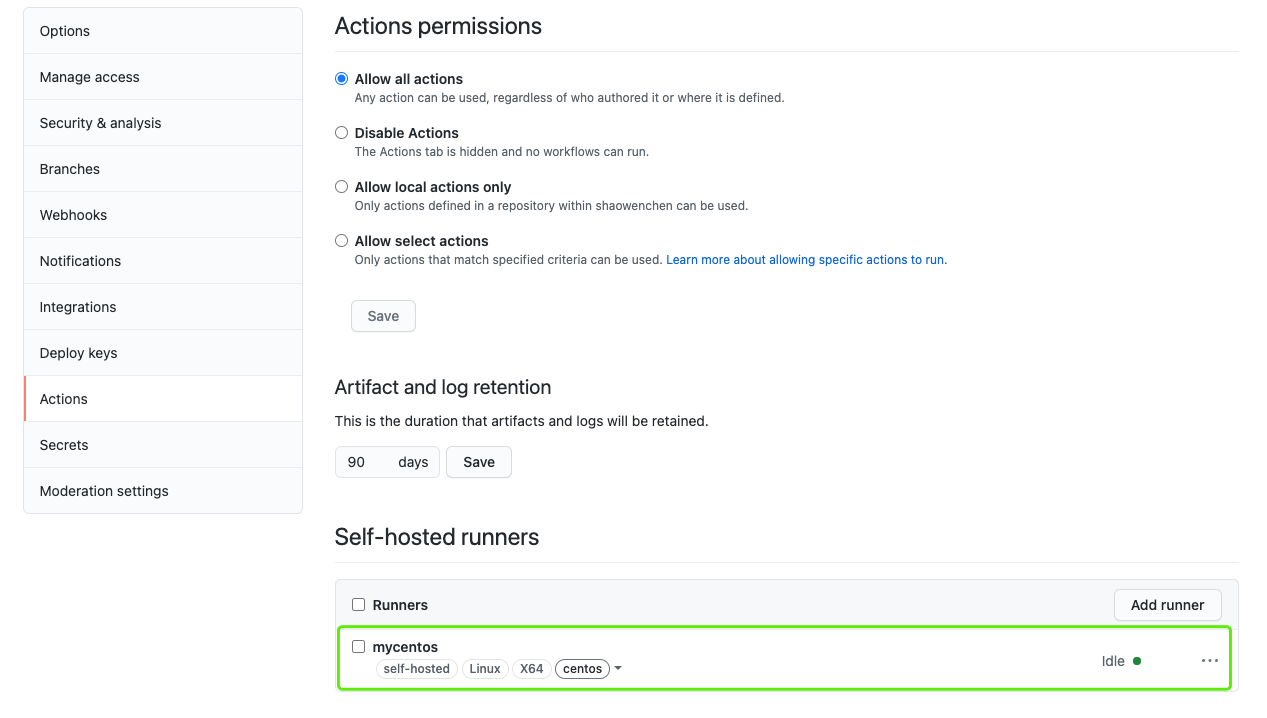
First, go into the project and find Actions on the Settings page.
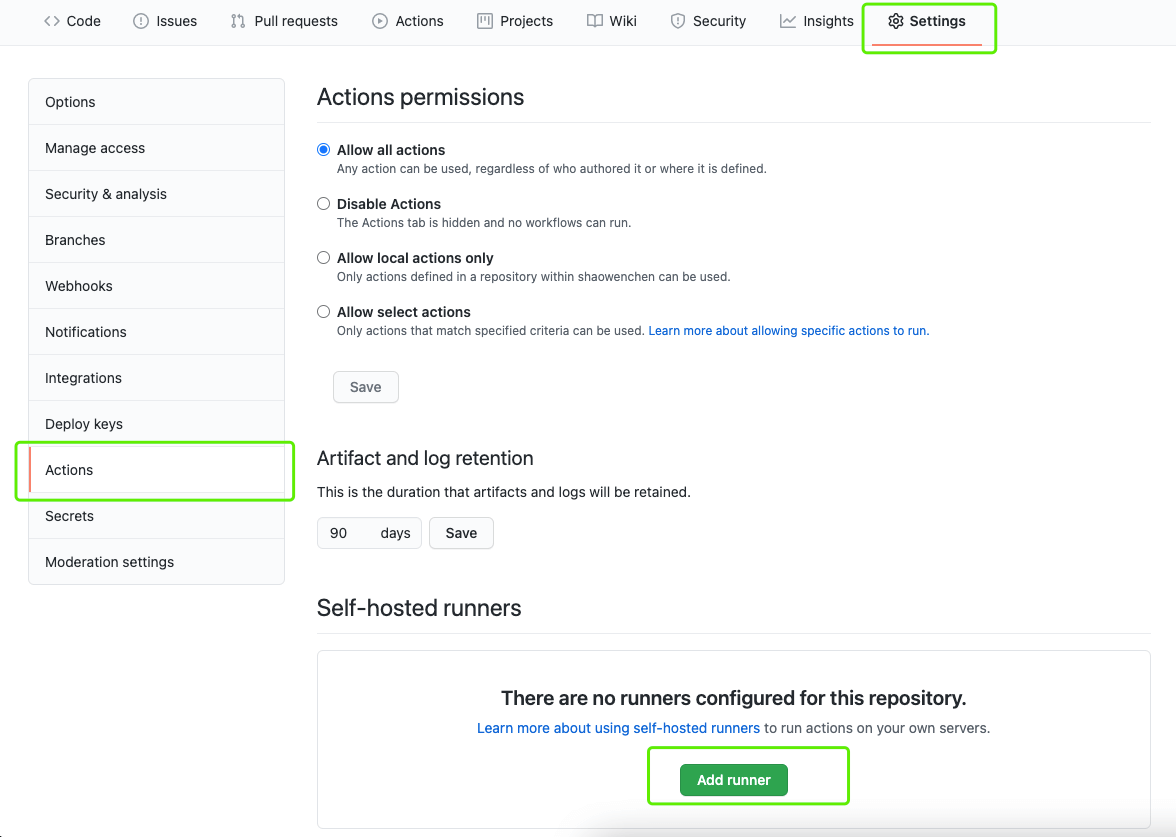
Click Add runner in the figure above to reach the add-host page below, which likewise supports three operating systems: macOS, Linux, and Windows.
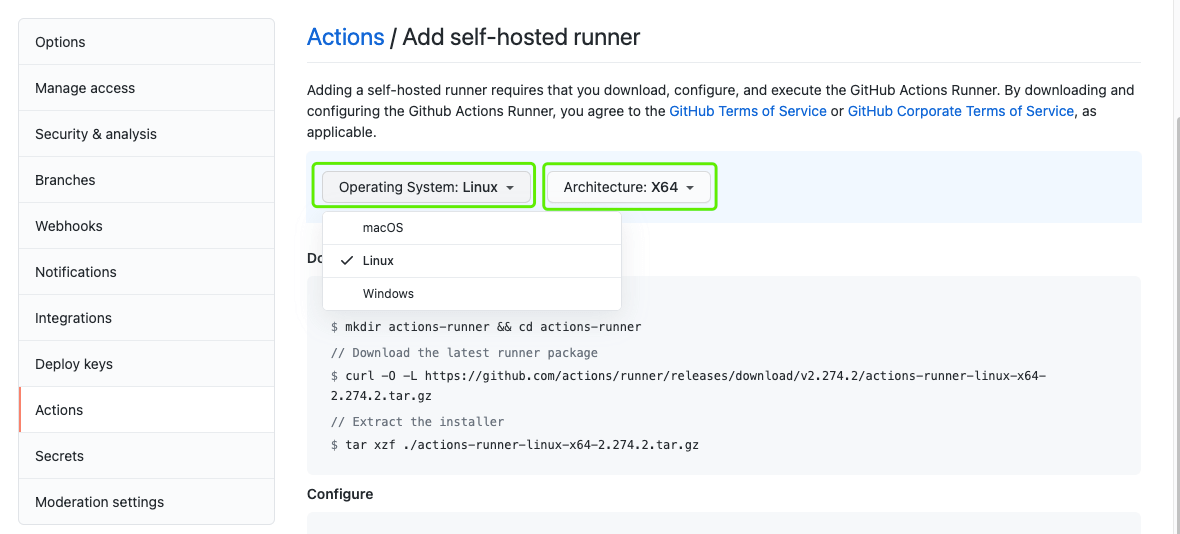
After choosing the operating system and architecture on the page, just follow the installation instructions.
- Create a user runner:runner
| |
- Download the Runner
| |
- Configure the Runner
In this step, you may need to follow the prompts. Run the command
su rootto switch to the root user, then run./bin/installdependencies.shto install dependencies.
Run config.sh to start configuring:
| |
Following the command’s prompts, the interaction goes as follows:
Enter the name of runner: [press Enter for node1] mycentos

This runner will have the following labels: 'self-hosted', 'Linux', 'X64'
Enter any additional labels (ex. label-1,label-2): [press Enter to skip] centos

√ Runner successfully added
√ Runner connection is good

# Runner settings

Enter name of work folder: [press Enter for _work] /home/runner/workspaces

√ Settings Saved.
- Run the Runner
| |
- View the Runner on the page
You can see the newly added Runner on GitHub’s Actions page.
4. Usage Test
- Add a workflows file
On the project’s master branch, add the file .github/workflows/blank.yml with the following content:
| |
- View the run result
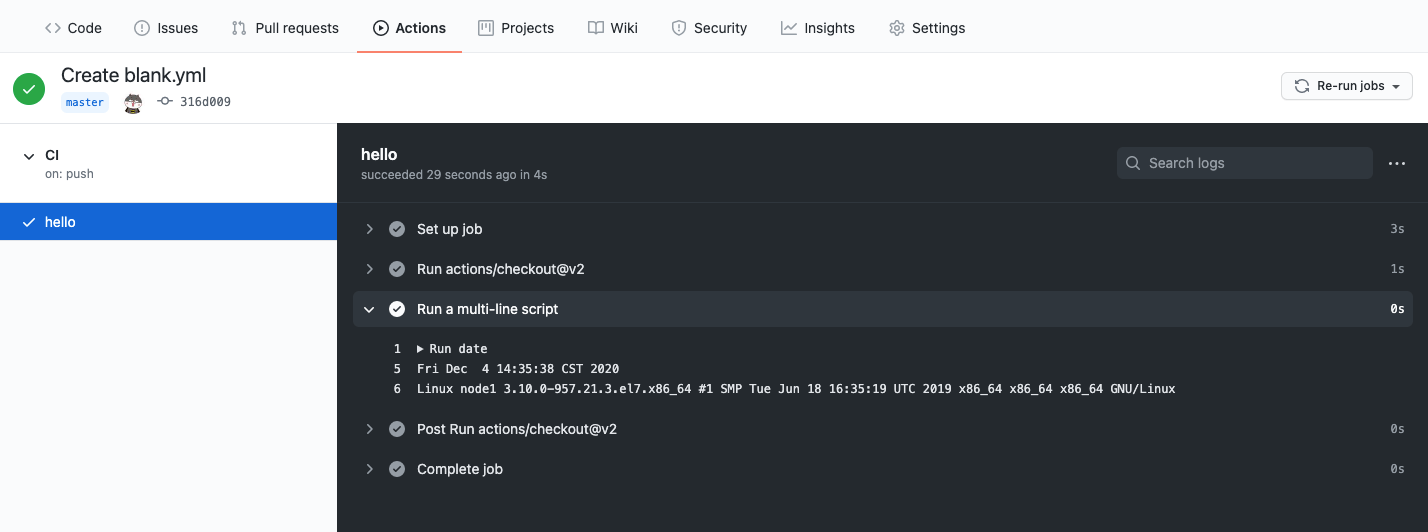
After you commit the file, Actions starts running right away; the result is shown below:
- View the workspaces on the node
| |
From the files in workspaces you can see that Actions checked the code out onto the host and then ran the orchestration commands on the host.
