Starting with GitLab 8.0, GitLab began integrating CI (Continuous Integration) functionality. You only need to add a Runner on the server and a .gitlab-ci.yml file in the project, and you can run CI. In GitLab Setup and Configuration I recorded the whole process of setting up a GitLab service from scratch. In GitLab CI Continuous Integration I explained some basic concepts of GitLab CI and gave a simple Demo.
This article mainly discusses the multi-person development workflow when using Git as the code repository; in the frontend development process, how to use the GitLab-CI tool to automatically compile Webpack projects.
1. Problems and Requirements
I work in SaaS development; let me briefly describe the current state of our team’s project development.
SaaS is developed, pre-released, and released based on the framework and CI/CD capabilities provided by PaaS, using SVN for code management. PaaS provides SaaS developers with the ability to develop applications quickly.
However, in projects developed collaboratively by multiple people, the branching capability SVN provides is not convenient for managing branches and merging code.
Compared with SVN, Git pulls code quickly, allows thousands of parallel development branches, and is fully distributed, which has won it the affection of a large number of developers. When developing projects collaboratively, people tend to use Git to manage code and only commit to SVN when preparing to deploy. To shorten the process, on one hand we can push PaaS to provide a Git code hosting service; on the other hand, we can use certain tools to automate the whole process (Git -> SVN), saving time on development and deployment.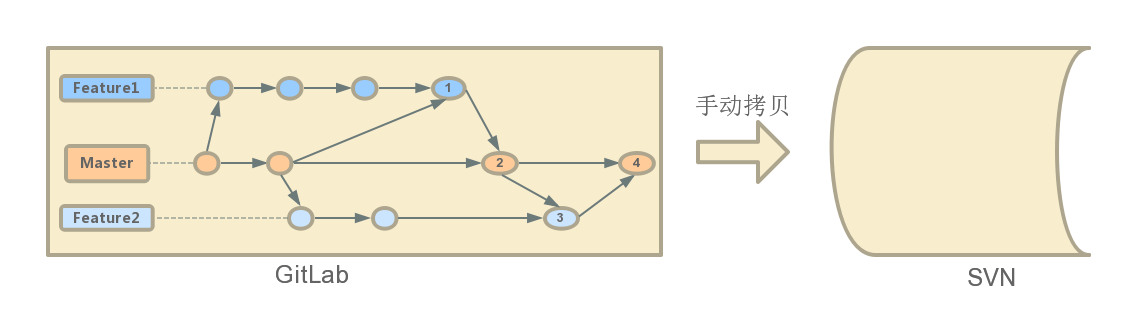
Another problem is that the frontend team uses the Webpack module bundling and management tool, so frontend projects need to be bundled and compiled. For some complex projects, multiple people may take part in the frontend development work. Sometimes, before bundling a Webpack project, a frontend developer has not pulled the latest code, so features developed by other frontend developers are not updated into the latest version of the files in time.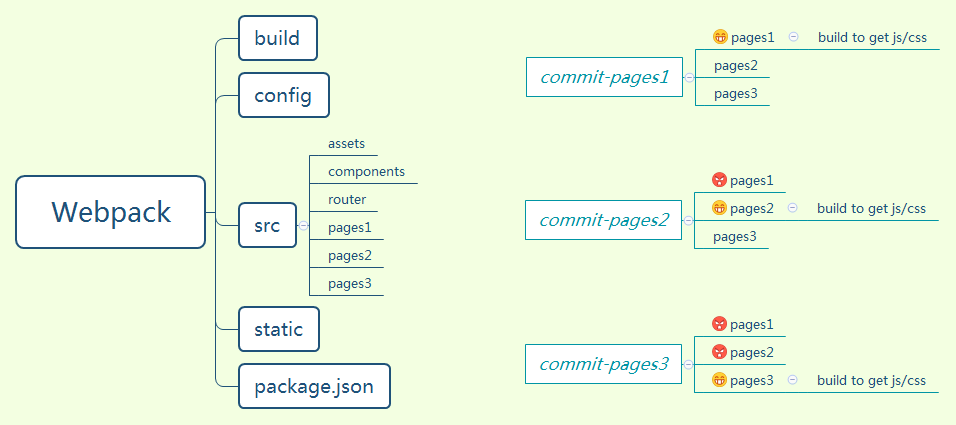
Fortunately, GitLab provides CI, which can solve the problems above. GitLab CI provides the ability to execute scripts and automate flows on the server.
2. Git Workflow
Usually the Git workflow adopts feature-driven development. First there is a requirement, then a feature branch or patch branch. After development is done, that branch is merged into the main branch and the branch is then deleted.
There are three widely used workflows:
- Git flow
- Github flow
- Gitlab flow
Git flow requires maintaining two very similar branches, develop and master, at the same time, and is better suited to projects with a longer release cycle; Github flow only needs to maintain one branch — pull a new branch from master for a new requirement, merge and ship it, then delete the new branch. Gitlab flow, in addition to the master branch, establishes different environment branches and merges new features along the upstream/downstream relationships of those environments.
Currently the team’s SaaS has a short update cycle and iterates frequently, so new features and fixed bugs can be merged into master quickly. Personally, I think using the Github flow workflow is simpler and more convenient.
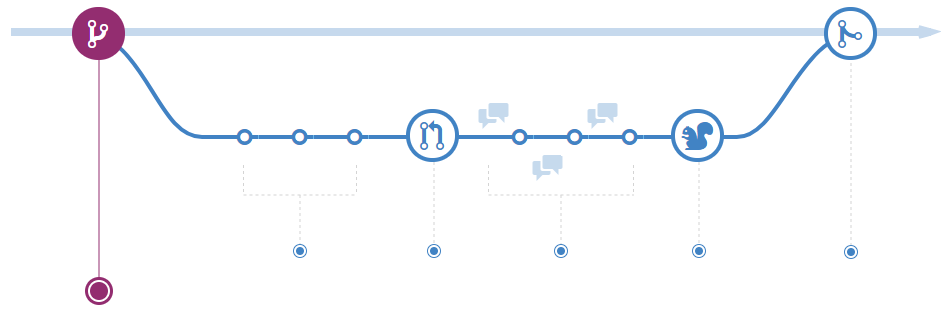
When there is a new requirement or Bug, pull a new branch from the latest master and develop on the new branch. After development on the new branch is complete, open a Pull Request to merge into master, and finally delete the newly created branch.
3. GitLab-CI Workflow
By configuring a CI process in the project, GitLab triggers the CI process after a code commit by default. The default CI configuration file path is the .gitlab-ci.yml file in the project root; you can also specify the configuration file path under [Settings] - [Pipelines] - [Pipelines] in the project.
Simply put, you add a .gitlab-ci.yml file under the project, define the CI process in the file, and after you commit code, GitLab CI starts building automatically. The following discussion mainly revolves around the .gitlab-ci.yml file.
3.1 .gitlab-ci.yml Keywords and Their Meanings
- before_script
Defines commands that run before any Job. - after_script
Defines commands that run after any Job finishes. (Requires GitLab 8.7+ and GitLab Runner 1.2+) - variables && Job.variables
Defines environment variables. If a Job-level environment variable is defined, that Job preferentially uses the Job-level environment variable. (Requires GitLab Runner 0.5.0+) - cache && Job.cache
Defines the files that need to be cached. When each Job starts, the Runner deletes the files inside .gitignore. If some files (such as node_modules/) need to be shared by multiple Jobs, we can only have each Job run npm install first. (Requires GitLab Runner 0.7.0+) - Job.script
Defines the commands the Job runs; required. - Job.stage
Defines the Job’s stage; defaults to test. - Job.artifacts
Defines the artifacts generated in the Job. After the Job runs successfully, the generated files can be kept as artifacts (such as generated binaries), packaged and sent to GitLab, and afterwards we can download the artifacts under the GitLab project page.
3.2 Workflow
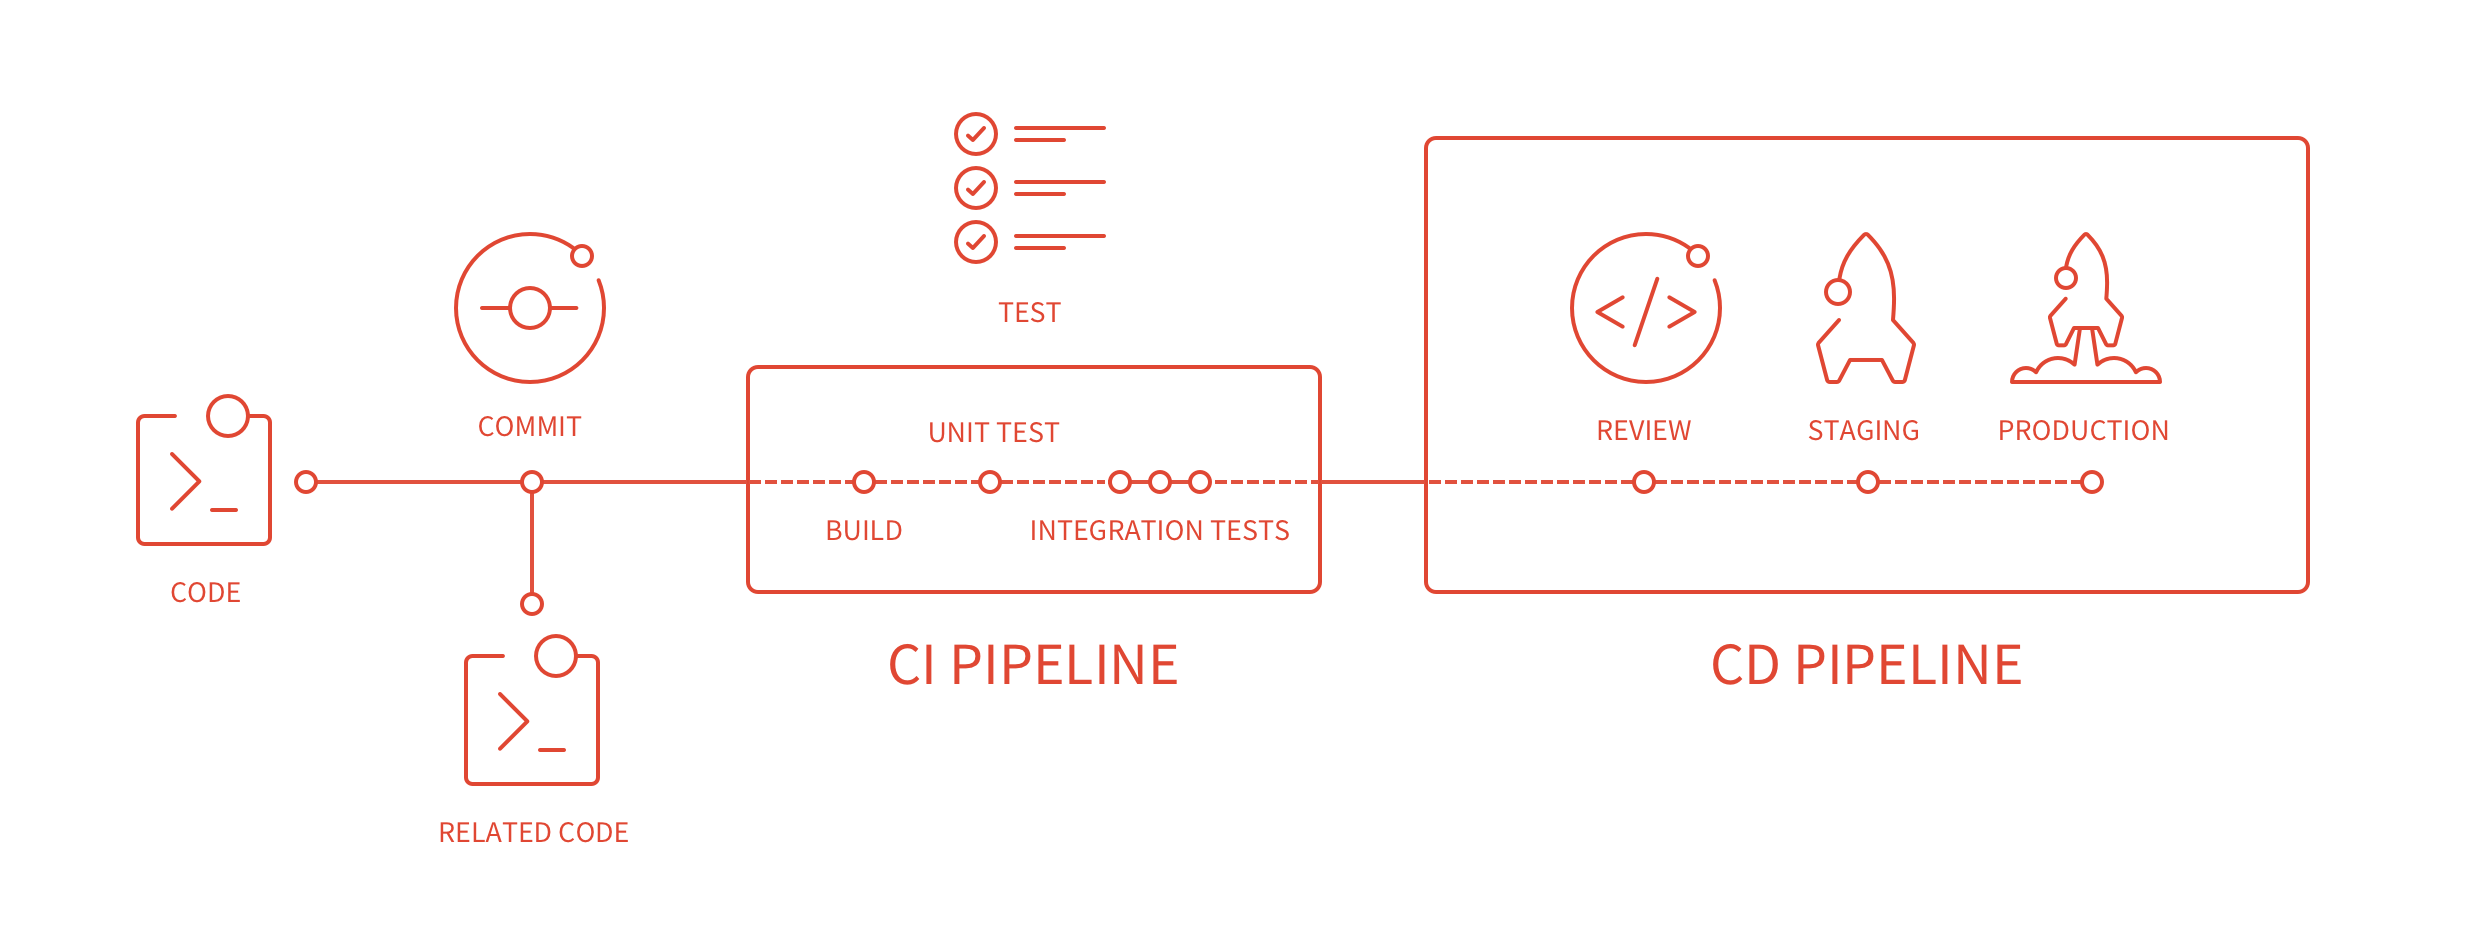
Develop features and define the flow locally; after committing code, GitLab completes the CI/CD process through a Pipeline.
4. Webpack CI Practice
GitLab’s minimum server requirement is 1 core CPU, 1GB RAM, 3GB swap; the recommended configuration is 2 cores CPU, 4GB RAM. The GitLab server configuration the team uses is:
- Intel(R) Xeon(R) CPU E5-2420 six-core, 1.90GHz, 12 threads
- Memory 64G
- Disk 300G, 10000RPM, SAS
The project’s file structure:
| |
4.1 .gitlab-ci.yaml Configuration
Note that GitLab CI provides some built-in environment variables; for example, $CI_PROJECT_PATH represents the project path. Using these built-in variables can significantly improve the portability of the yaml configuration and reduce typos. Below is the configured yaml file; the function of each step is written in the comments.
| |
The yaml configuration above achieves this: after you commit code, it automatically bundles and compiles the Webpack project and updates the compiled files to the GitLab repository. If you also need to update SVN, you only need to run the corresponding SVN commit command — I’ll leave that as homework for you, the reader of this document.
4.2 Hiding Sensitive Information with Environment Variables
On the project page, choose in order - [Settings] - [Pipelines] - [Secret variables]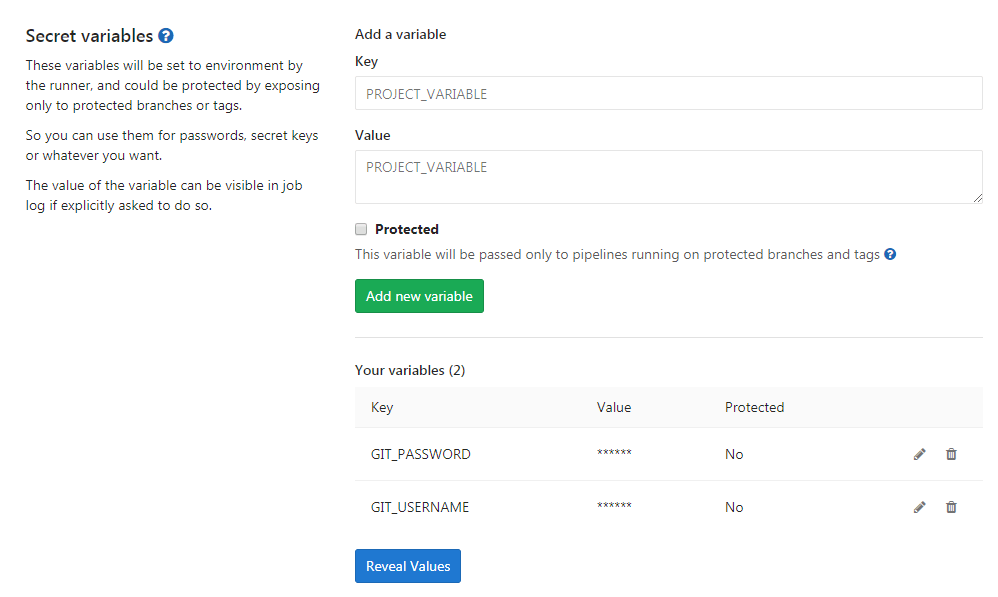
4.3 Viewing CI Results
After you commit code to GitLab, the CI process is triggered automatically. Wait for the execution to finish.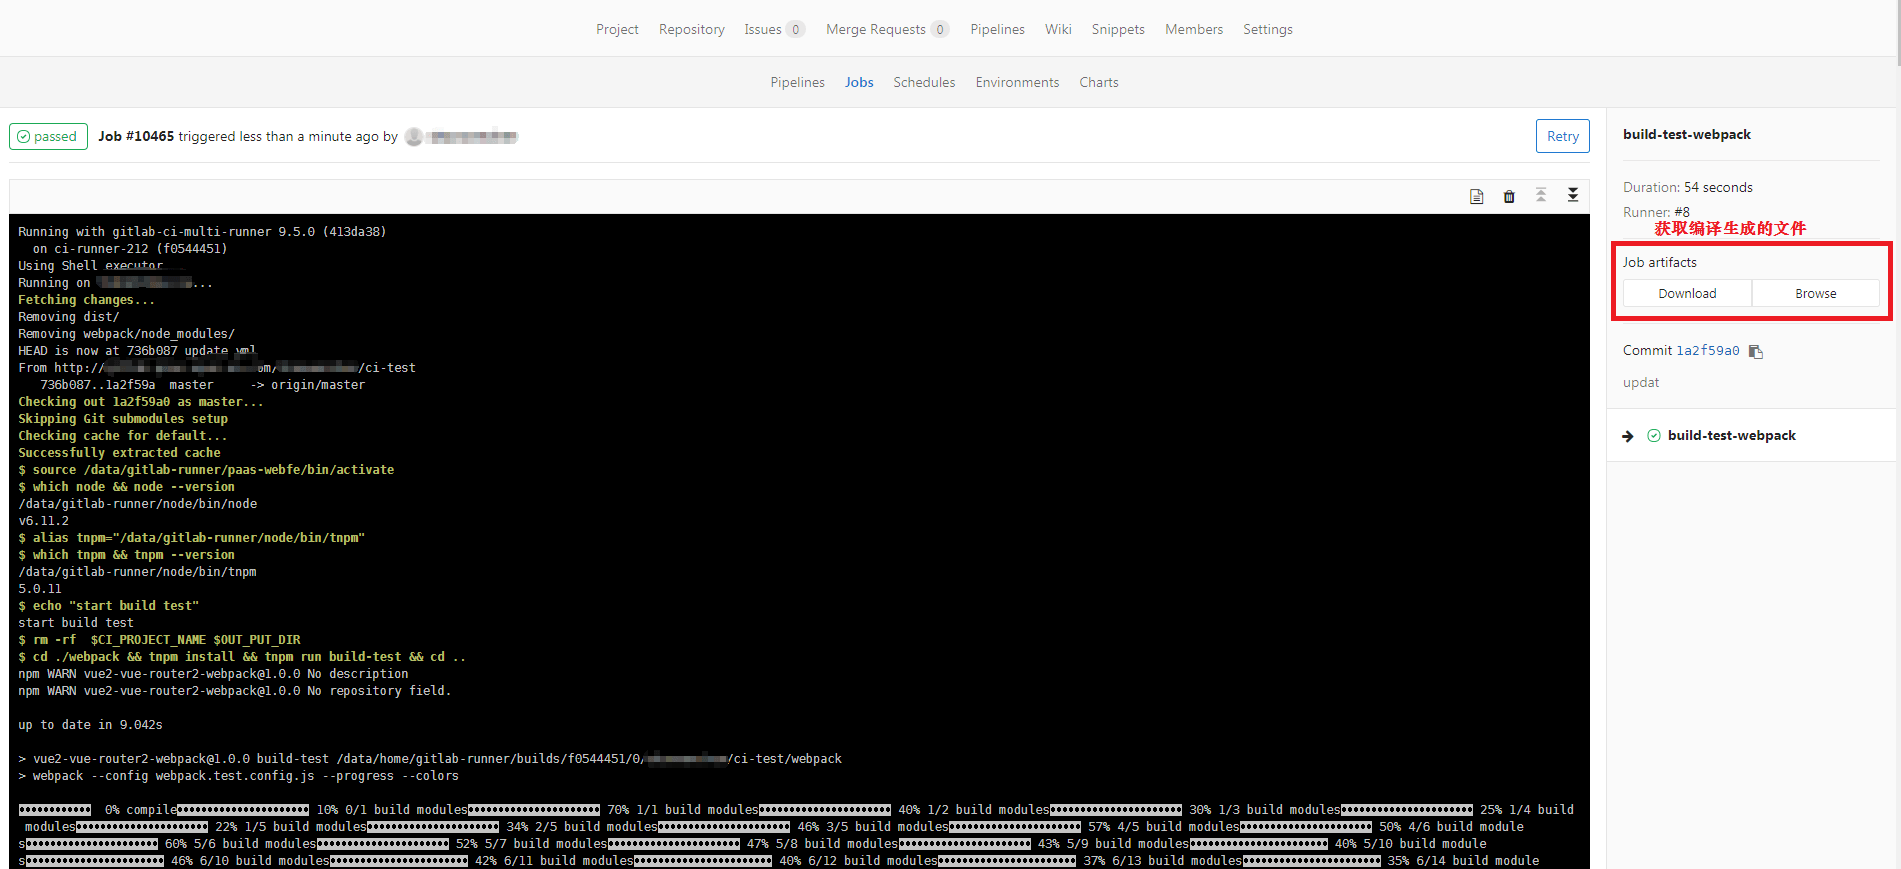
Another key point that needs explaining is circular builds. In the script, on each build, a git commit is executed, which triggers a new build, and so on repeatedly, running builds endlessly. To solve this problem, when committing code in the script you need to add the “[ci skip] or [skip ci] keyword” to the commit message, to skip that build. When viewing the [Pipeline] execution status on the web, you can see that one commit adds two records, one of which is [skipped].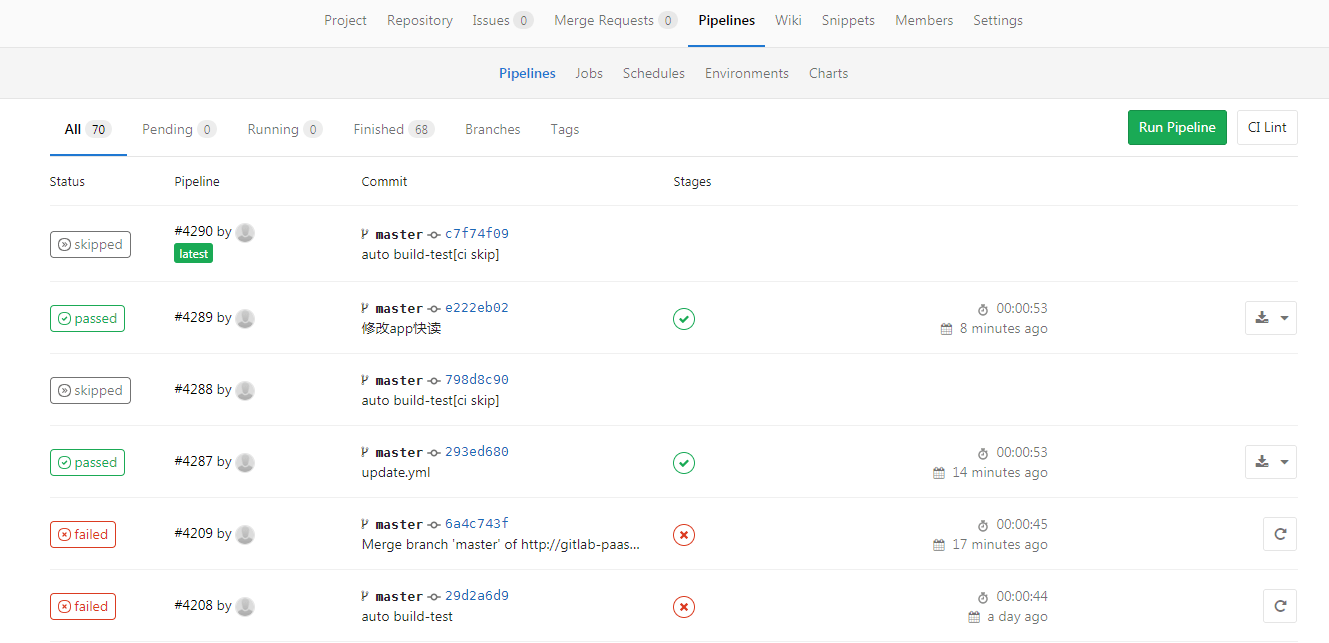
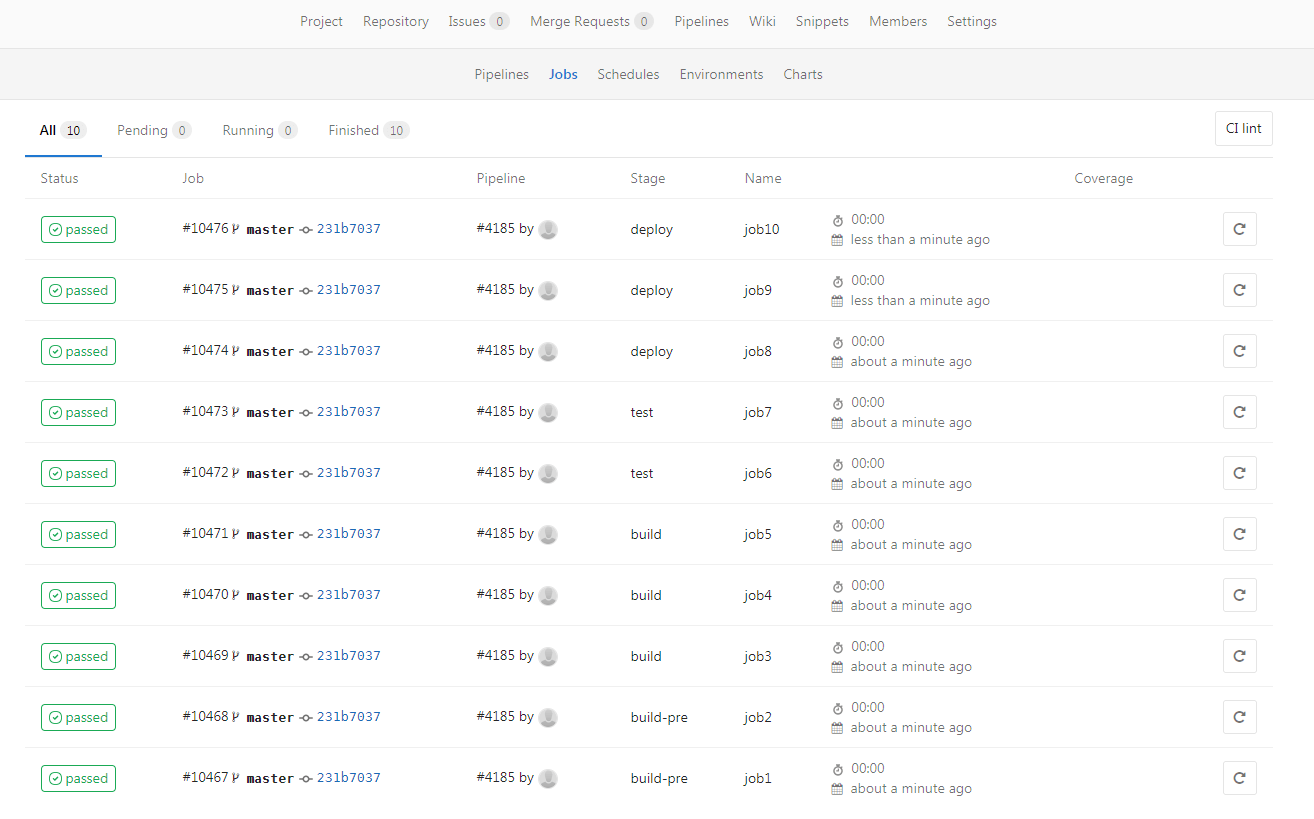
When executing a job, besides the console outputting build information, under the [Jobs] option you can also view the job’s execution flow and execution results. For a better page effect, below is the execution result of another Example (I deliberately wrote many stages and jobs).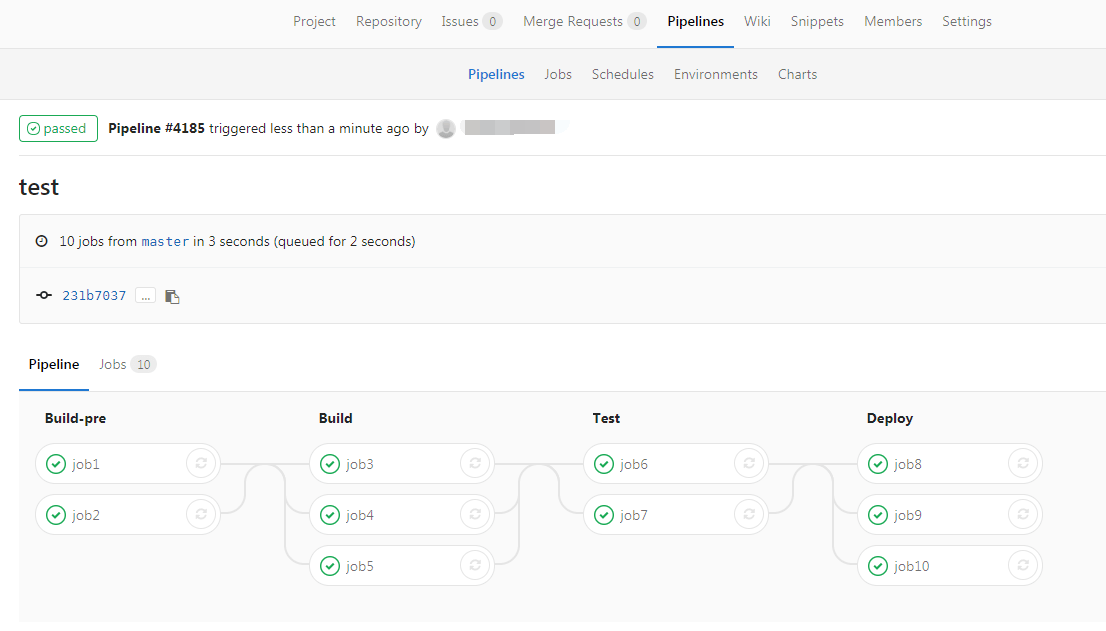
4.4 A Few Tips
- Using the when keyword in a job lets you control that the job only runs when certain conditions are met
| |
- To skip CI, add ci skip or skip ci when committing code, and you can skip the CI process triggered by that commit
| |
- In a job you can set only to restrict execution to specified branches only
| |
5. References
- http://www.ruanyifeng.com/blog/2015/12/git-workflow.html
- https://guides.github.com/introduction/flow/index.html
- https://www.ibm.com/developerworks/cn/java/j-lo-git-mange/index.html
- https://docs.gitlab.com/ce/ci/variables/
- https://gitlab.com/gitlab-org/gitlab-ce/issues/18106
- https://hackernoon.com/setting-up-ci-cd-on-gitlab-step-by-step-guide-part-1-826385728223
- https://www.perforce.com/perforce/r16.3/manuals/gitswarm/ci/yaml/README.html
6. Appendix
Another configuration that pushes Git repository code to SVN
| |
