1. Where Serverless Fits
If cloud computing is meant to make resources flow like tap water — turn it on and use it, turn it off and it stops — then Serverless is one of the future directions of cloud computing. Compared with runtimes such as IaaS and Kubernetes, Serverless offers finer-grained resource control while also providing greater elasticity, letting developers ship features quickly.
Common Serverless scenarios include aggregation services, building lightweight services, and massive pay-as-you-go capacity, which covers most needs. In this article we will use Tencent Cloud’s Serverless service to build a backend for a WeChat Official Account.
2. Creating a Function Service on Tencent Cloud Serverless
Currently Tencent Cloud Serverless mainly offers two types:
- Function service, which provides function execution
- Serverless application, which provides a runtime for a complete application
The Serverless application type does not currently support compiled applications, nor the Gin framework; it is mainly PHP and Python. But within the function service, Serverless offers an image type that can run the files inside an image directly. So you can build the application image in advance and then use the function service to create the application service.
2.1 Initializing the Image
- Create a namespace
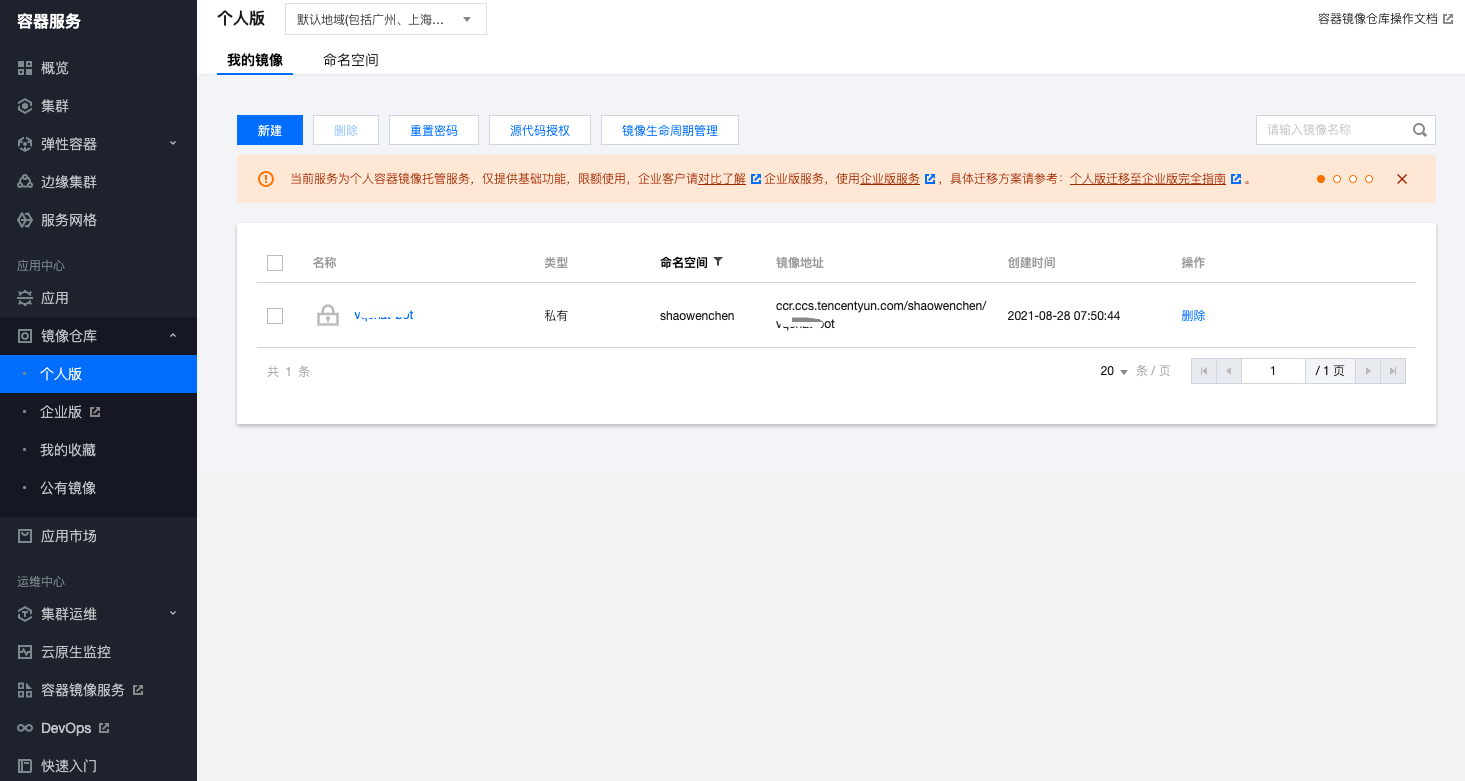
Open the link https://console.cloud.tencent.com/tke2/registry/user/space , create a new namespace; here I used shaowenchen
- Create an image
Click [Create], create an empty image, to be used for creating the function service. You need to note down the image address, ccr.ccs.tencentyun.com/shaowenchen/xxx.
2.2 Creating the Function Service
Open the link https://console.cloud.tencent.com/scf/list-create?rid=1&ns=default&createType=empty
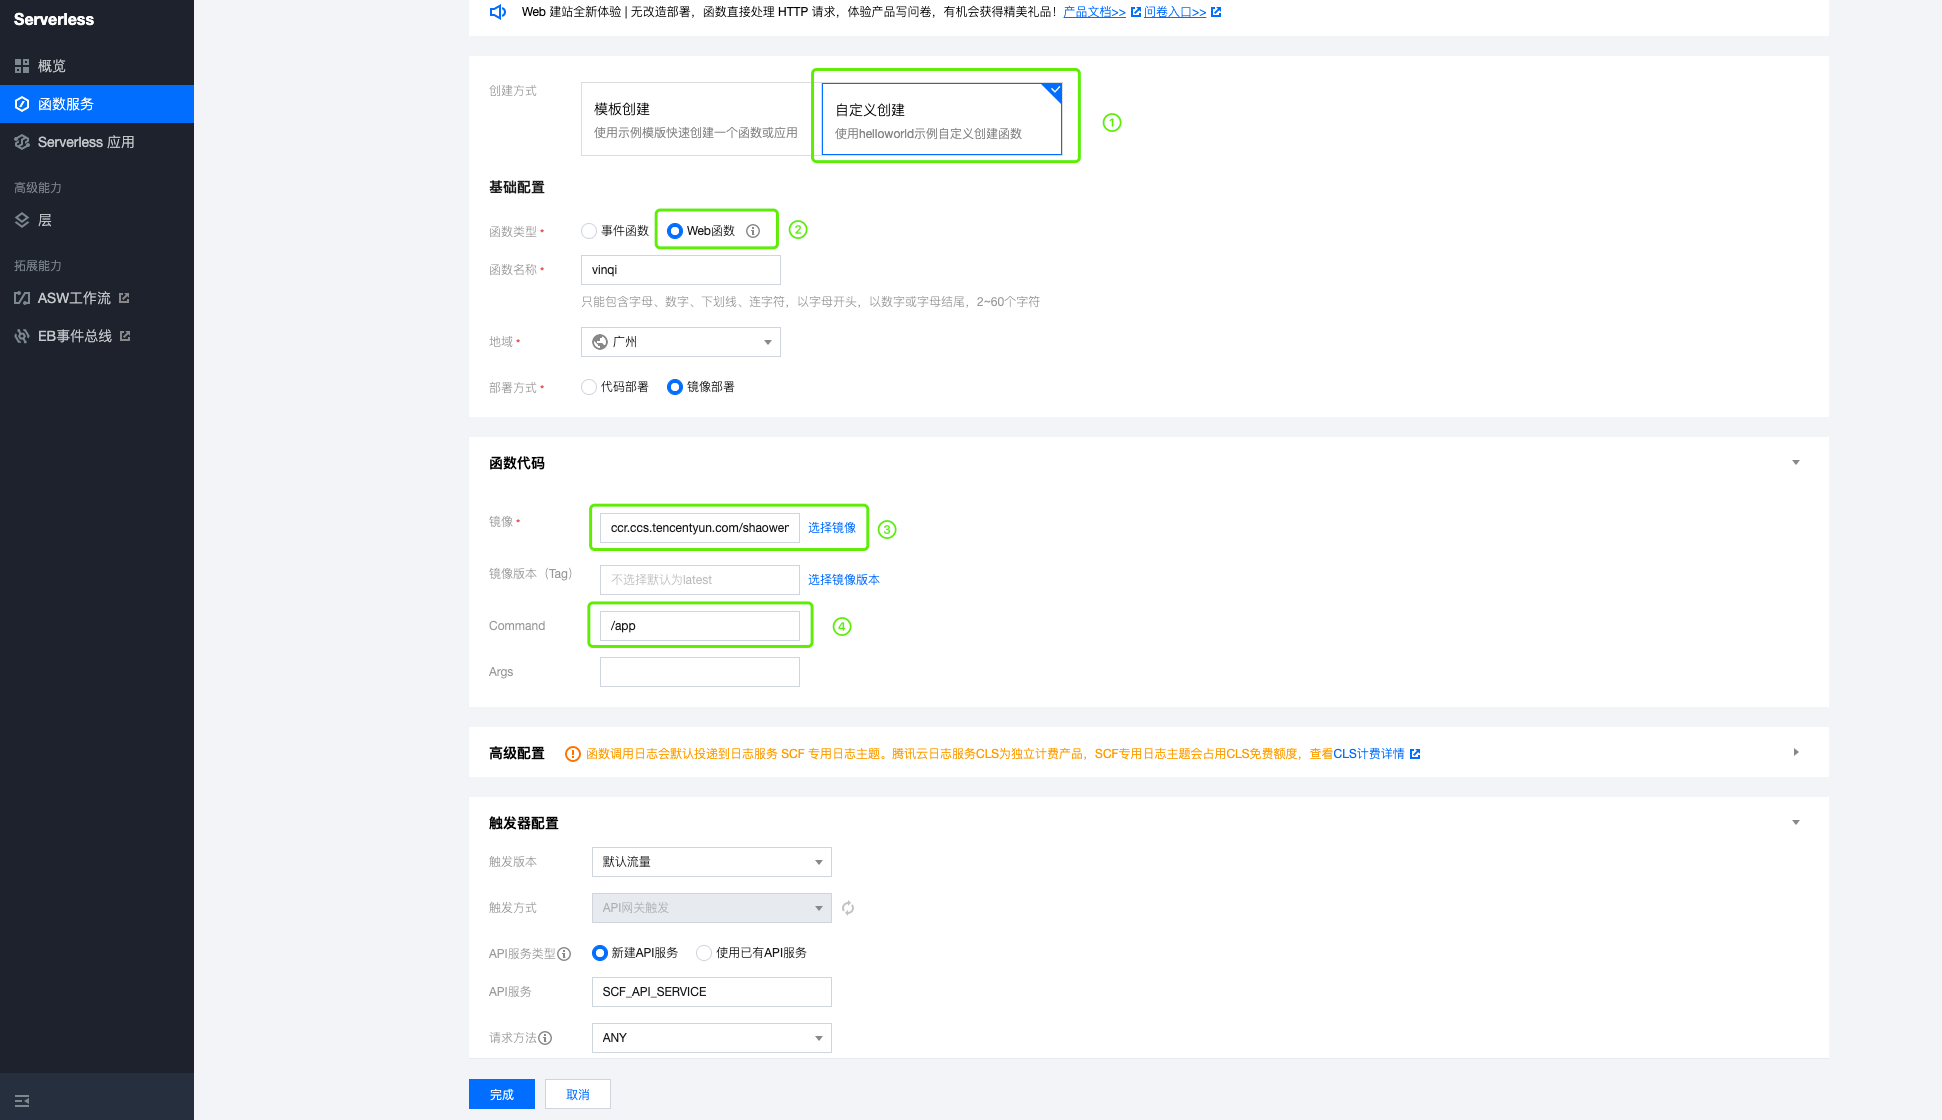
Following the screenshot, proceed through the steps below in order:
- Choose custom creation
- Choose Web function
- Choose image deployment, click Select image, and pick the image created in the previous step
- Complete Command, entering the startup command of the application service inside the image:
/app
Finally click [Finish] to create the service, but the gateway address it provides, https://service-xxx.gz.apigw.tencentcs.com/release/, will not open, because the image is still empty. Next, we create the project and push the image.
3. Creating the Backend Project on Github
3.1 Initializing the Project with Gin
Use Gin to create a backend project; below is the main.go file.
| |
What the code achieves is: it responds to the user’s input xxx by returning the message I get a msg : xxx, and the server-side configuration sits on the /mp/ path.
It is particularly important to note that the port must listen on 9000, otherwise Serverless cannot respond
3.2 Adding a Dockerfile
The Dockerfile content is as follows
| |
A multi-stage build: the code is compiled into the alpine:latest image, the executable is /app, and the exposed port is 9000.
3.3 Adding a Github Action
For convenience of continuous integration, add the file .github/workflows/build.yaml to the repository, with the following content:
| |
After you commit the code, Github Action automatically compiles the code and pushes the image to Tencent Cloud’s image registry.
4. Official Account Configuration and Testing
4.1 Enabling the Server Configuration for the Official Account
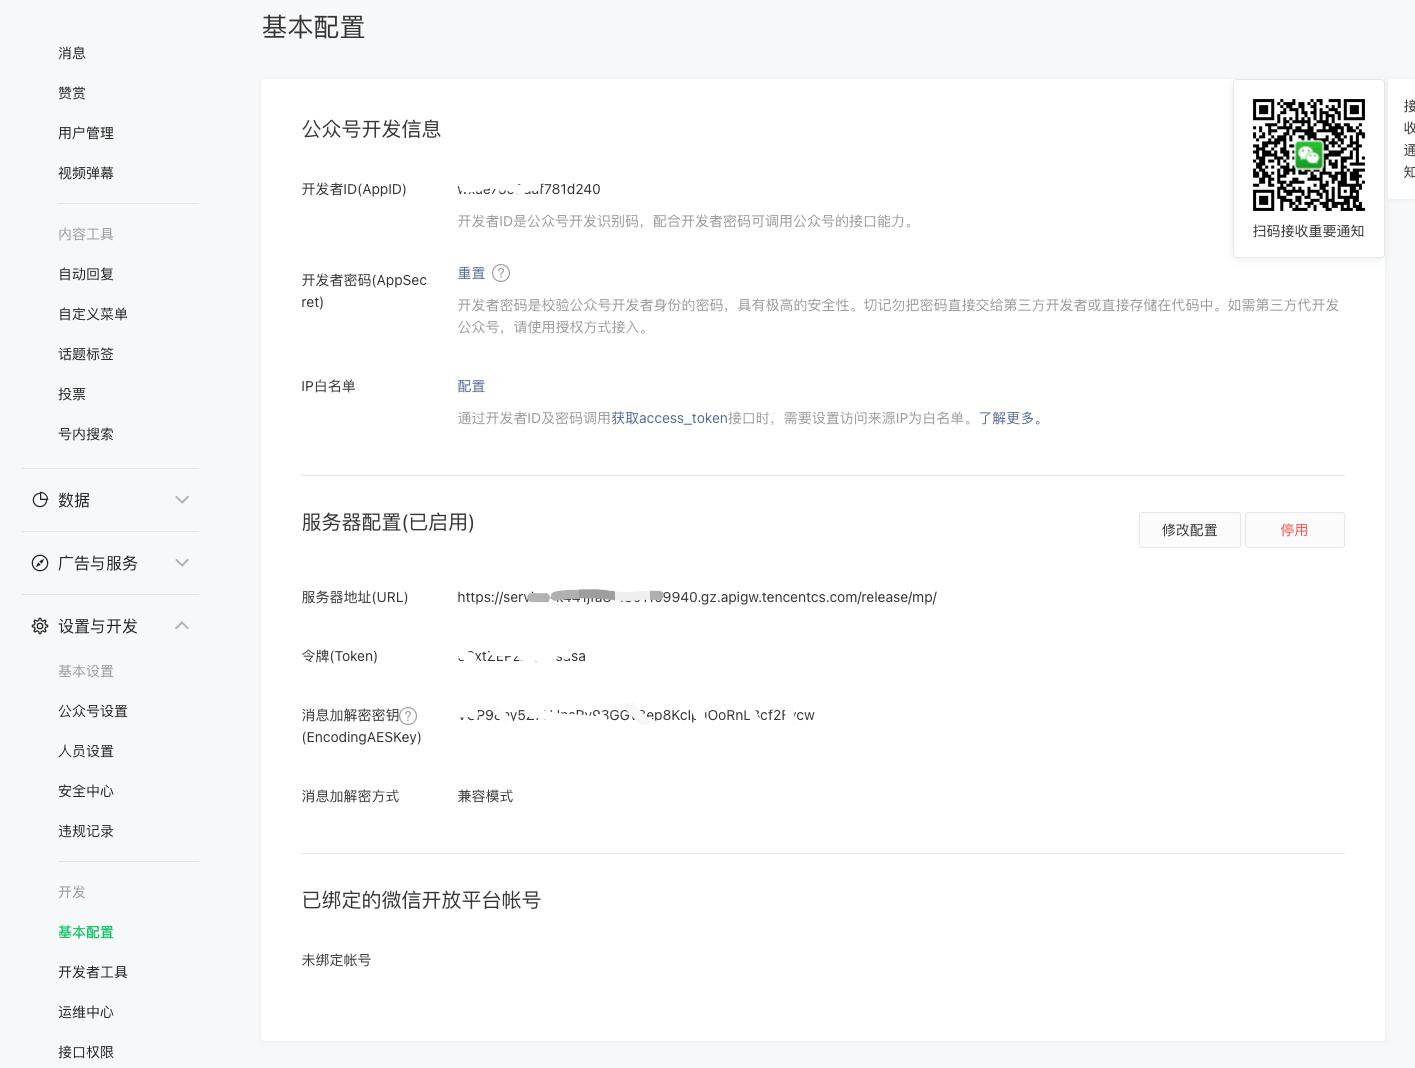
As shown in the screenshot, on the WeChat Official Account management page, enable the service configuration. You need to note down the following information, which is used by the backend code for authentication:
- AppID
- AppSecret
- Token
- EncodingAESKey
The server address here is the function service’s gateway address https://service-xxx.gz.apigw.tencentcs.com/release/ + mp/. Since the service has not been updated yet, verification will not pass; you need to stay on this page and save once the service is ready.
4.2 Configuring the Secrets and Updating the Service
Fill the configuration obtained in the previous step into the configuration of the main.go file:
| |
After committing, wait for Github Action to finish and the image push to succeed.
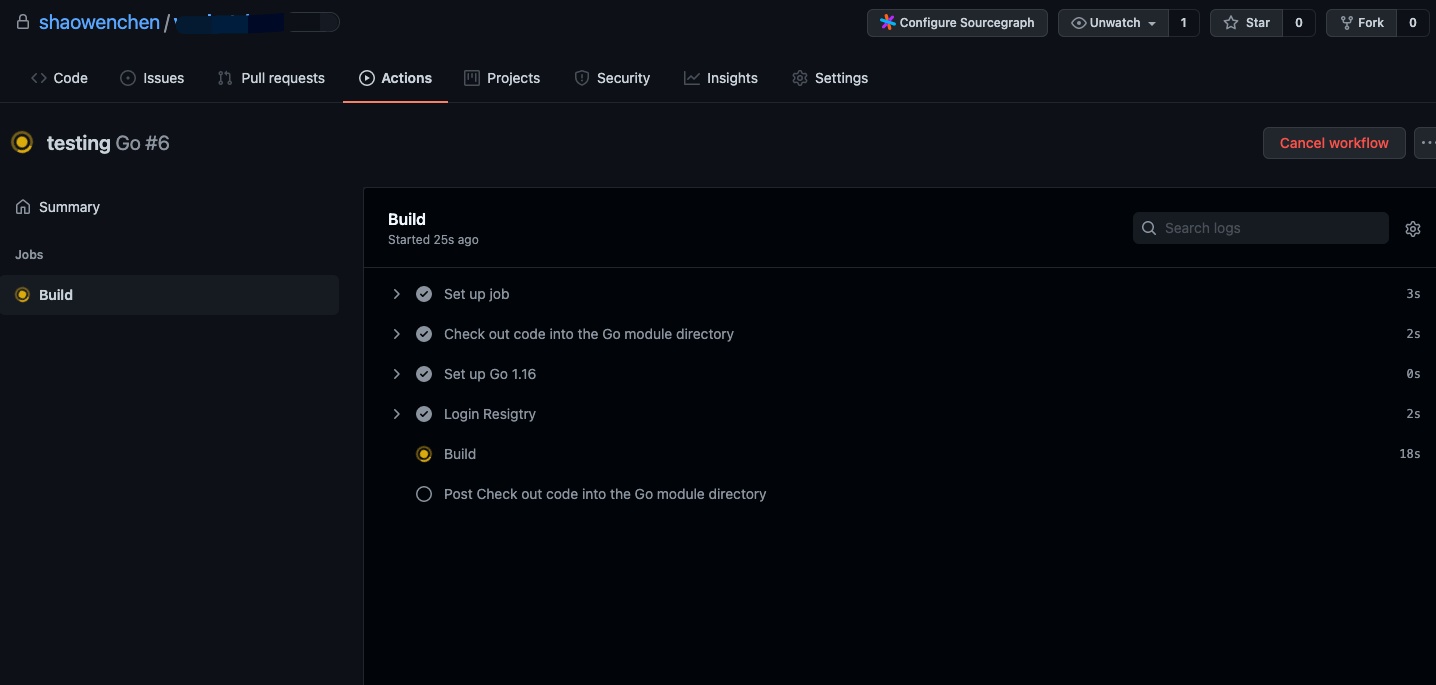
4.3 Updating the Function Service
Although the service image was updated successfully, the function service will not update itself.
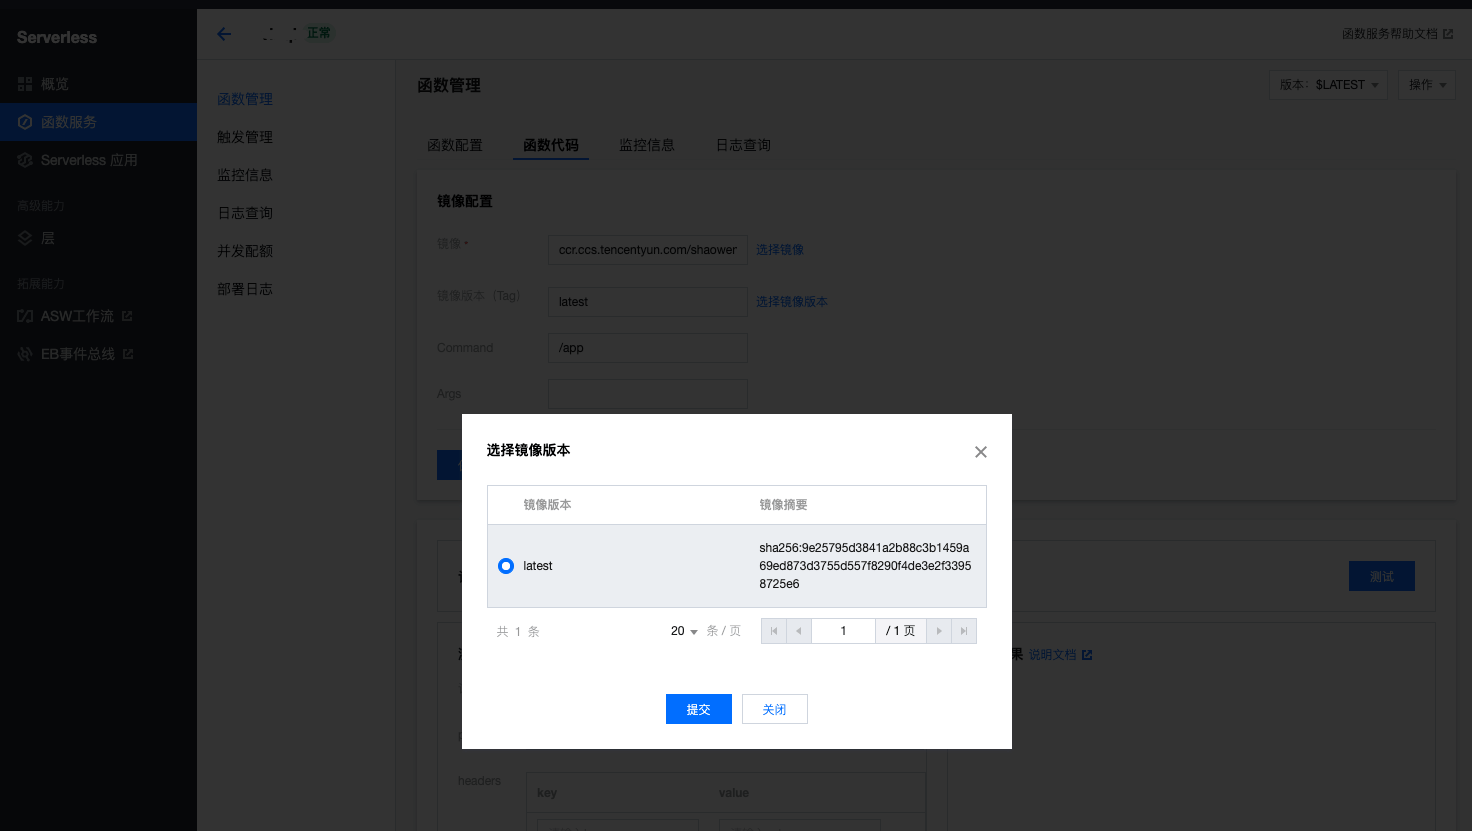
As shown in the screenshot, we open the function management page, select the image version, check latest and submit. After a successful submission, the page will indicate that the image is being pulled and the service is being updated; at this point open the access address, and the page responds with OK.
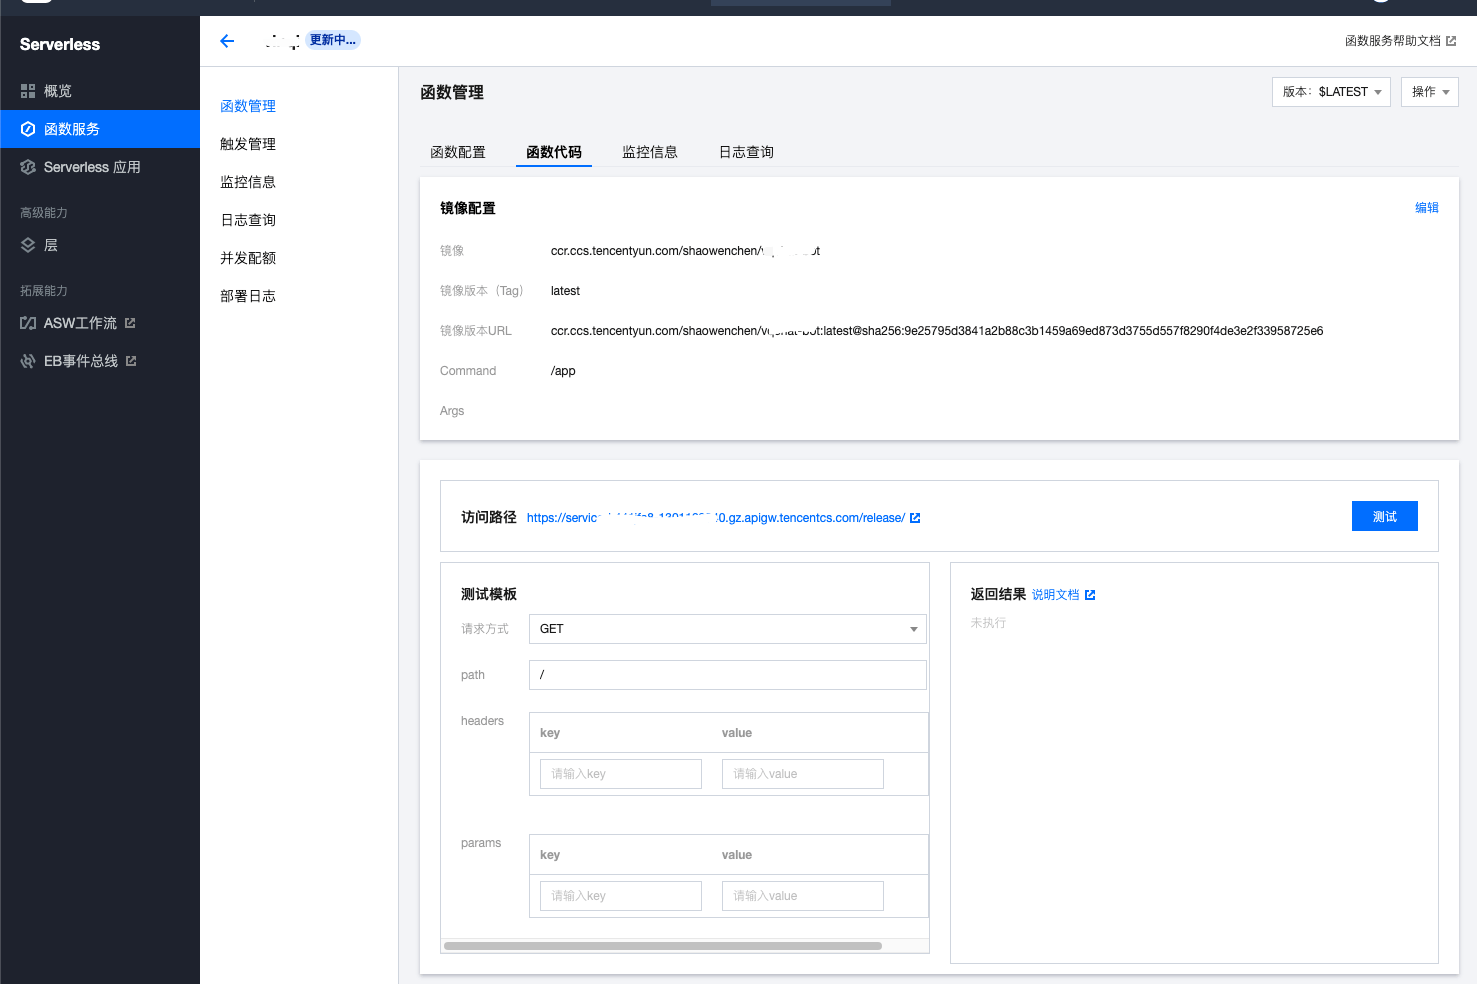
Now go back and submit the Official Account service configuration, and it will succeed.
4.4 Sending a Message to Test
Finally, test the functionality in the WeChat Official Account:
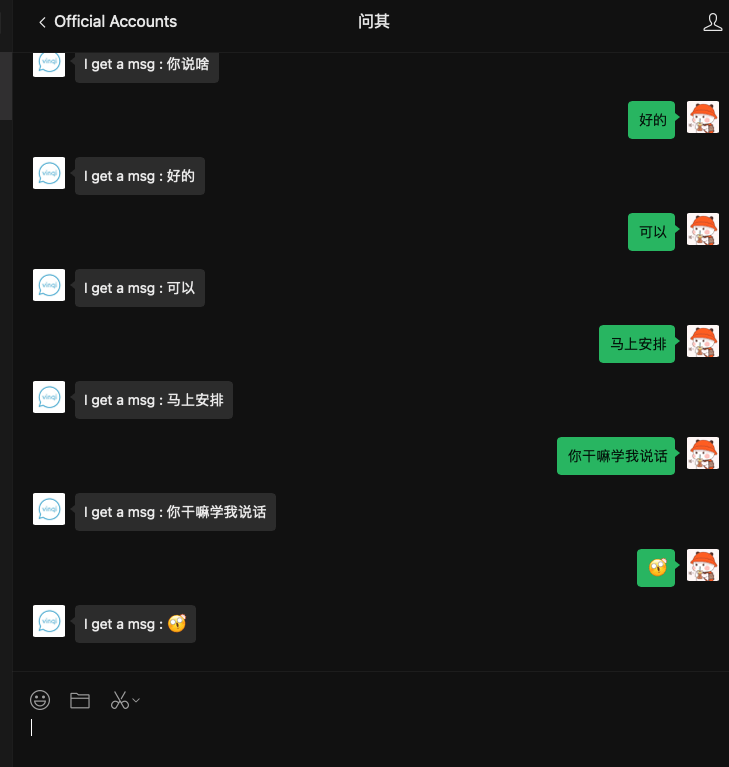
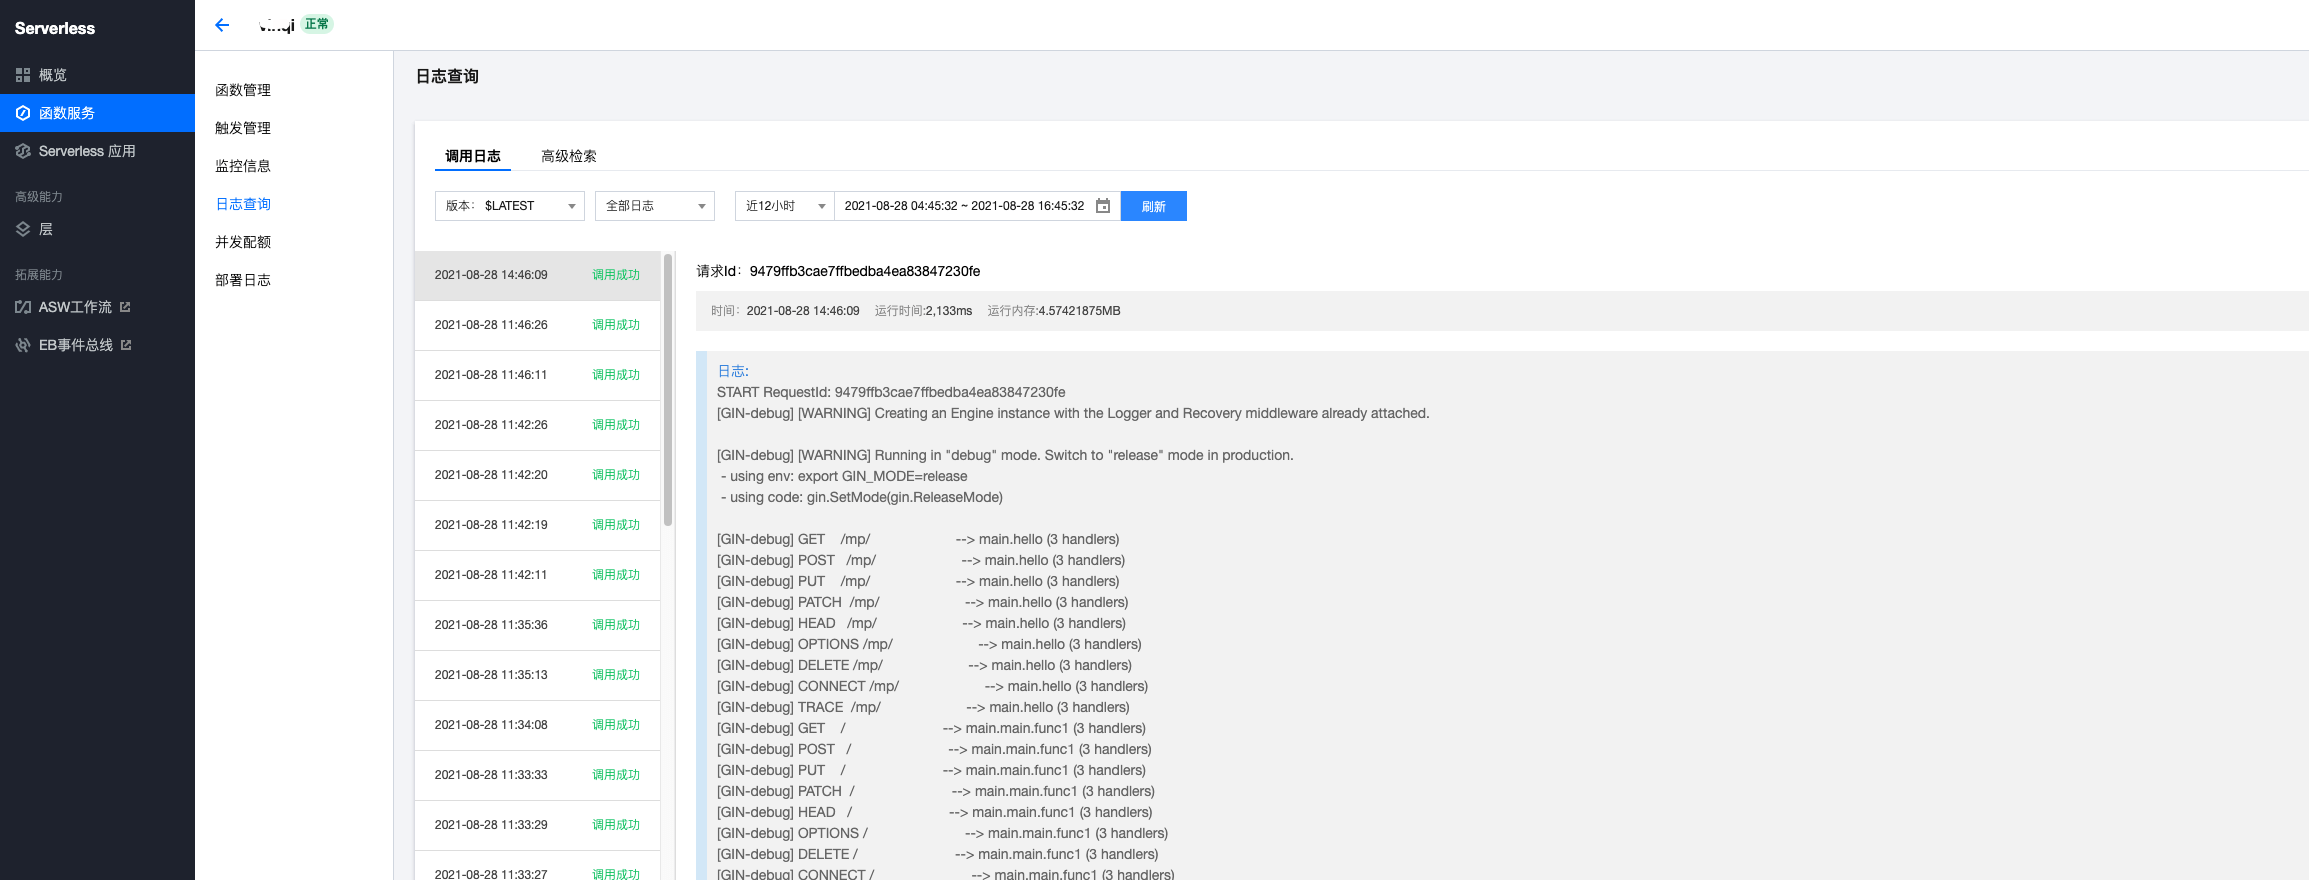
In the Tencent Cloud function service backend, you can also view the related request logs.
5. Summary
This article took WeChat Official Account backend development as its requirement and gave Tencent Cloud Serverless a try. Since Tencent Cloud Serverless currently has a certain free quota, it is enough for small personal projects and Demo projects. This article mainly covers the following:
- Created a Tencent Cloud Serverless function service
- Created a Gin continuous integration project using Github Action
- Configured the WeChat Official Account server side
In the end we implemented a feature that automatically responds to messages users send to the Official Account.
