1. Why Secondary Scheduling Is Needed
The job of the Kubernetes scheduler is to bind a Pod to a single best node. To do this, the scheduler runs through a series of filtering and scoring steps.
Kubernetes scheduling is based on Requests, but the actual usage of each Pod changes dynamically. After running for a while, node load becomes uneven. Some nodes are overloaded, while others have very low utilization.
So we need a mechanism that lets Pods be distributed across the cluster’s nodes in a healthier and more balanced way dynamically, rather than being pinned to one host after a single scheduling decision.
2. The Several Ways descheduler Runs
descheduler is a subproject under kubernetes-sigs. First clone the code locally and enter the project directory:
| |
- One-off Job
Runs only once.
| |
- CronJob
The default is */2 * * * *, running once every 2 minutes.
| |
- Long-running Deployment
The default is --descheduling-interval 5m, running once every 5 minutes.
kubectl create -f kubernetes/base/rbac.yaml
kubectl create -f kubernetes/base/configmap.yaml
kubectl create -f kubernetes/deployment/deployment.yaml
- CLI
First generate the policy file locally, then run the descheduler command.
| |
descheduler has a --help flag to view the related help documentation.
| |
3. Testing the Scheduling Effect
- Cordon some nodes so that only one node participates in scheduling
| |
- Run an application with 40 replicas
You can observe that all replicas of this application are on node3.
kubectl get pod -o wide|grep nginx-645dcf64c8|grep node3|wc -l
      40
- Deploy descheduler in the cluster
Here the Deployment approach is used.
| |
- Uncordon the nodes
Before scheduling, all replicas are concentrated on node3.
| |
Uncordon the nodes.
| |
- Check the descheduler logs
When the scheduled time requirement is met, descheduler starts evicting Pods according to the policy.
| |
- Pod distribution after secondary scheduling
For node load, node3 decreased while the other nodes rose somewhat.
| |
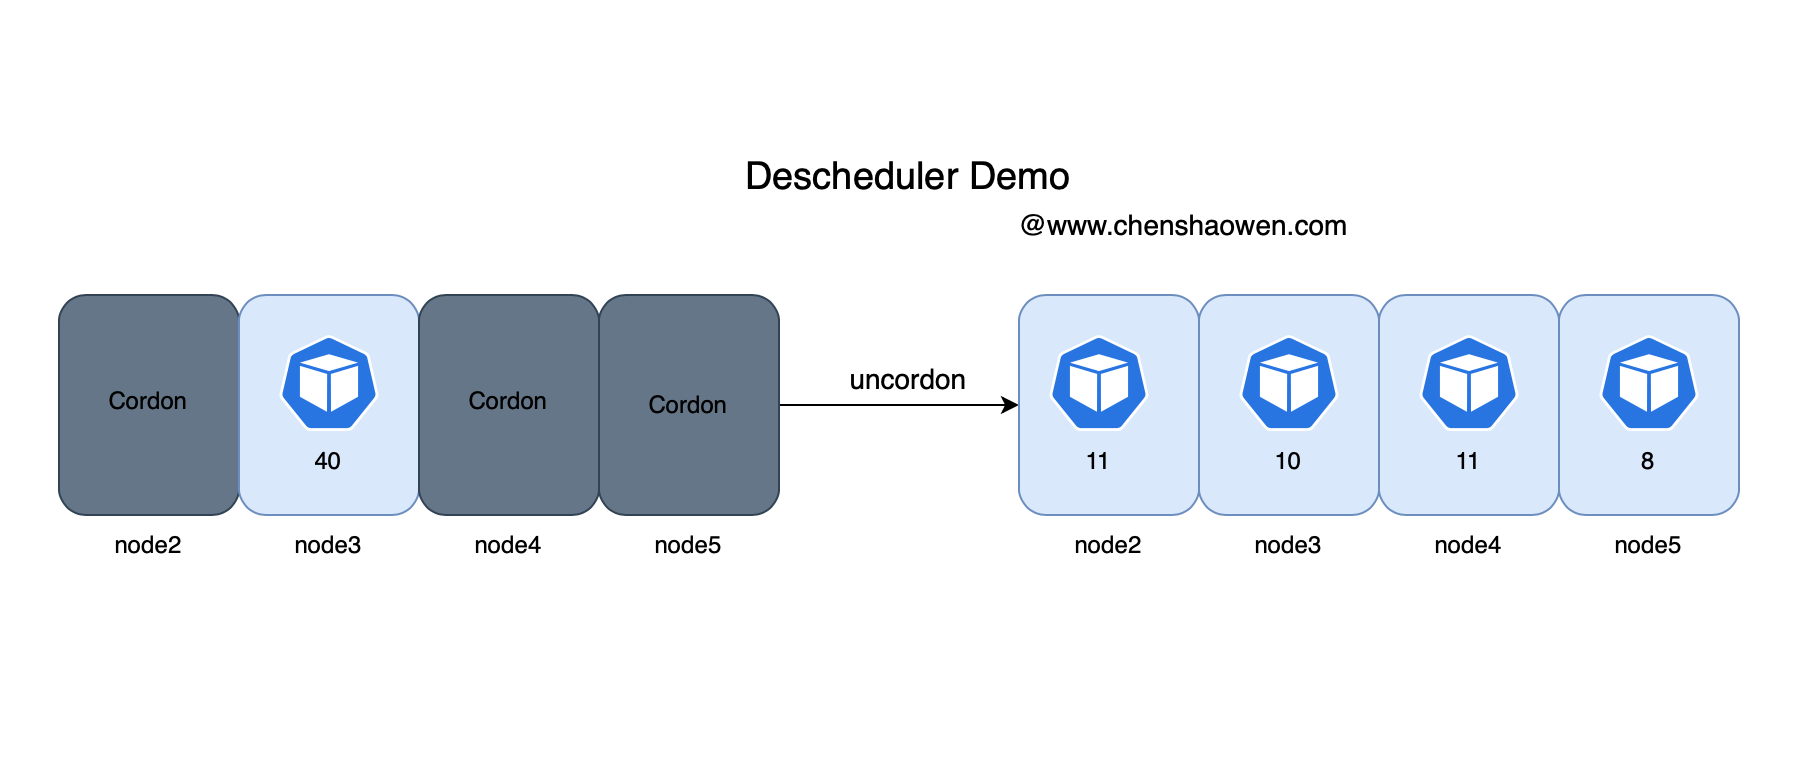
The distribution of Pods across nodes, in a scenario with no affinity or anti-affinity configured.
| Node | Pod count (40 replicas total) |
|---|---|
| node2 | 11 |
| node3 | 10 |
| node4 | 11 |
| node5 | 8 |
The Pod count distribution is very balanced, where node2-4 have the same VM configuration and node5 is lower-spec. The figure below is a diagram of the whole process:
4. descheduler Scheduling Strategies
View the default policy configuration recommended by the official repository:
| |
By default the RemoveDuplicates, RemovePodsViolatingInterPodAntiAffinity, and LowNodeUtilization strategies are enabled. We can configure them according to the needs of the actual scenario.
descheduler currently provides the following scheduling strategies:
- RemoveDuplicates
Evicts multiple Pods on the same node.
- LowNodeUtilization
Finds low-load nodes and evicts Pods from other nodes.
- HighNodeUtilization
Finds high-load nodes and evicts the Pods on them.
- RemovePodsViolatingInterPodAntiAffinity
Evicts Pods that violate Pod anti-affinity.
- RemovePodsViolatingNodeAffinity
Evicts Pods that violate Node anti-affinity.
- RemovePodsViolatingNodeTaints
Pods that violate a NoSchedule taint.
- RemovePodsViolatingTopologySpreadConstraint
Evicts Pods that violate the topology domain.
- RemovePodsHavingTooManyRestarts
Evicts Pods that have restarted too many times.
- PodLifeTime
Evicts Pods that have been running longer than a specified time.
- RemoveFailedPods
Evicts Pods in a failed state.
5. What Shortcomings descheduler Has
- Calculating node load based on Requests does not reflect the real situation
In the source code at https://github.com/kubernetes-sigs/descheduler/blob/028f205e8ccc49440bd52940eb78a737f8f5b824/pkg/descheduler/node/node.go#L253, you can see that descheduler calculates utilization by summing the Request values of the Pods on a Node.
This approach may not be very suitable for real scenarios. It would be more meaningful to use the data directly from metrics-server or Prometheus, because in many cases the Request and Limit settings are inaccurate. Sometimes, to save cost and increase deployment density, the Request is even set to 50m, or even 10m.
- Evicting Pods causes application instability
descheduler calculates a series of Pods that meet the criteria through the policy and evicts them. On the good side, descheduler does not evict Pods without a replica controller, does not evict Pods with local storage, and so on, ensuring that eviction does not cause application failure. But when using client.PolicyV1beta1().Evictions to evict a Pod, it deletes the Pod first and then restarts it, rather than doing a rolling update.
For a brief period, there may be no ready Pod on the cluster, or a new Pod may fail to start due to a fault, and the service will then report errors. There are many detailed parameters that need to be tuned.
- It depends on Kubernetes’ scheduling strategy
descheduler does not implement a scheduler itself, but depends on the Kubernetes scheduler. This also means that all descheduler can do is evict Pods and let them go through the scheduling process again. If the number of nodes is very small, descheduler may evict Pods frequently.
6. What Scenarios descheduler Is Suitable For
descheduler’s perspective is about dynamics, which includes two aspects: Node and Pod. The dynamic aspect of Node means when a Node’s labels, taints, configuration, count, etc. change. The dynamic aspect of Pod means the distribution of Pods across Nodes, and so on.
Based on these dynamic characteristics, the following suitable scenarios can be summarized:
- A new node is added
- After a node restarts
- After modifying a node’s topology domain or taints, you want existing Pods to also satisfy the topology domain or taints
- Pods are not evenly distributed across different nodes
