1. Jenkins Working Modes
Jenkins has a single-Master, multi-Slave architecture. The Master assigns tasks and manages services. Slaves execute the actual tasks.
Even when multiple Masters are deployed, they remain independent of one another and cannot coordinate scheduling. A high-availability Jenkins solution requires an external task distribution framework, such as gearman, to coordinate scheduling across the Masters.
Install the gearman plugin on every Master node and connect it to the gearman server. Only under the unified distribution of the gearman server can the Masters form a high-availability Jenkins application.
So how do the Master and Slaves communicate? There are mainly two ways: ssh and jnlp.
- ssh mode
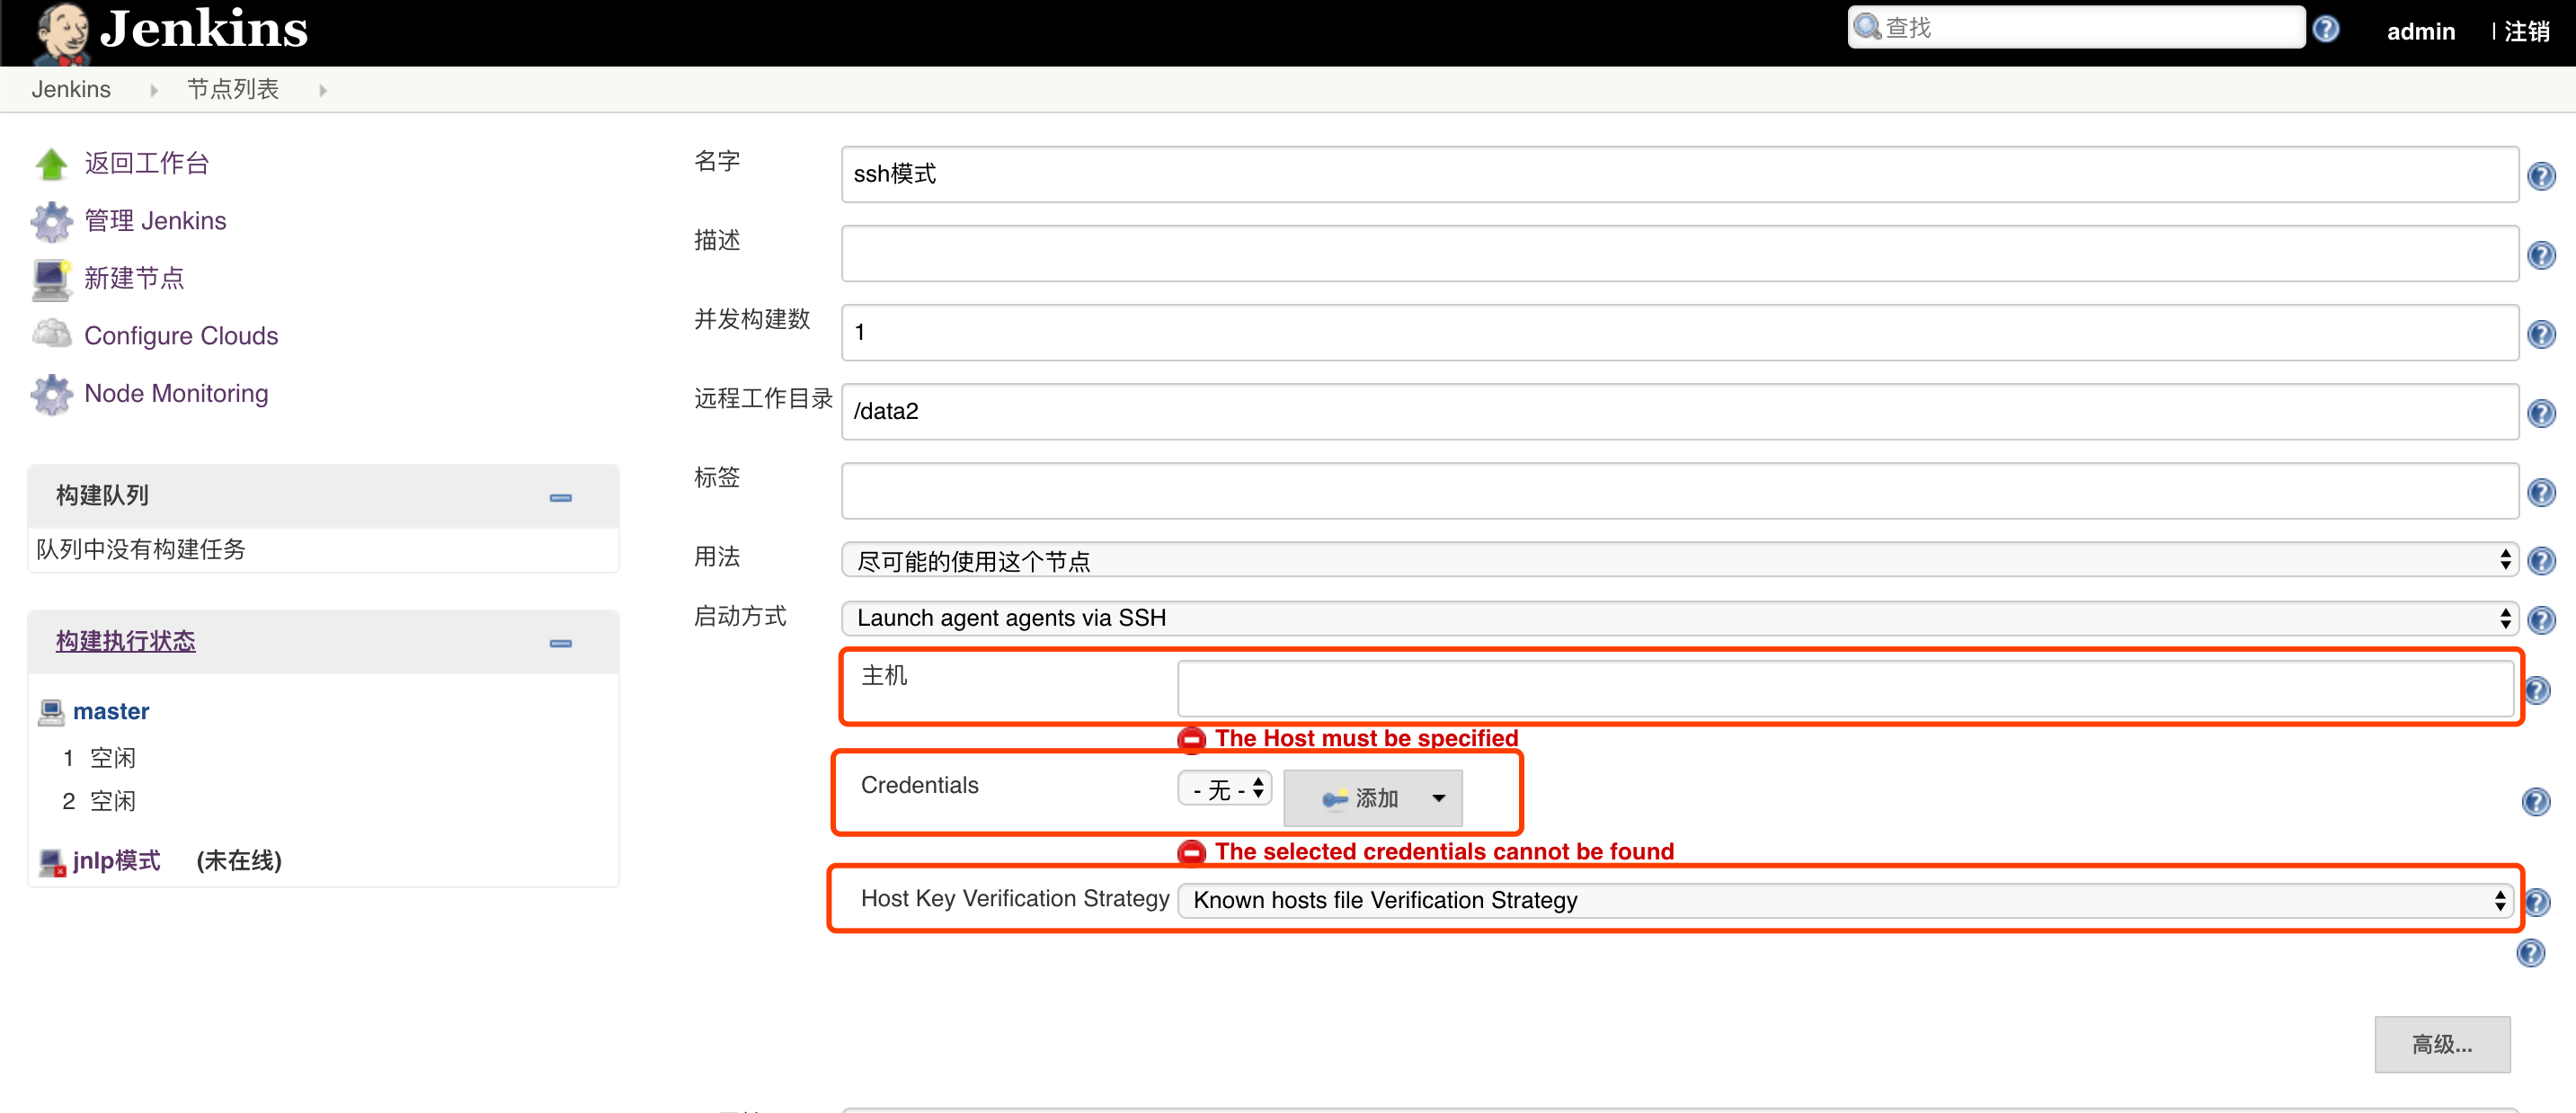
Configure the Master’s SSH public key on all the Slaves. When a task is scheduled, the Master uses an ssh client for remote communication and starts an Agent to run the task.
On the [Manage Jenkins] -> [Manage Nodes] -> [New Node] page, choose [Launch agent agents via SSH] as the launch method, fill in the host information, and save.
- jnlp mode
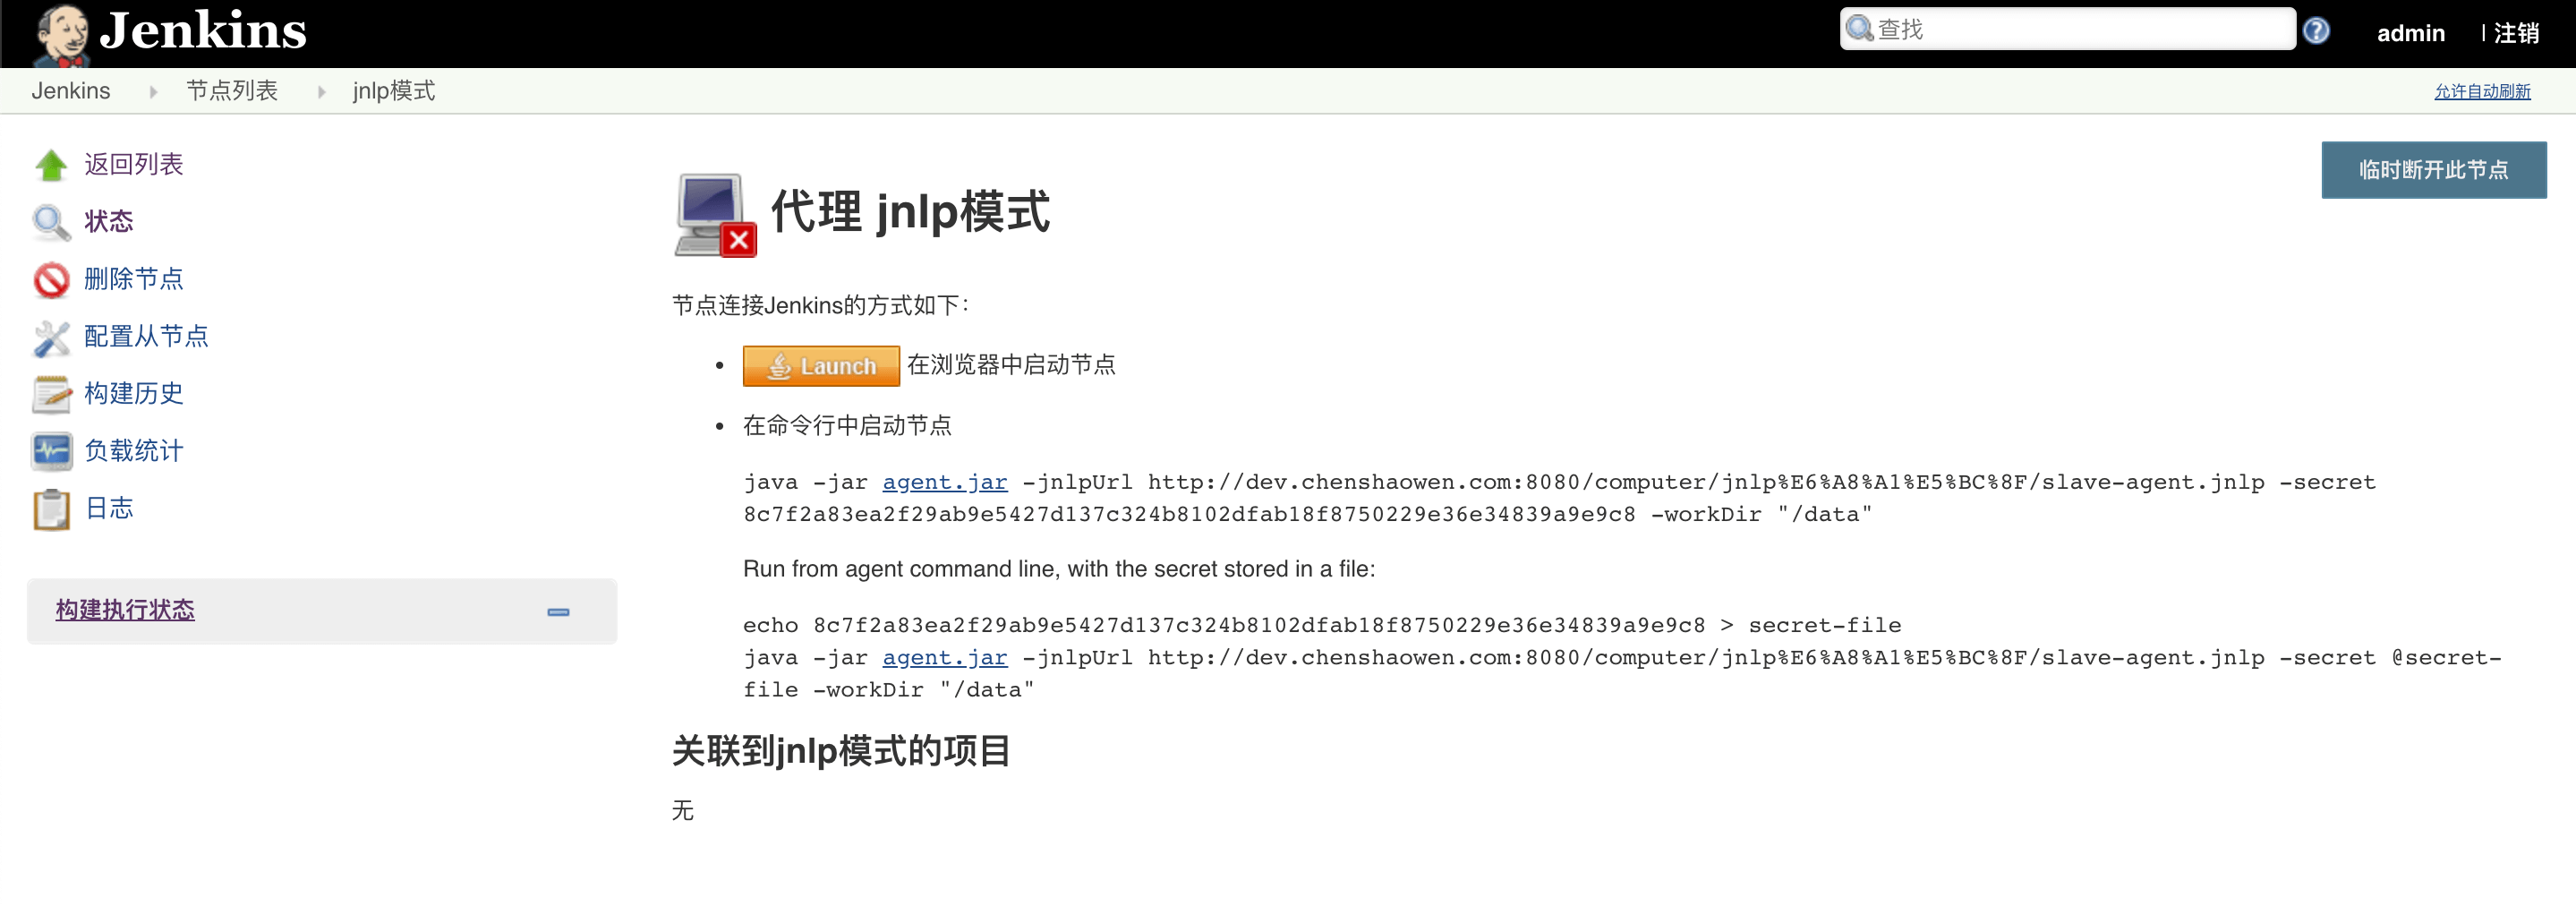
A jnlp daemon process must reside permanently on the Slave, communicating with the Master over HTTP. Each jnlp needs its own dedicated secret.
On the [Manage Jenkins] -> [Manage Nodes] -> [New Node] page, choose [Launch agent via Java Web Start] as the launch method. After saving, click to view the agent and you will see the command to start the node:
| |
2. Installing Kubernetes and Jenkins
Installation is not the main topic of this post; the relevant documents or scripts are provided here mainly to keep the content coherent.
2.1 Kubernetes
Two installation methods are provided:
- KubeSpray
KubeSpray actually uses Kubeadm for installation as well, but it provides integrations for various related components.
- Kubeadm
Reference document: Using Kubeadm to Install a Kubernetes Cluster
2.2 Jenkins
Jenkins very kindly provides a complete war package, and there are three ways to deploy Jenkins.
- Run the war package directly in a Java environment
- Run it with Docker Compose
- Deploy Jenkins in Kubernetes using a yaml file or a helm chart
Here, I run Jenkins with Docker Compose. The other methods are similar; just remember to expose the relevant access ports.
3. Dynamically Creating a Slave on Kubernetes
3.1 Creating a ServiceAccount
To give Jenkins permission to access the Kubernetes cluster, we need to create a ServiceAccount here.
On a Kubernetes cluster host, create the file jenkins-rbac.yml. To skip the namespace creation step, the namespace here uses default.
| |
Create the ServiceAccount
| |
Get the access token
| |
Ignore default-token-xxx and get the token value from jenkins-token-xxx:
Name:         jenkins-token-6vn2v
Namespace:    default
Labels:       <none>
Annotations:  kubernetes.io/service-account.name: jenkins
              kubernetes.io/service-account.uid: e1c181ae-ac1a-4ca8-b696-c06087b8c87c

Type:  kubernetes.io/service-account-token

Data
====
token:[这里的值,需要配置在 Jenkins 中]
ca.crt:     1025 bytes
namespace:  7 bytes
3.2 Installing the Kubernetes Plugin
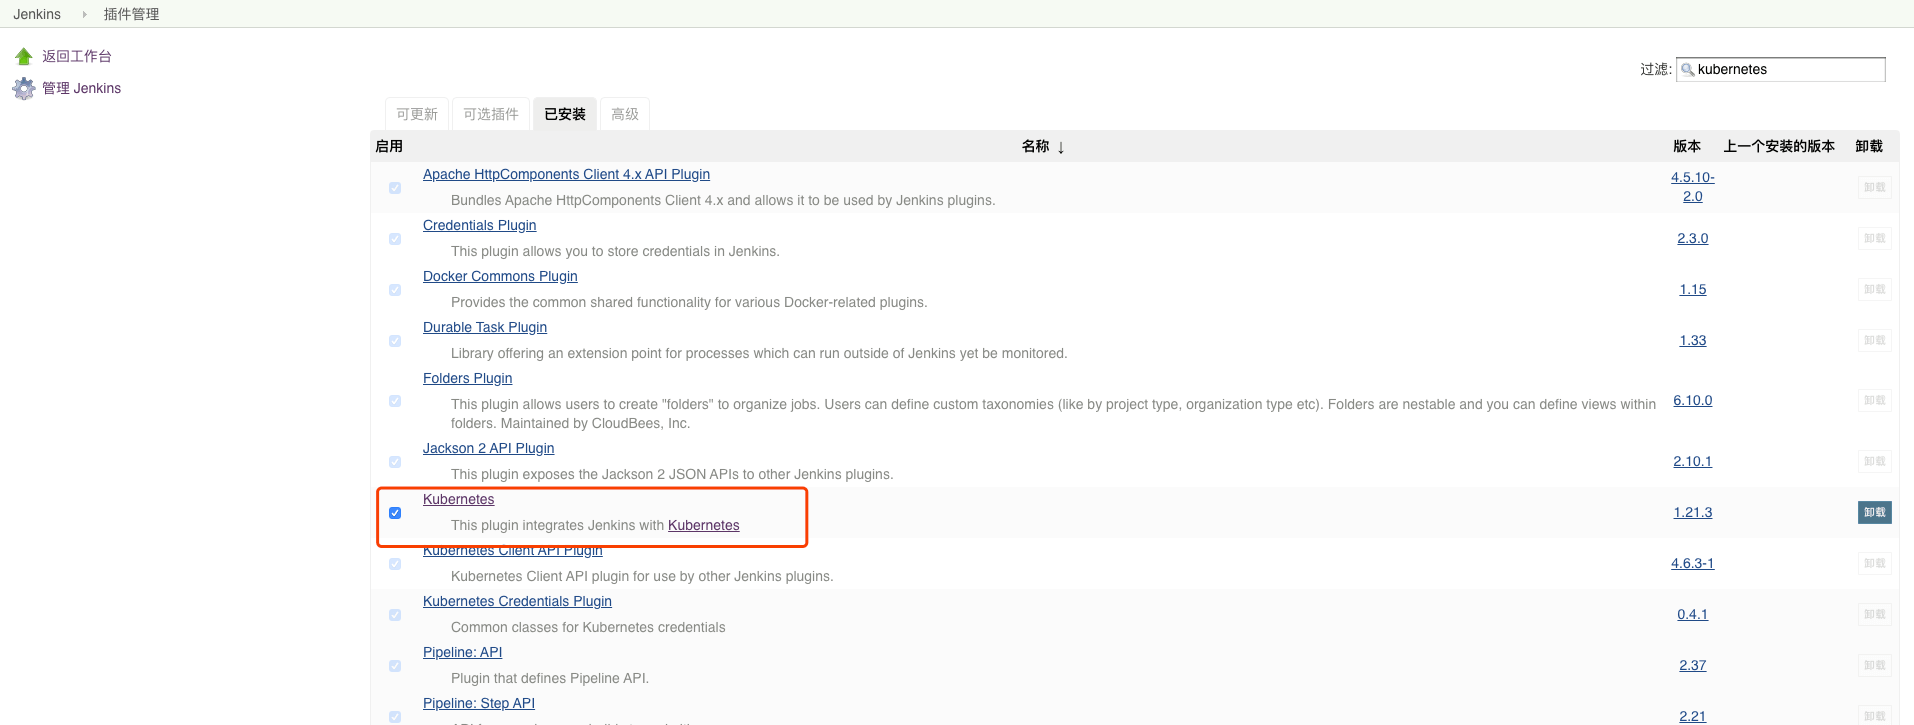
In [Manage Jenkins] -> [Manage Plugins] -> [Available], search for Kubernetes, find the Kubernetes plugin, install it, and restart Jenkins.
In the screenshot below the plugin is already installed; if it is pending installation, select the [Available] tab.
3.3 Plugin Configuration
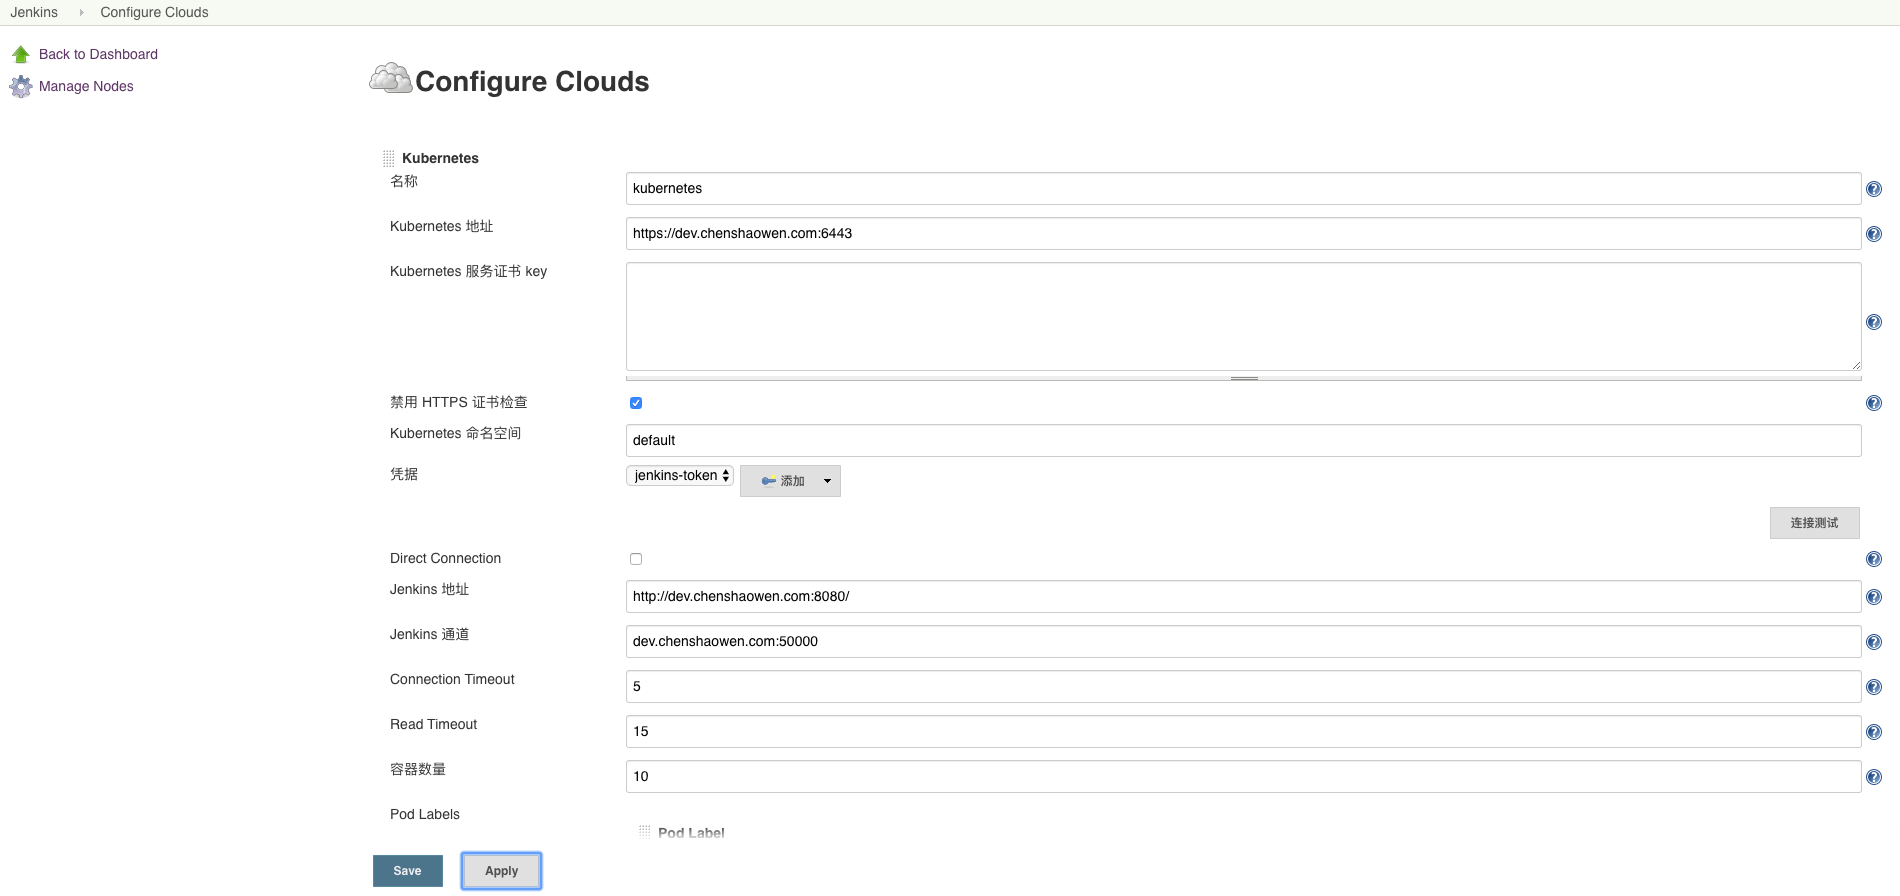
In [Manage Jenkins] -> [Configure System], scroll to the bottom of the page, find cloud, and add a new cloud.
The Kubernetes address is the Apiserver address; the Jenkins address is the URL used to access the Jenkins page; the Jenkins channel is the address over which jnlp communicates with Jenkins, by default the Master’s port 50000.
In [Credentials], add a credential of type Secret text and fill in the token value obtained above.
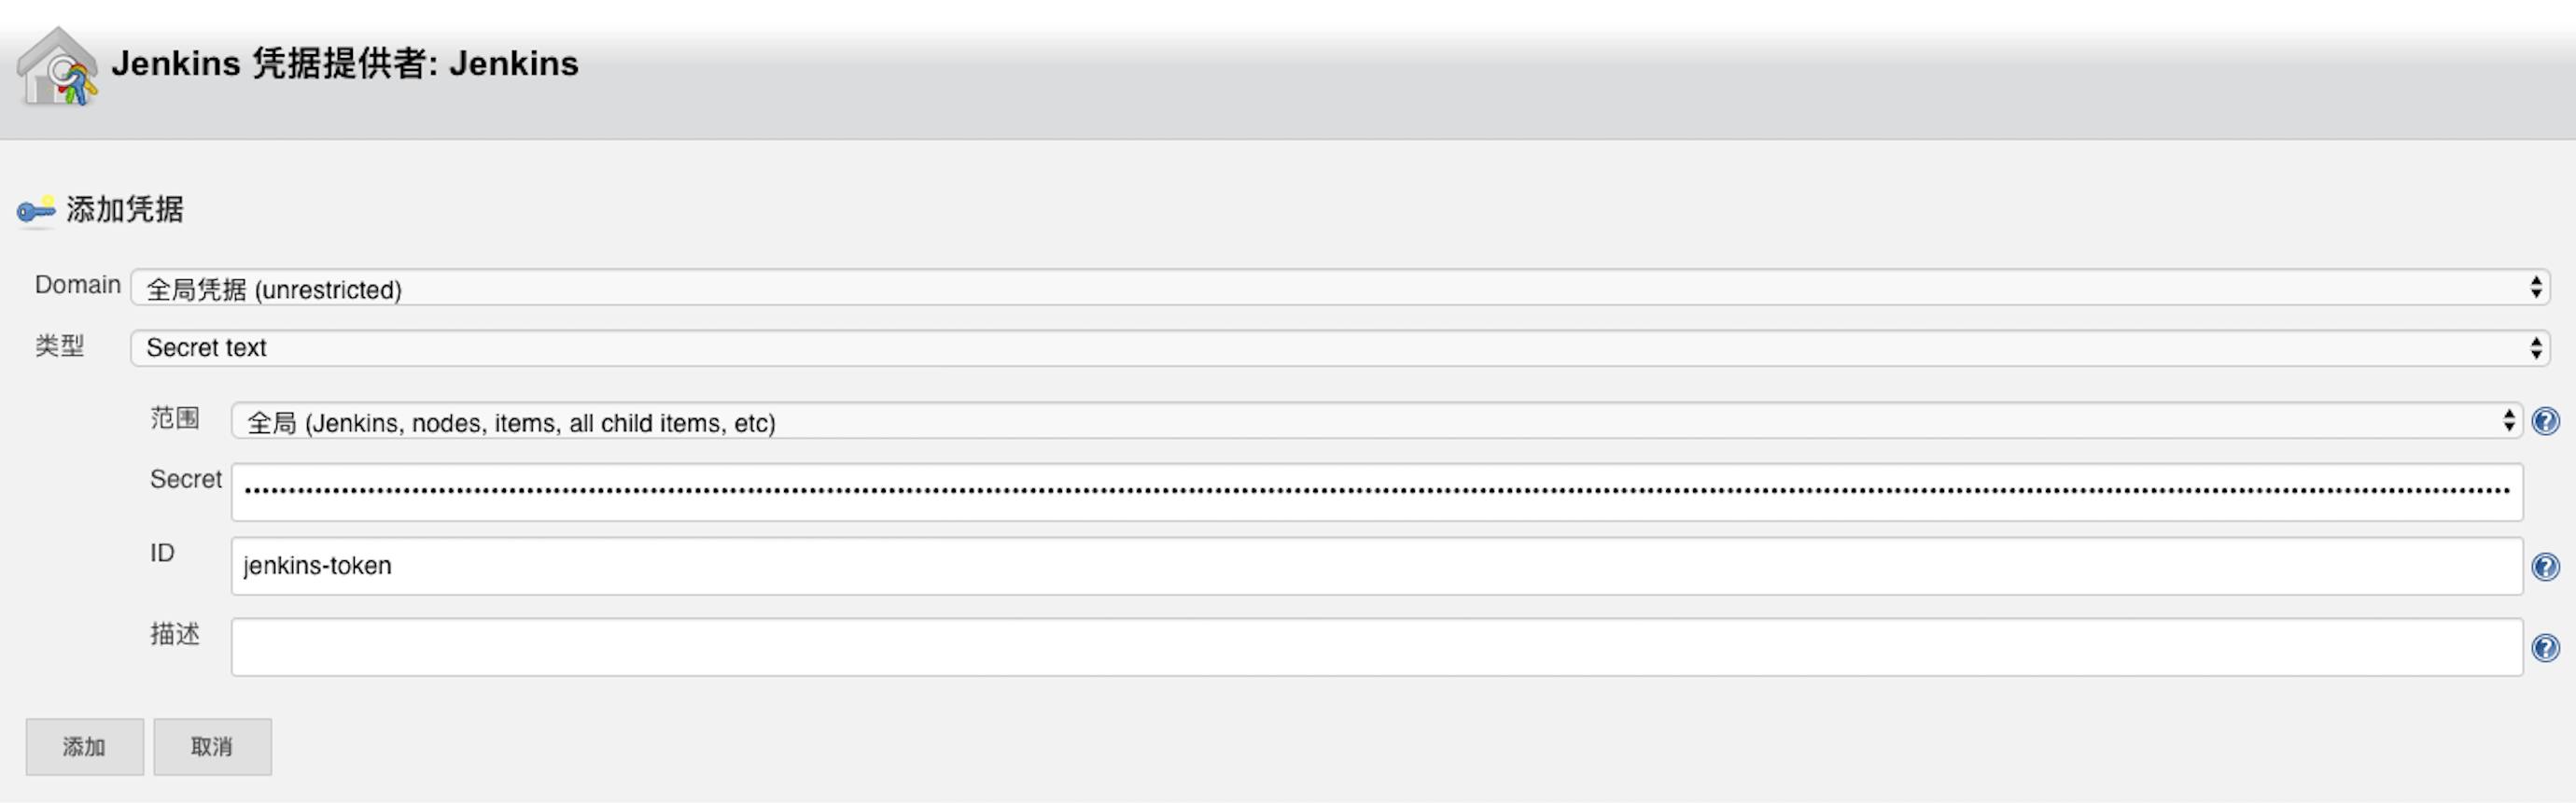
After selecting the [jenkins-token] credential, click [Test Connection]; a “Connection test successful” message means the configuration succeeded. The final configuration parameters are shown below:
3.4 Creating a Job
Create a Pipeline job, paste the following script into the pipeline editor, and save and run it.
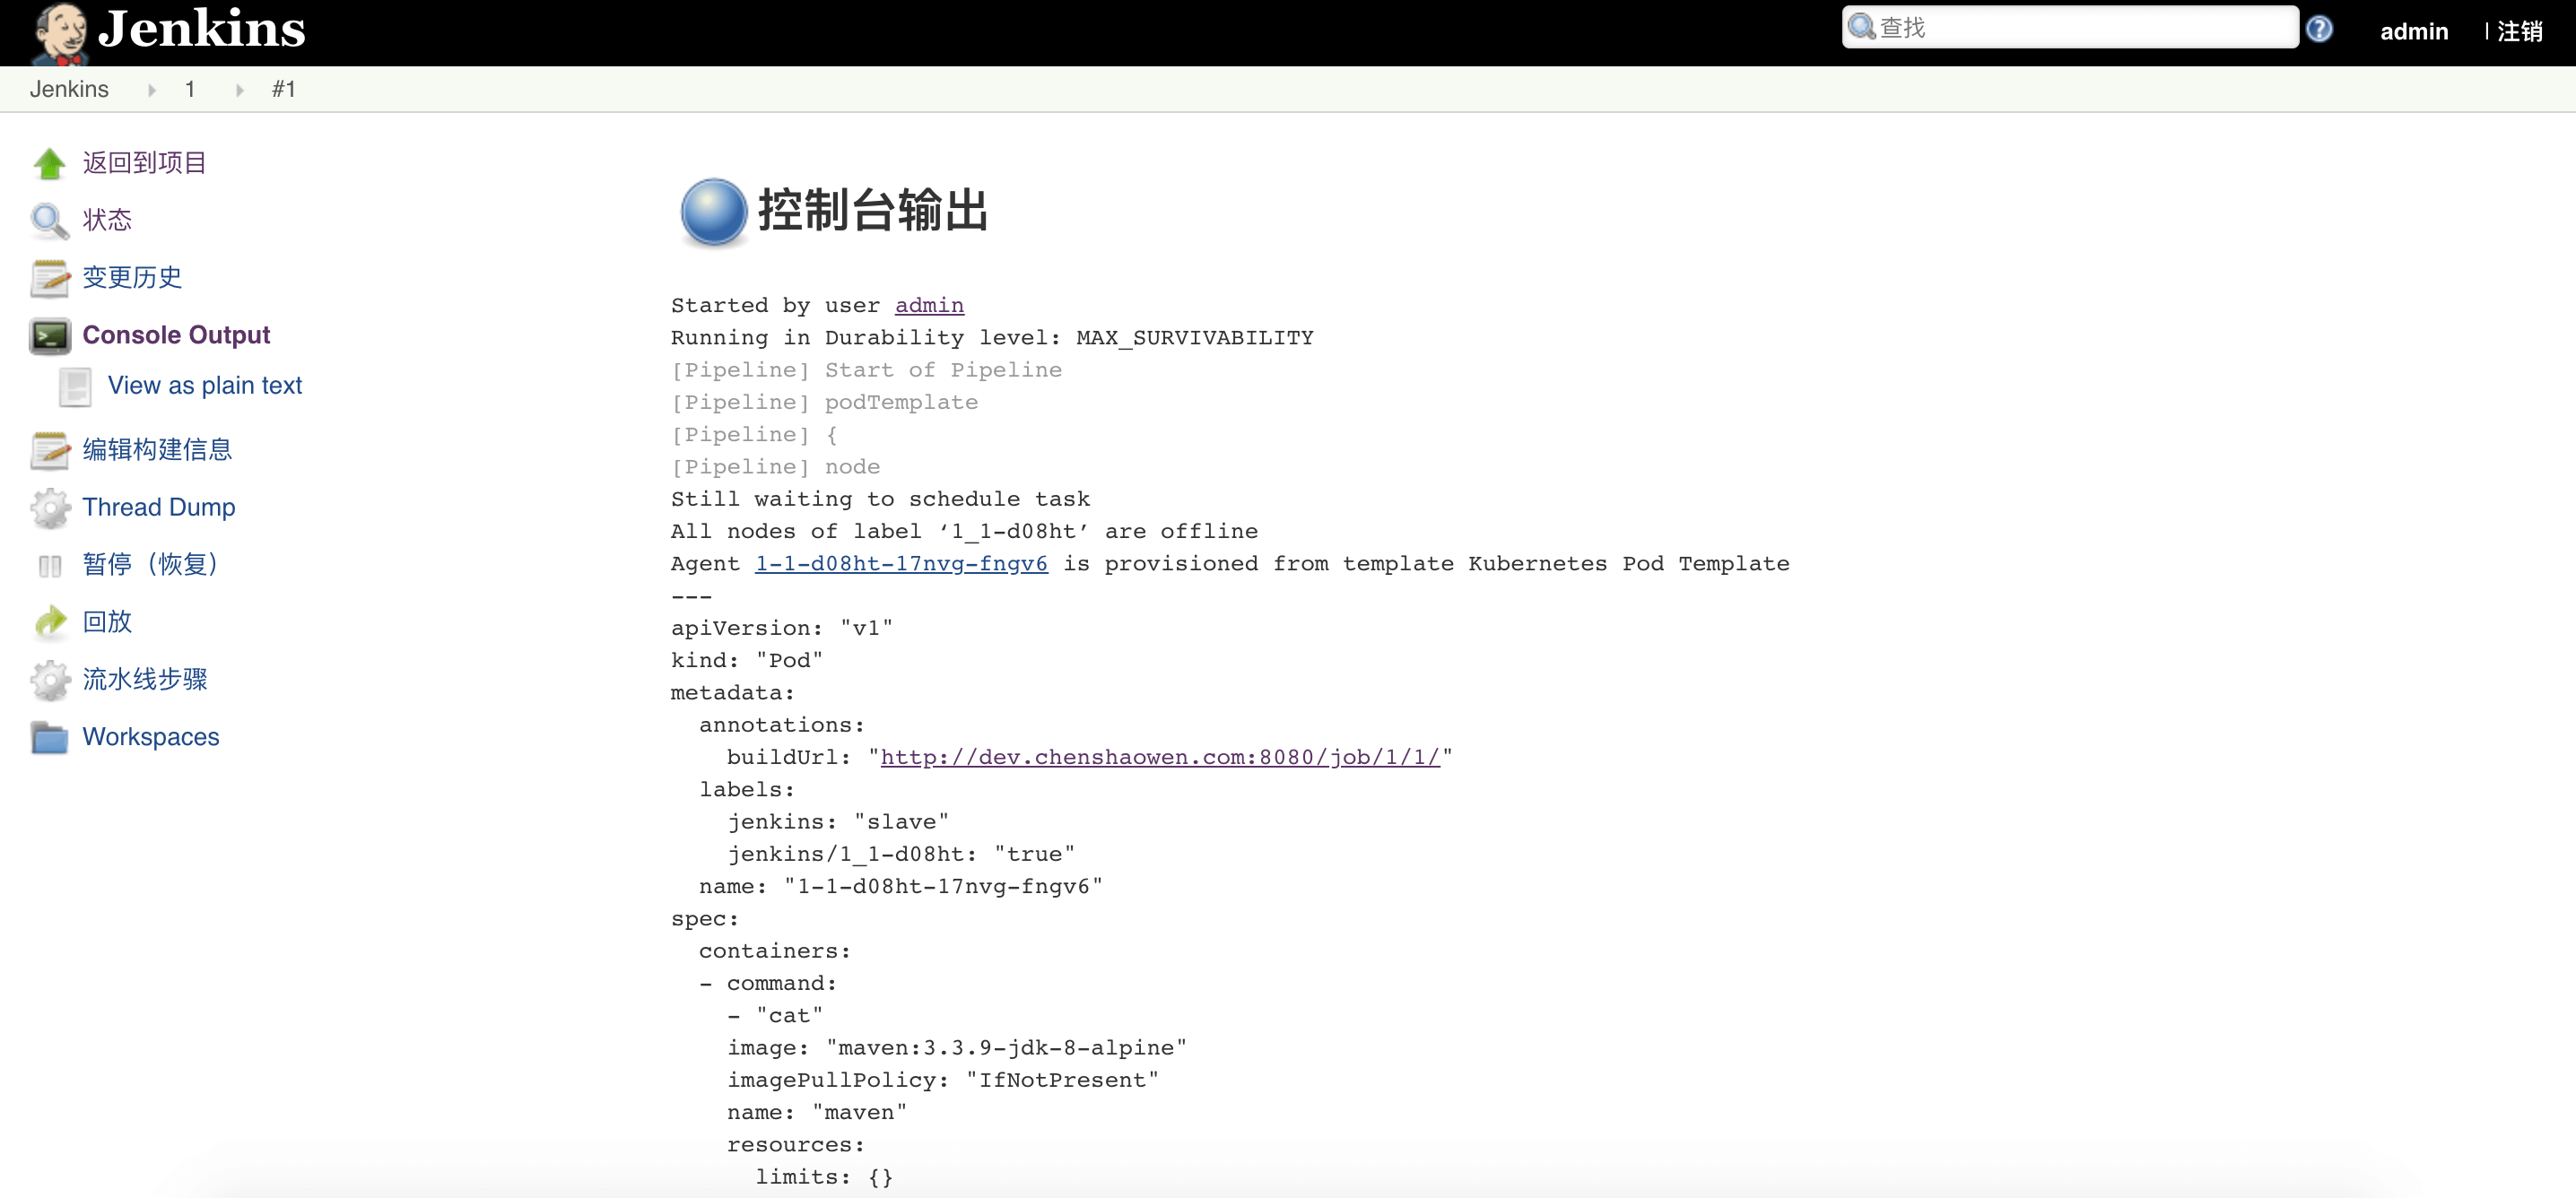
- Build using the podTemplate syntax
| |
Execution log:
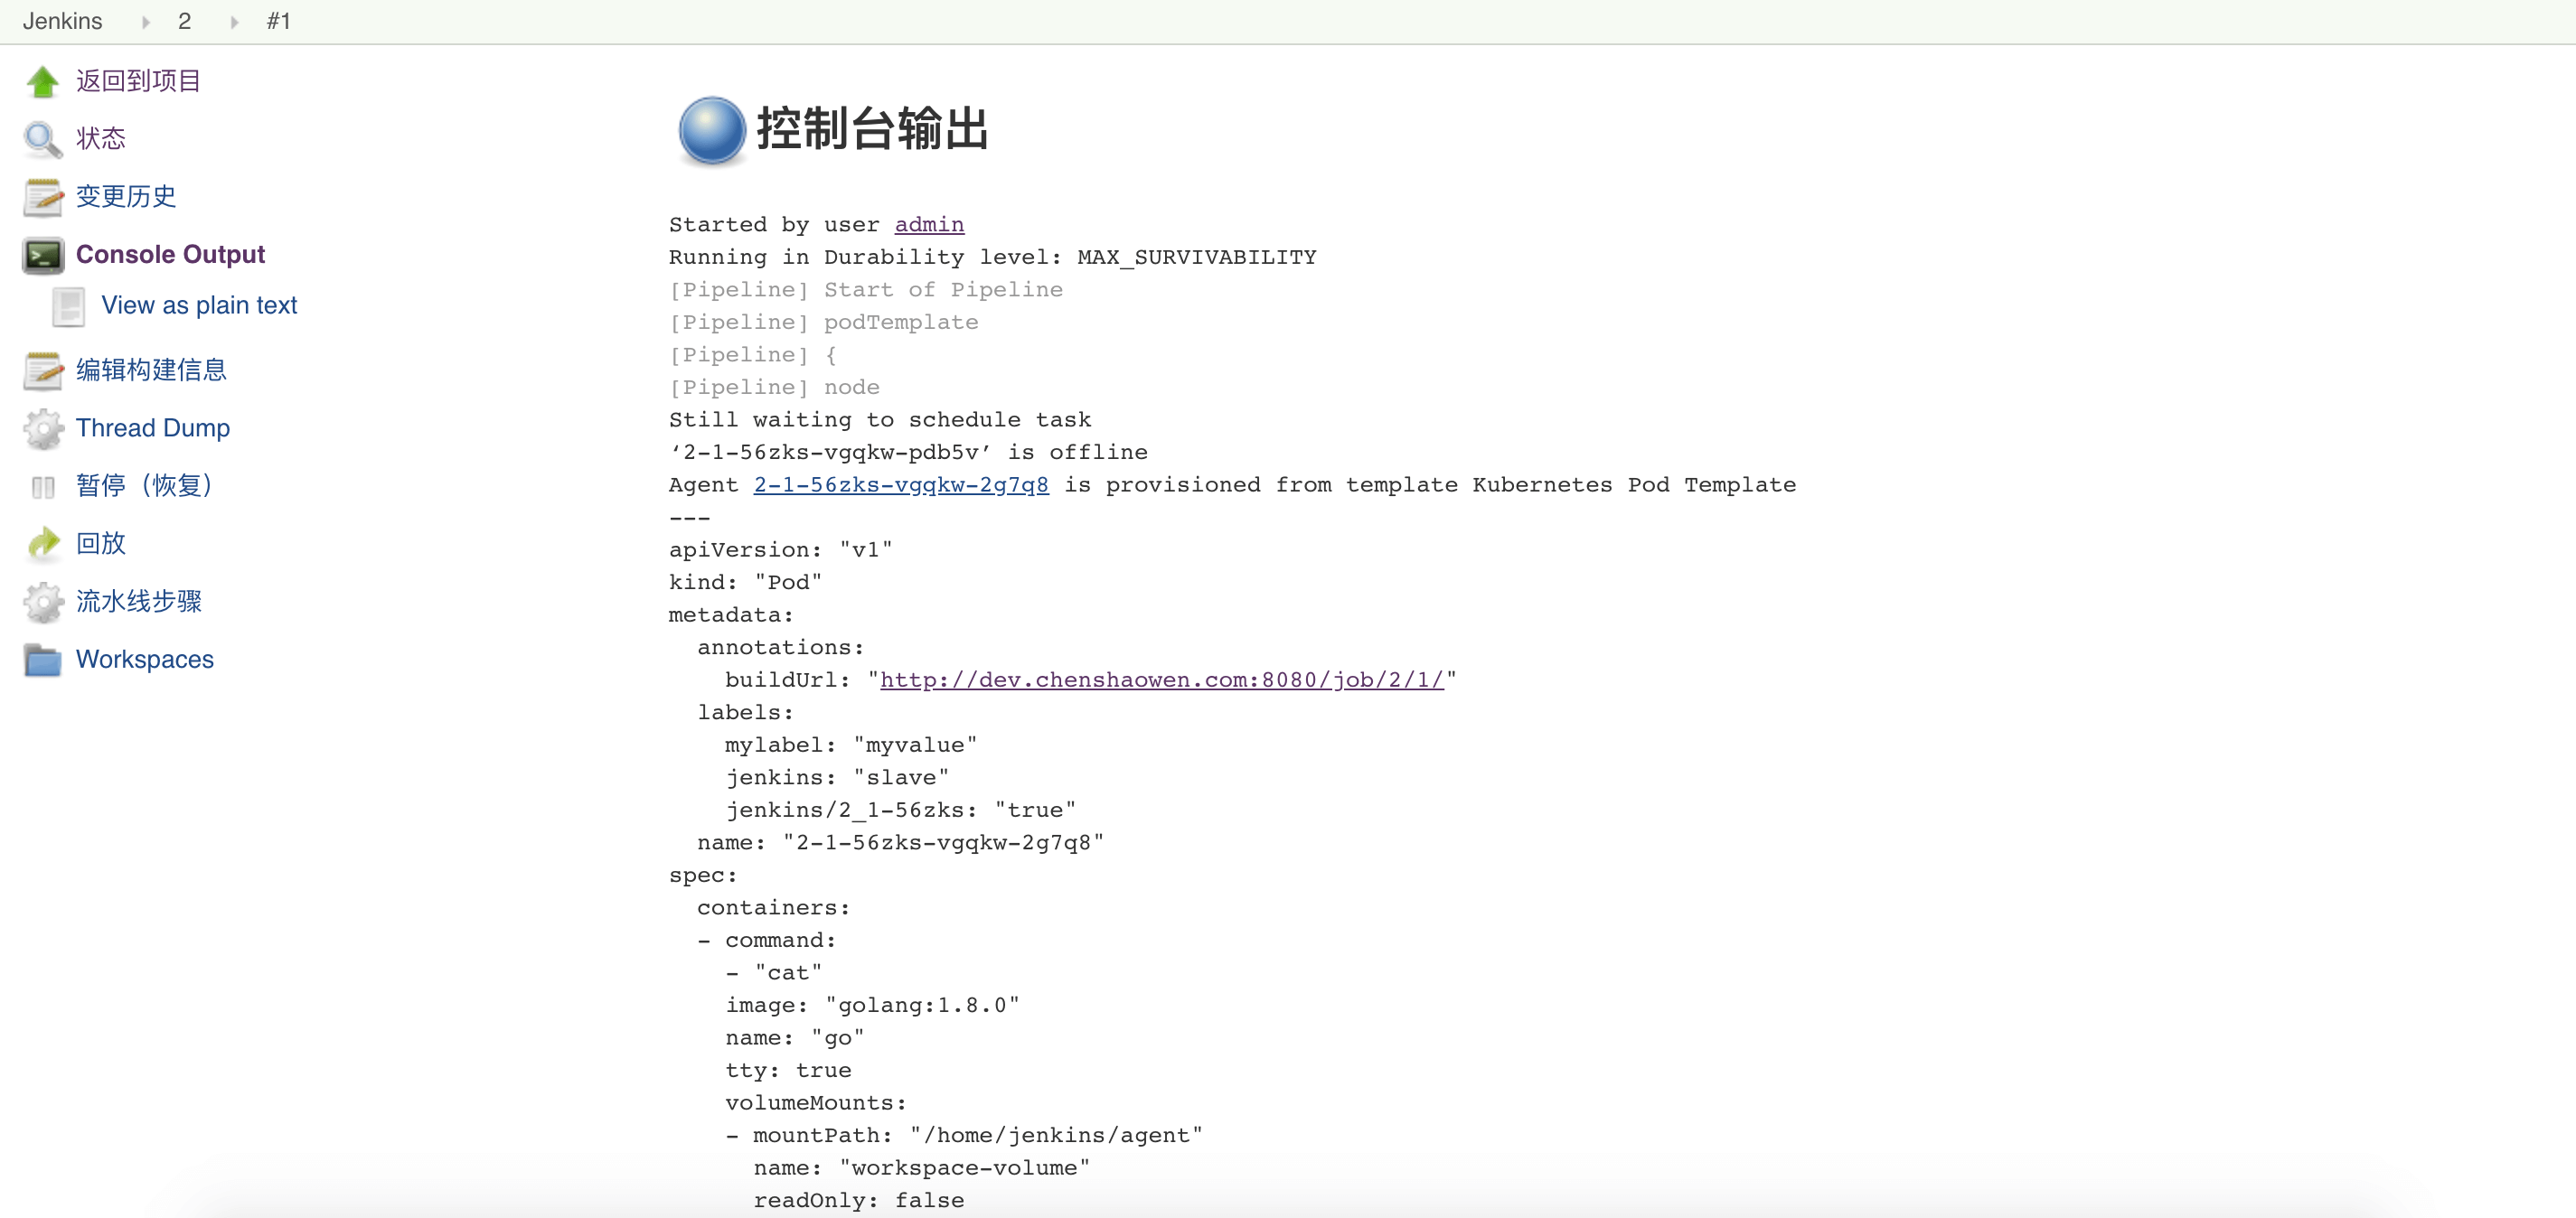
- Use the declarative syntax and provide the YAML content directly. You can also provide a file path pointing to a YAML file.
| |
Execution log:
4. Creating Slaves from a Template
The podTemplate provided by the Kubernetes Plugin is very flexible and can supply Jenkins with all kinds of worker nodes.
However, if every pipeline has to configure a template this way, it becomes tedious instead. The Kubernetes Plugin provides a built-in podTemplate, which can be used directly for Pod creation when the agent label configured in the pipeline matches it.
4.1 Configuring a PodTemplate
In [Manage Jenkins] -> [Configure System], scroll to the bottom of the page, find Pod Template, add a template, and fill in the relevant information.
Pay special attention to the label list value here. In a pipeline, you can select the current Pod Template through the label list.
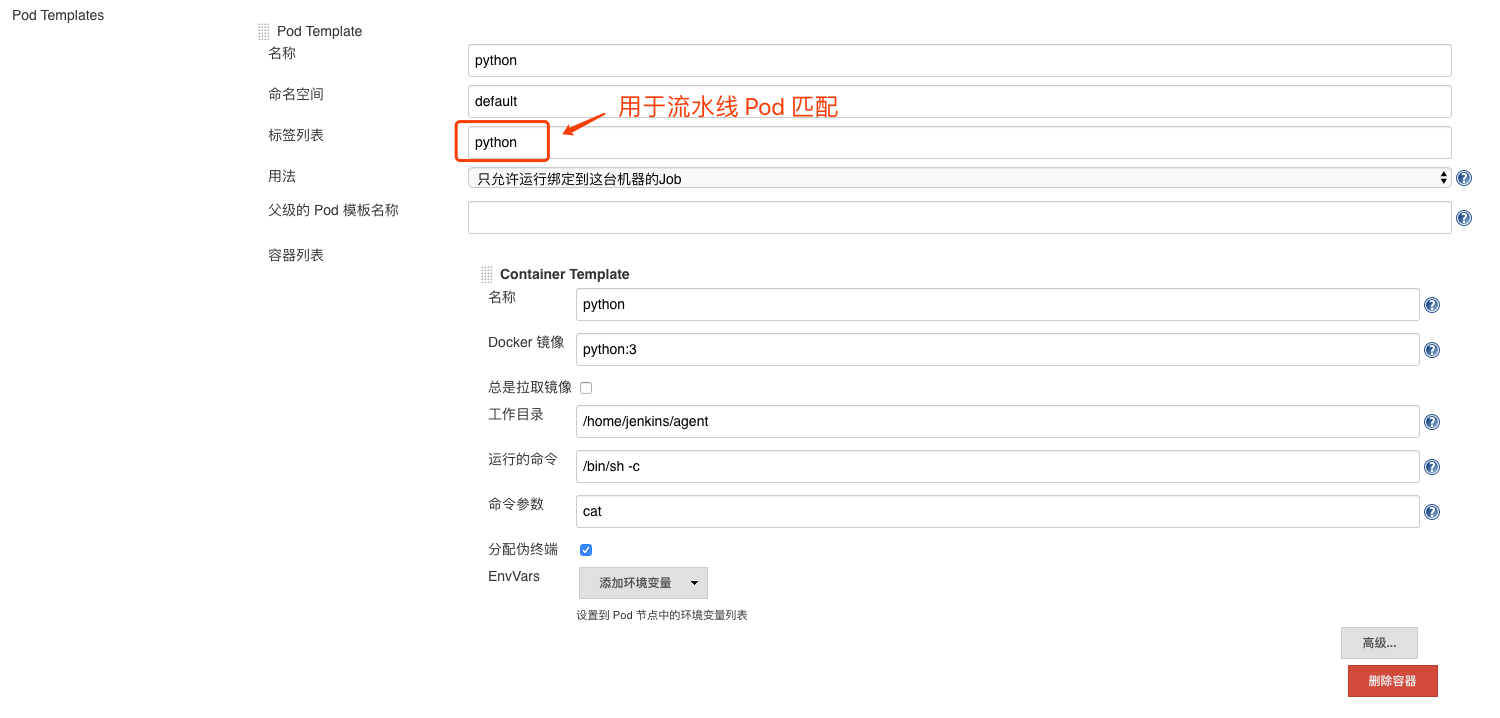
As shown above, if only the Python container is added, the pipeline will keep waiting for scheduling when it runs.
Started by user admin
Running in Durability level: MAX_SURVIVABILITY
[Pipeline] Start of Pipeline
[Pipeline] node
Still waiting to schedule task
‘test-nqppr’ is offline
Looking at Jenkins’ system global log, you can see:
Failed to send back a reply to the request hudson.remoting.Request$2@693aae9b: hudson.remoting.ChannelClosedException: Channel "hudson.remoting.Channel@376b1008:JNLP4-connect connection from 172.17.0.1/172.17.0.1:56788": channel is already closed
This means there is no jnlp in the Pod to communicate with. Therefore, besides the runtime container, you also need to add a container named jnlp to communicate with Jenkins. As shown below:
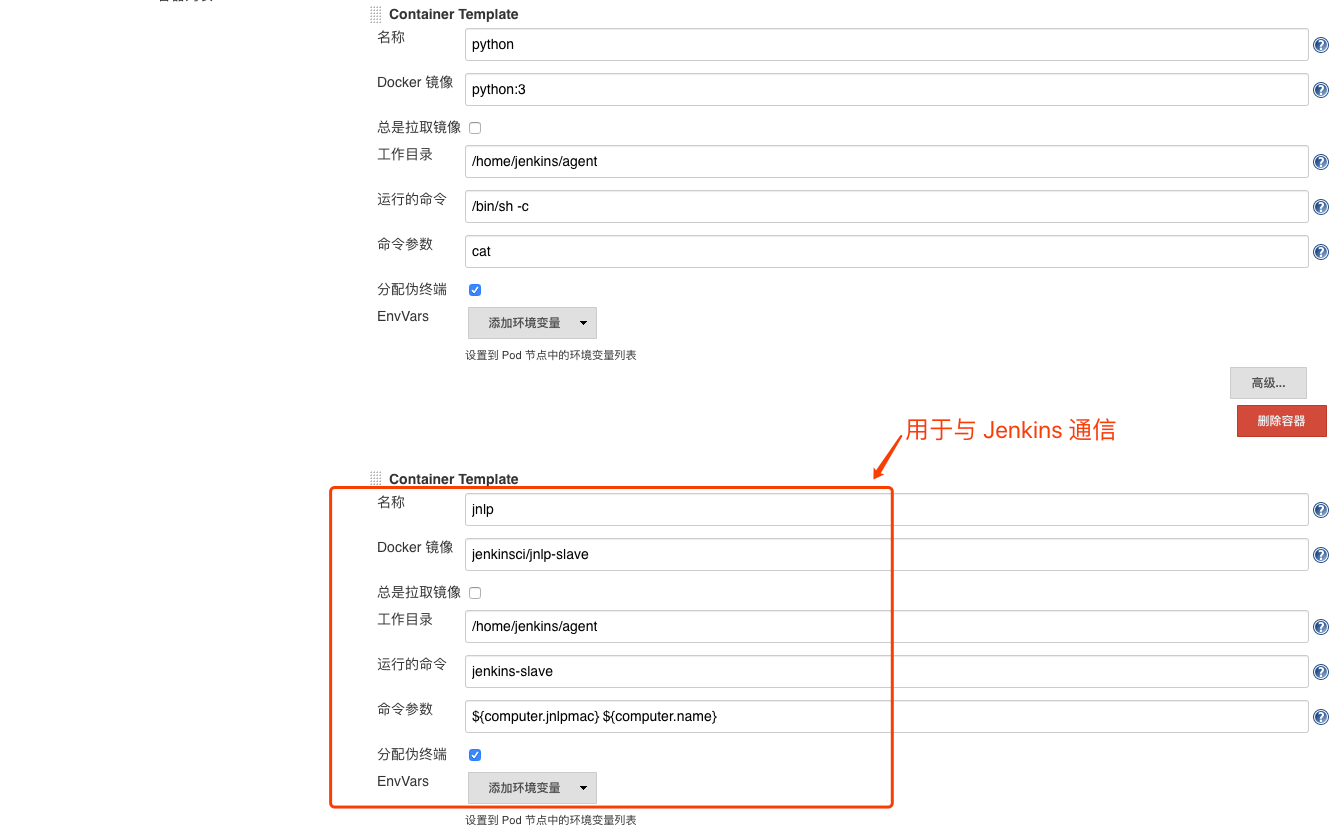
The end result is one Pod template containing one or more specified runtime containers plus a jnlp container.
If the jnlp container is not filled in, a jnlp container is created automatically, but sometimes it reports an error and cannot connect (possibly a Jenkins bug), so it is recommended to explicitly specify a jnlp container. At the same time, jnlp is the default container, that is, any run environment not wrapped in container is jnlp. As a convenience, another approach is to customize jnlp.
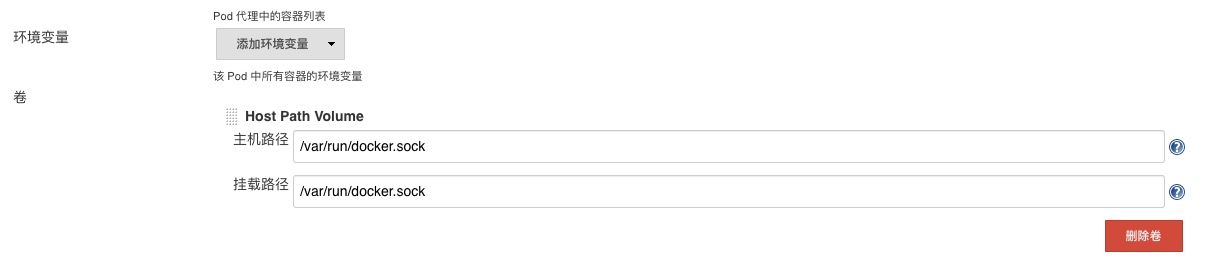
[Optional] If you need the containers in the Pod to share the Docker on the host, that is docker in docker, you can add a [Host Path Volume] under [Volumes] and mount the host’s /var/run/docker.sock to the container’s /var/run/docker.sock, as shown below.
4.2 Creating a Template Job
- Create a Pipeline job
| |
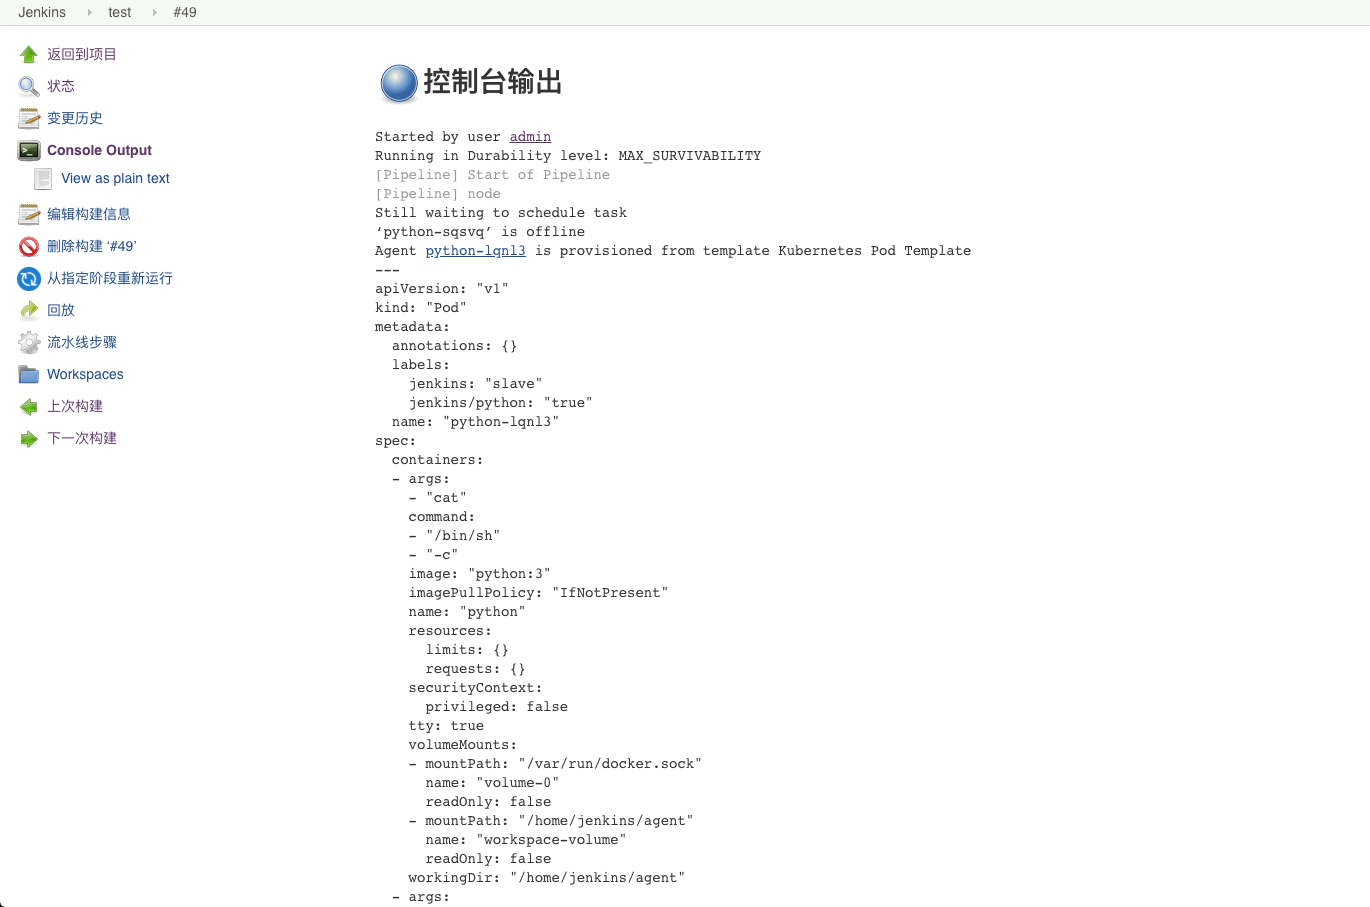
Execution log:
- Create a Freestyle project
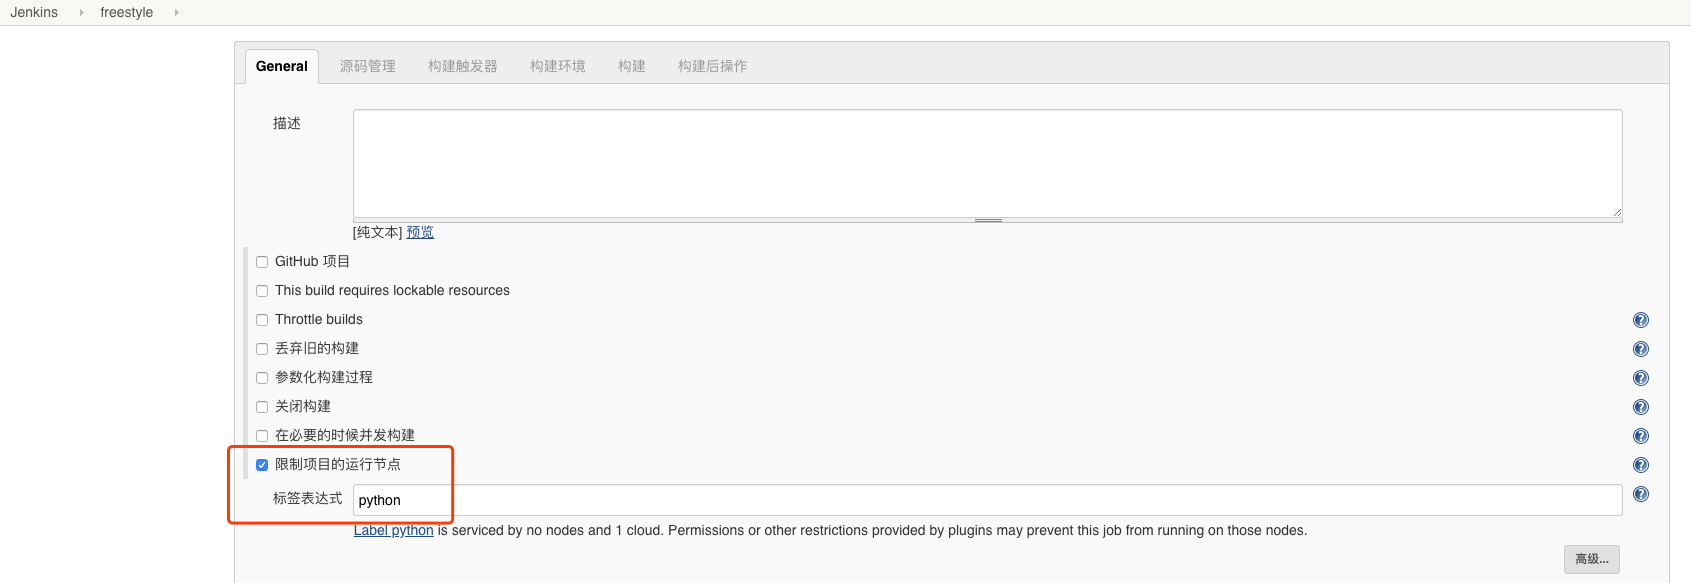
Under Build, select [Execute shell] and fill in the following:
| |
Execution log:
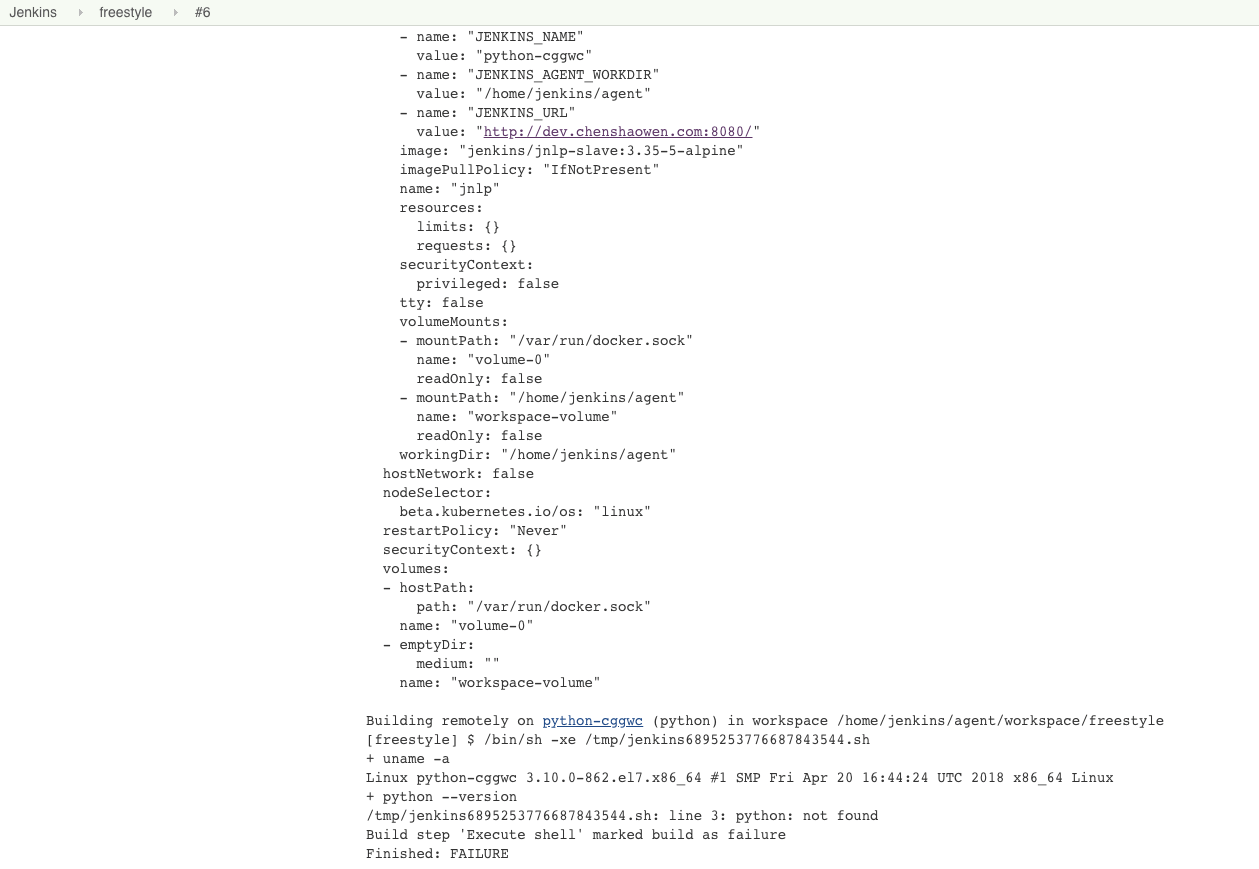
You can see that python --version failed. This is because the default container is jnlp, and the jenkins/jnlp-slave:3.35-5-alpine image does not bundle python. This also means that only the commands provided by jnlp can be run here.
