1. Basic Concepts
- GitLab-CI: the continuous integration system provided by GitLab. It manages the build status of a project and runs build tasks through GitLab Runner.
- GitLab-Runner: used to execute build tasks. The
scriptportion of.gitlab-ci.ymlis run by GitLab-Runner. - .gitlab-ci.yml: a file in the root directory of a git project that records a series of stages and execution rules. After a
git push, GitLab-CI parses it and, based on its contents, calls GitLab-Runner to execute it. - Pipeline: one Pipeline is equivalent to one build task, and it can contain multiple flows, such as installing dependencies, running tests, compiling, deploying to a test server, deploying to a production server, and so on.
- Stages: build stages. Multiple Stages can be defined in one Pipeline. All Stages run in order, and if any Stage fails, the later Stages will not execute.
- Jobs: build tasks, the tasks executed within each Stage. A Stage can have multiple Jobs, and all Jobs run in parallel.
2. Installing GitLab-Runner
Using Ubuntu as an example:
| |
3. Registering a Runner
A Runner must be registered with GitLab before a project can use it. One gitlab-ci-multi-runner service can register multiple Runners.
| |
At this point you need to enter a series of parameters for the Runner.
| |
View the status of the Runner
| |
At this point, the GitLab project still cannot use the newly created Runner.
On the [admin area] page, under [Overview] - [Runners]
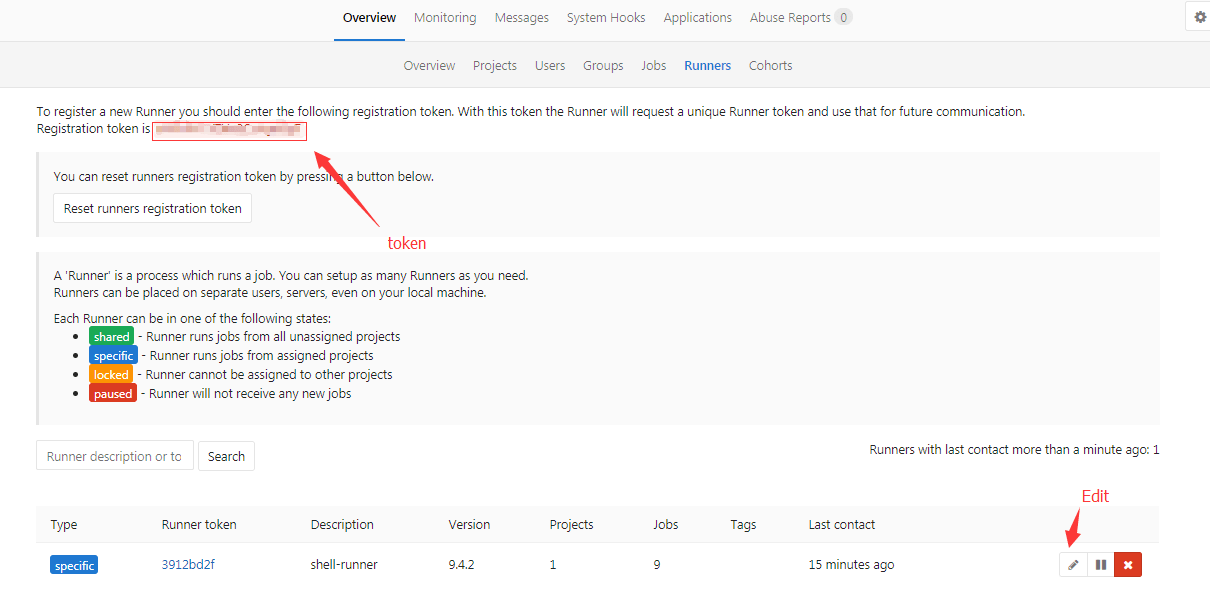
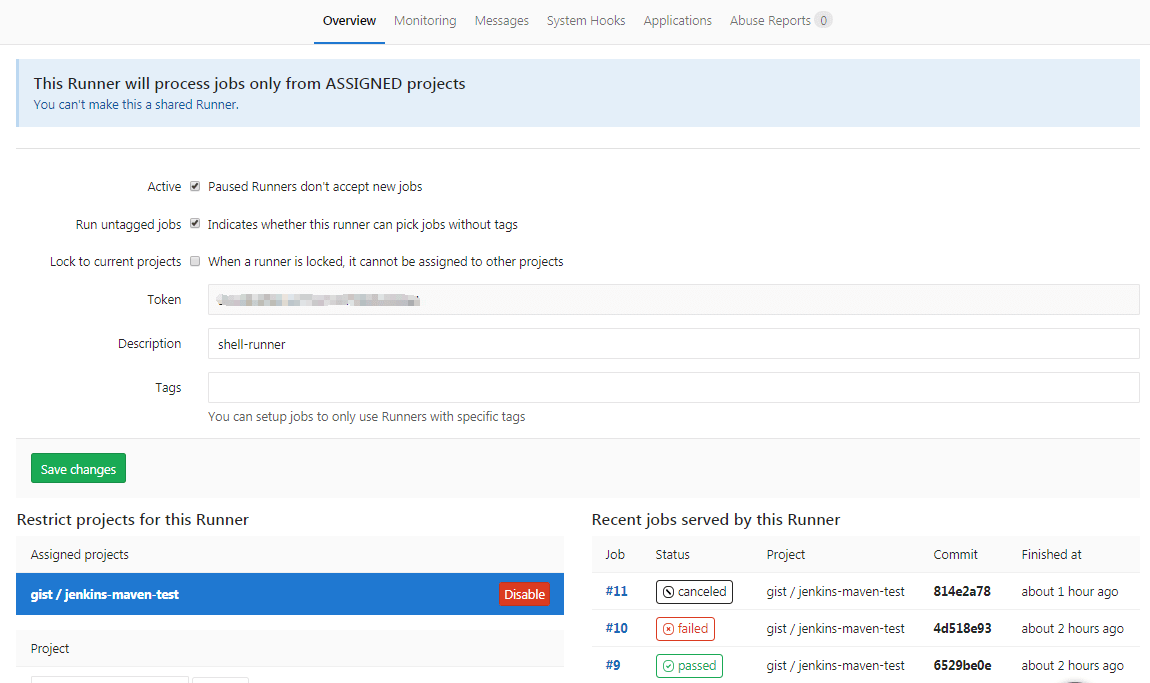
Click edit and authorize the newly created Runner [enable] for use by the project.
4. .gitlab-ci.yml
The project’s file structure:
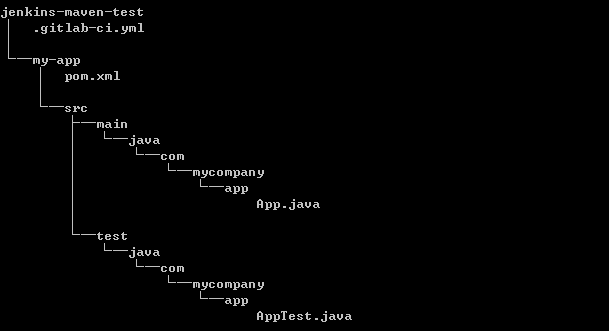
In the top-level directory of the project, create a new .gitlab-ci.yml file, the filename specified by GitLab-CI. Its contents are as follows:
.gitlab-ci.yml
| |
It is essentially two commands:
- The
cdcommand, which enters the directory containing pom.xml - The
mvncommand, which packages the project.
The .gitlab-ci.yml file stores the build process and uses the YAML format. The syntax rules are in the reference links at the end of the article. The build keywords are as follows:
| Keyword | Required | Description |
|---|---|---|
| image | no | Use a docker image |
| services | no | Use docker services |
| stages | no | Define the builds stage |
| before_script | no | Define the script to run before each job |
| after_script | no | Define the script to run after each job |
| variables | no | Define build variables |
| cache | no | Define the files that should be cached between subsequent jobs |
5. Running a Build
After committing code to GitLab, the build task runs automatically.
Under the project’s [Pipeline] - [Jobs] tab, you can see the list of execution statuses.
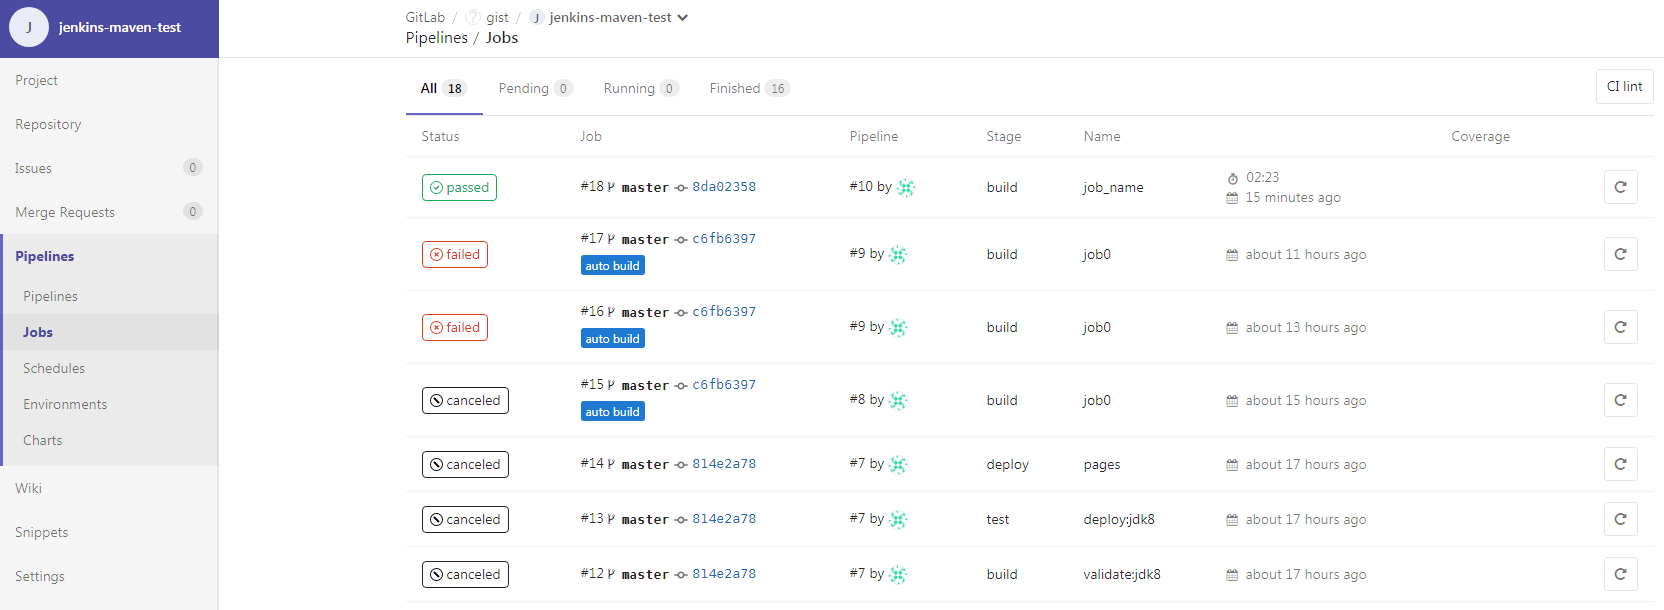
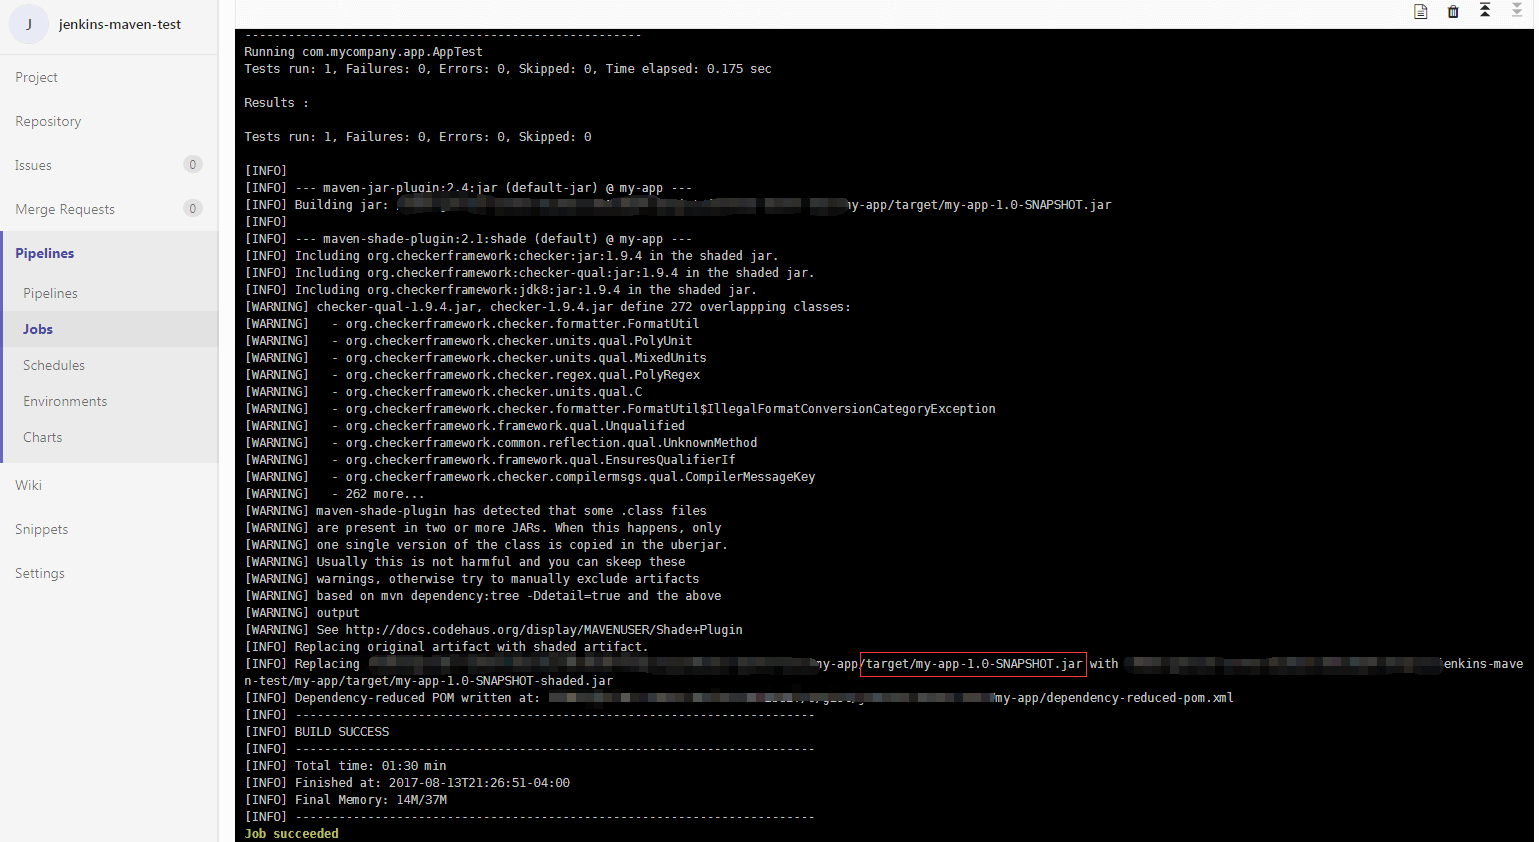
Under the project’s [Pipeline] - [Jobs] tab, click the colored buttons in the [Staus] column — [passed], [failed], [canceled] — to see the console output details of the execution.
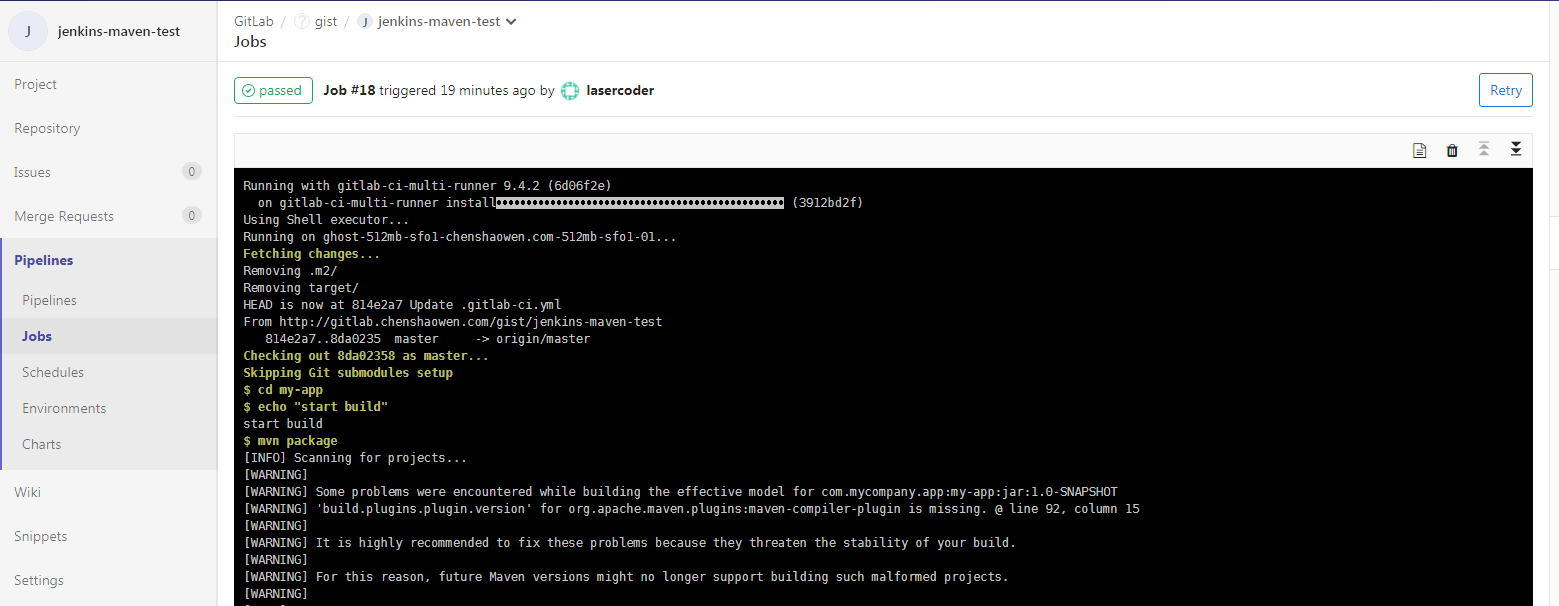
At the end of the details, you can see that an executable Java file, my-app-1.0-SNAPSHOT.jar, was finally generated in the target directory.