I have been learning Go recently, and the internal PaaS platform we commonly use happens to support Go as well as related Web frameworks. A PaaS system that supports multiple languages cannot do without the buildpack mechanism. Although PaaS platforms keep being upgraded, the buildpack mechanism has always been retained. This article is mainly a collection of buildpack materials and some hands-on practice.
1. How PaaS Deploys Applications
Whether a PaaS platform is based on native Docker or on Kubernetes, it only solves the problem of resource isolation; it does not prescribe how an App runs. For an App to run, besides the code that developers care about, there is the configuration information that operations staff care about. This configuration information includes:
- Account configuration, such as MySQL and Redis account passwords.
- Service configuration, such as service name, port number, and third-party service addresses like Ceph.
- Runtime dependencies, such as Python 2, Python 3, Golang, and Nodejs, along with related dependency packages such as gunicorn.
In fact, besides providing the runtime, before running an App, PaaS also needs to execute a series of scripts to complete some necessary runtime environment setup. Usually these scripts are called buildpacks and are managed in a shared Git repository.
2. buildpack
buildpack is Heroku’s deployment mechanism. Heroku is a PaaS platform that supports multiple languages, including Ruby, Java, Node.js, Scala, Clojure, Python, PHP, Perl, and more. On Github, Heroku open-sourced buildpacks. You can pick them up and use them right away for your project, and you can also customize and develop your own buildpacks.
CloudFoundry and Heroku buildpacks are compatible: the same buildpack can be deployed on either Heroku or CloudFoundry. Many PaaS platforms use buildpacks to deploy applications. buildpack has become the de facto standard for PaaS application deployment.
3. Cloud Foundry Deployment Principles
Cloud Foundry is the industry’s first open-source PaaS cloud platform, supporting a wide range of frameworks, languages, runtime environments, cloud platforms, and application services. Cloud Foundry has had a very important influence on the way PaaS platforms were later built. Many teams refer to Cloud Foundry when building their own PaaS.
The diagram below shows the complete flow of deploying an App on Cloud Foundry.
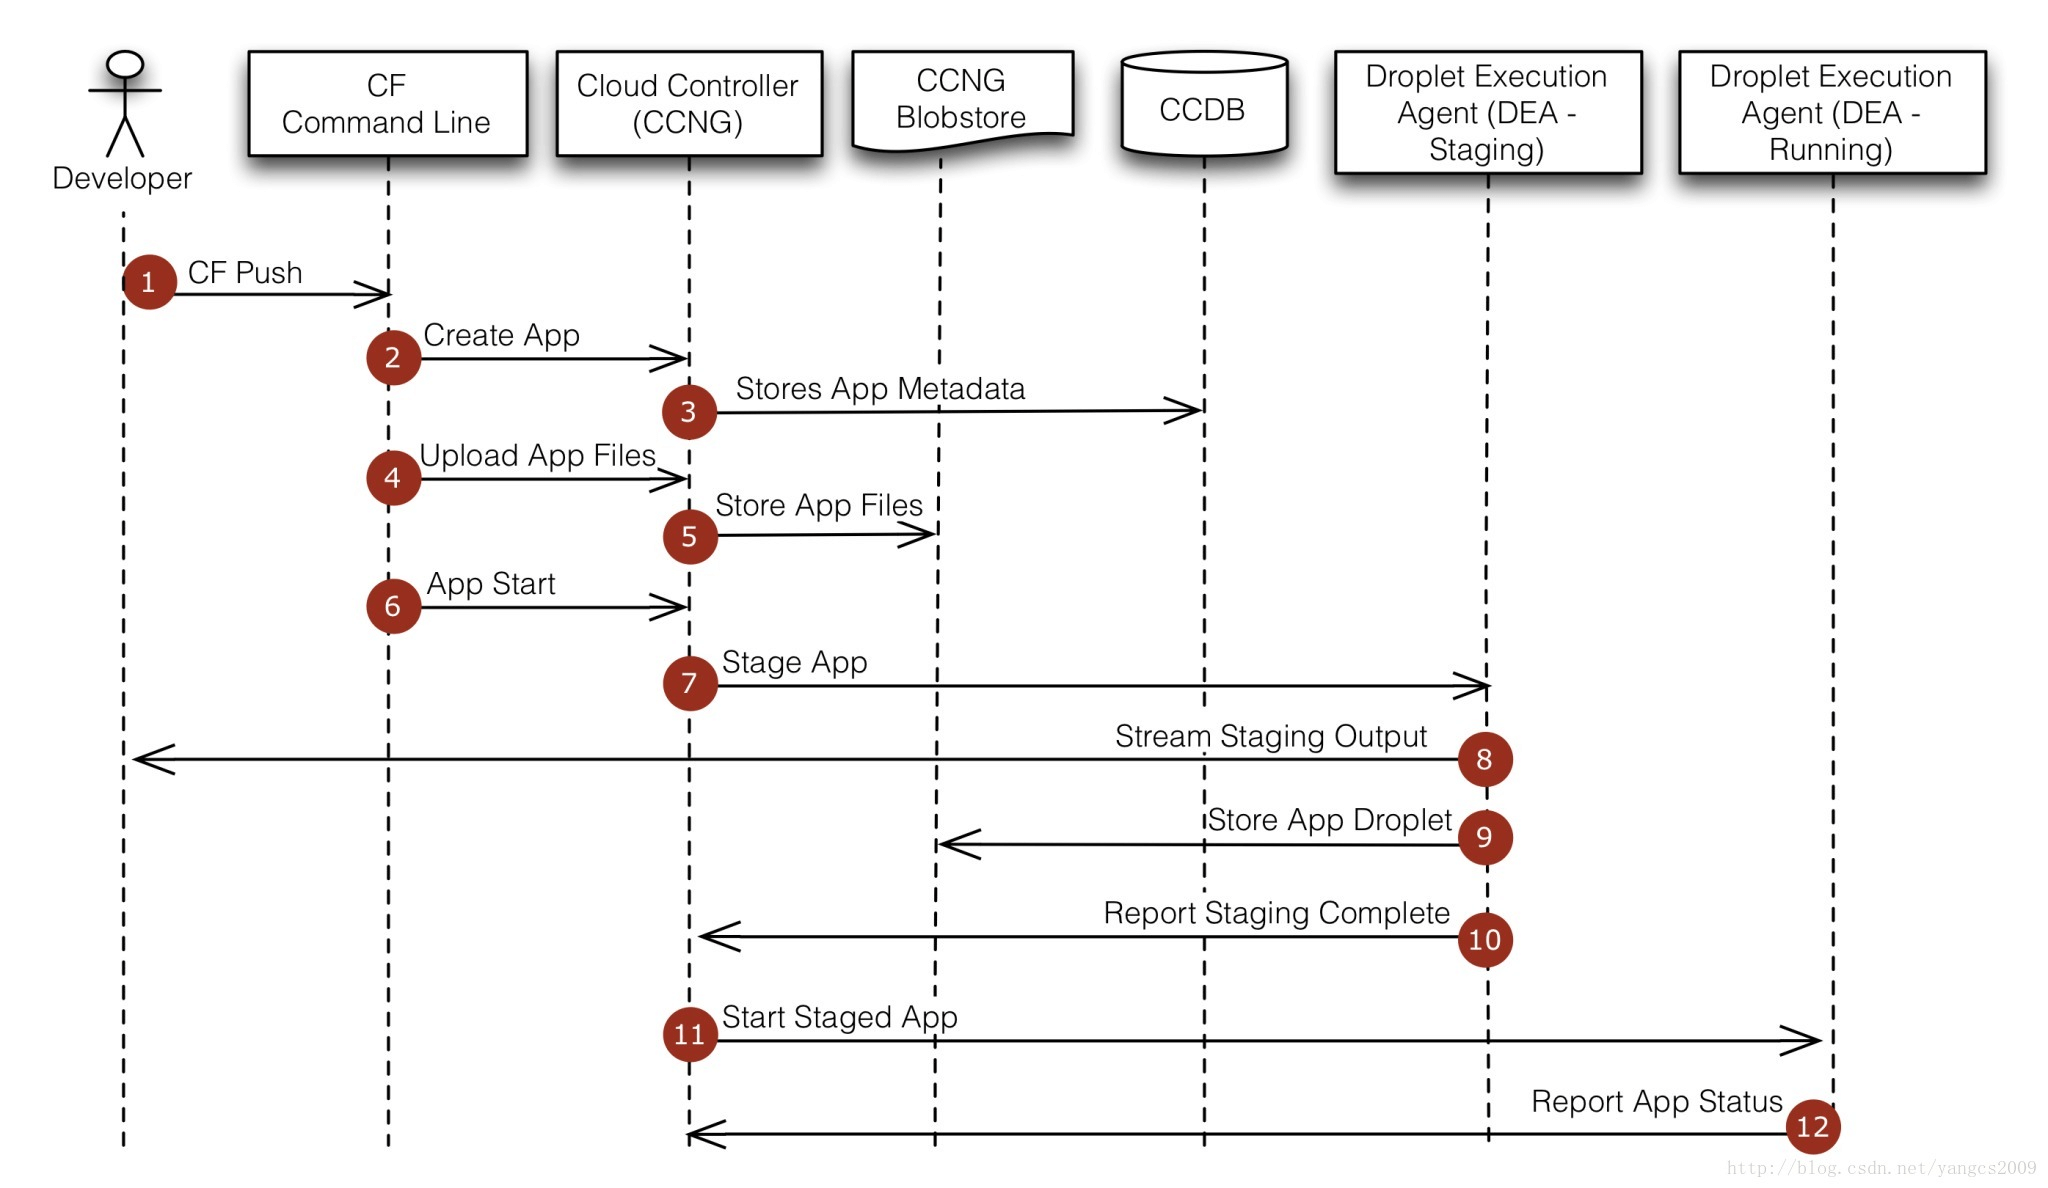
- The user uploads the application with the CF PUSH command
- The CLI tells CCNG to create an application
- CCNG adds a record for the application in the database, for example the application name and which buildpack to use
- The CLI uploads the program
- CCNG stores the program
- The CLI starts the application
- Since the application has not been deployed yet, CCNG finds a DEA (Droplet Execution Agent) and runs the buildpack inside that DEA to deploy the application
- The DEA outputs information about running the buildpack
- When the buildpack finishes, it outputs a Droplet file (the compiled and packaged result), and the DEA stores that file
- The DEA reports the packaging result to CCNG
- CCNG picks a DEA to deploy the application
- The application runs in the DEA and its output is sent to CCNG
As you can see, both the buildpack and the App run in the same environment (the DEA). A buildpack is very simple — it needs only three scripts:
- bin/detect, detects whether the buildpack supports this application
- bin/compile, the compilation script
- bin/release, the packaging script
4. Creating an Application with the Heroku Buildpack
Cloud Foundry is a private cloud PaaS solution, while Heroku is a public cloud PaaS solution. Cloud Foundry has built a very good ecosystem by developing partners for integration and training. Heroku offers paid application deployment services on the public internet, but also provides a certain free quota.
For simplicity, I did not set up Cloud Foundry here, and instead used the deployment service Heroku provides directly.
4.1 Preparing Heroku
Step one: register a Heroku account at https://www.heroku.com/.
Step two: install the Heroku Toolbelt client.
Toolbelt is Heroku’s command-line tool, which lets you manage Heroku applications from the command line. Download link.
4.2 Preparing the Django Project
Step one: create a Django project for testing the deployment.
| |
Step two: following the buildpack conventions, create two new files in the project.
- requirements.txt, the third-party packages the App depends on
- Procfile, the command executed when the App starts
| |
Step three: modify the Django project to suit gunicorn deployment
Add to herokupro/wsgi.py:
| |
Add to herokupro/settings.py
| |
Create the static folder
| |
Step four (optional): create a runtime.txt file to specify the Python version.
You can find the available Python versions on the Github page for heroku-buildpack-python.
| |
The final directory structure:
| |
4.3 Creating the Heroku Application
Step one: log in to Heroku.
heroku login
Step two: create the App.
| |
Heroku assigns the App two addresses:
- The access address, https://heroku-django-app-hello.herokuapp.com/
- The git repository address, https://git.heroku.com/heroku-django-app-hello.git
Step three: commit the code and build and deploy the application.
| |
| |
Visit the App address Heroku provides, https://heroku-django-app-hello.herokuapp.com/:
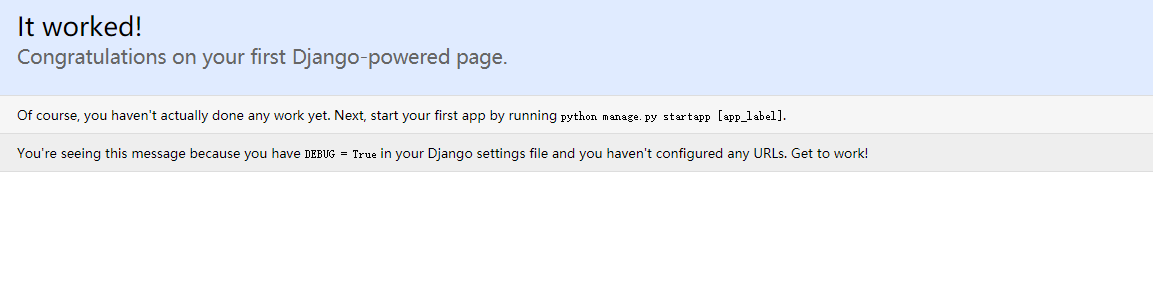
A deployment may not succeed on the first try. You can debug by viewing the logs with this command:
| |
