Docker solves the problem of environment isolation on the same machine and improves the efficiency of operations and deployment. Vagrant gives developers a unified, near-fully-isolated environment for development and testing. This article mainly discusses how to build a Django development environment with Vagrant. Versions: VirtualBox 5.0, Vagrant 1.8.
1. Basic Concepts
1.1 Vagrant
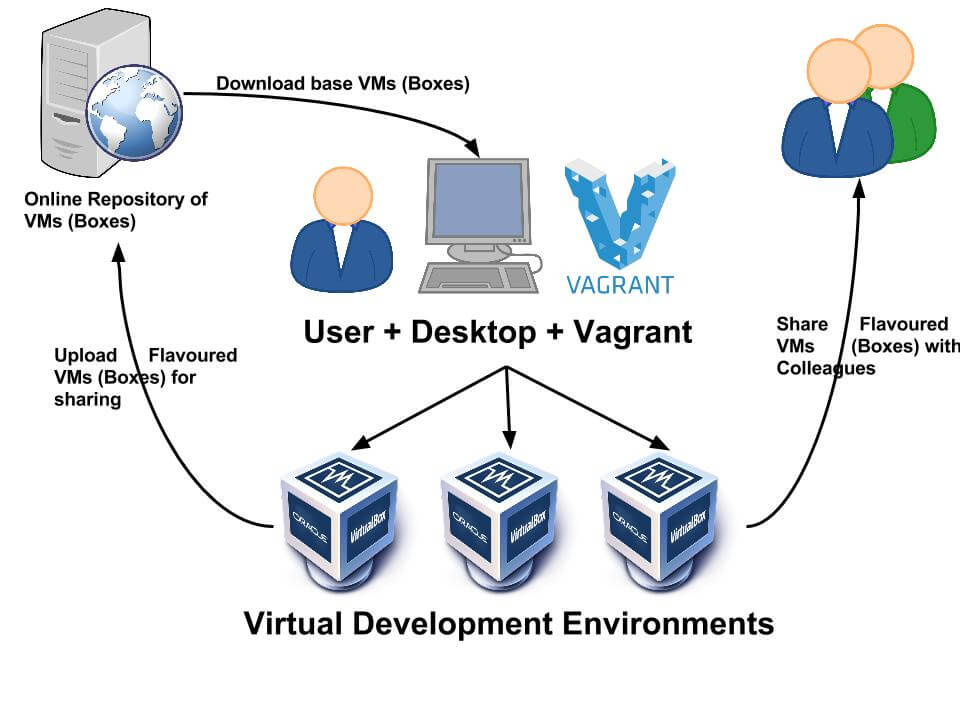
Vagrant is a tool for building virtual development environments. It does not provide virtualization itself; instead it manages virtual machines to construct a development environment. Vagrant is based on Ruby and mainly runs from the command line.
Underneath, Vagrant supports VirtualBox, VMware, and even AWS as the virtual machine system, making it very convenient to set up all kinds of virtual machine environments.
1.2 Boxes
A Box is a file with the box suffix. In practice it is a compressed archive containing the virtual machine configuration, the virtual machine disk image, and the Vagrant configuration.
2. Using Vagrant
2.1 Installing Vagrant
- Install VirtualBox, https://www.virtualbox.org/
- Install Vagrant, https://www.vagrantup.com/
2.2 Choosing an Image and Starting It
Usually you need to build the required software environment on top of some base image, for example CentOS, Ubuntu, and so on.
The official site provides a large number of images. You can go to http://www.vagrantbox.es/ and pick a suitable image Box file.
Step one, add the box
| |
Here name is the local name given to the Box file pointed to by path, and path can be either a remote URL or a local path.
Step two, initialize the environment
| |
Use the name image to initialize the current directory, creating a Vagrantfile configuration file in the working directory.
Step three, start the environment
| |
This starts a virtual machine. The virtual machine is created from the Box file: first it locates the Box file according to the config.vm.box setting in the Vagrantfile, and if it is not available locally, it will look it up and download it from the official site.
Step four, SSH login
The Windows terminal does not support ssh, so a third-party SSH client is needed. The author uses Xshell.
2.3 Common Vagrant Commands
| |
2.4 Configuring a Proxy
For development environments that cannot freely reach the external network, the network problem can be solved by configuring a proxy.
| |
Install vagrant-proxyconf
| |
Configure the Vagrantfile
Global configuration
Create $HOME/.vagrant.d/Vagrantfile and edit the contents
| |
2.5 Vagrant Network Configuration
Through the configuration file, Vagrant can support VirtualBox’s NAT, Bridged, and Hostonly networks.
- NAT network
By default, a VM created by Vagrant has one NAT network adapter.
- Bridged network
When the following configuration statement is used, the VM created by Vagrant has a Bridged network
| |
At this point the VM is equivalent to a physical machine on the LAN where the host machine resides. You can reserve a fixed DHCP address for the VM through MAC binding on the router, so that the VM obtains the same IP address no matter when it starts.
- Hostonly network
When the following configuration statements are used, the VM created by Vagrant has two Hostonly networks
| |
- Mixed network
When the following configuration statement is used, the VM created by Vagrant has one NAT and one Hostonly network
| |
The identifier private_network is always mapped to VirtualBox’s Hostonly model.
When Vagrant creates network adapters, if the configuration file defines only one private_network, Vagrant automatically creates a NAT adapter and then creates the network described by the configuration file; but if the configuration file specifies two or more private_network entries, Vagrant no longer automatically creates a NAT adapter.
The mixed network is very well suited to development and testing environments: it can reach the Internet through NAT, and multiple VMs can also communicate with each other.
- Internal and external network
When the following configuration statements are used, the VM created by Vagrant has one Bridged and one Hostonly network
| |
This is a fairly common configuration pattern. The VM has both an IP on the LAN where the Host machine resides and a private network IP address, so these VMs are fully interconnected with each other.
2.6 Port Forwarding
When the following configuration statement is used, Vagrant forwards access requests to port 80 on the host machine to the service on port 80 of the virtual machine
| |
For example, if a Django application is running on the virtual machine under Nginx, then when you open http://localhost:80 in a browser on the host machine, Vagrant will forward this request to the Nginx service running on port 80 inside the VM. So through this setting you can configure the exchange of information between the host and the VM, or between VMs.
2.7 Mounting Directories
When Vagrant starts, by default it mounts the current directory at /vagrant. You can also set additional mount directories through configuration:
| |
In the setting above, the first parameter is the host directory and the second is the directory mounted in the virtual machine
3. Vagrant Environment for Django
3.1 Local Installation
Download the Box file xx-django1.8-u3.box from http://pypi.o.tc.com/vagrant/xx-django1.8-u3.box. This image includes the environment needed for Django development, such as MySQL and RabbitMQ. The default password for the database root account is empty.
| |
3.2 Vagrantfile Configuration
| |
Host hosts configuration, making it convenient to access directly by domain name
| |
| |
Use the account vagrant:vagrant to SSH into 127.0.0.1:2222.
3.3 Django Configuration
By default Vagrant mounts the local directory at /vagrant. Create an app directory in the local directory and copy the Django project into app.
Switch to the application working directory
| |
Install the dependencies
| |
Create the database
| |
Start Django
| |
Accessing the database through Navicat requires authorization
| |
