1. Introduction to Velero
Velero is an open-source Kubernetes cluster backup and migration tool from the heptio team (acquired by VMWare).
Velero stores cluster resources in object storage. It supports AWS, Azure, and GCP object storage by default, is compatible with the S3 protocol, and can be extended to other platforms such as Aliyun OSS through plugins.
At present, Velero has no version management: it only performs incremental restores, and never deletes or overwrites.
2. How Velero Works
Velero first creates various CRDs and their associated controllers in the cluster, then carries out backup and restore actions by operating on those CRD objects. The workflow is shown below:

- The Velero client calls the Kubernetes API server to create a Backup object.
- BackupController watches for changes to Backup objects in order to run the backup process.
- During the backup, BackupController queries the relevant data through the API server.
- After the backup, BackupController uploads the data to object storage.
The operations topology is shown below:
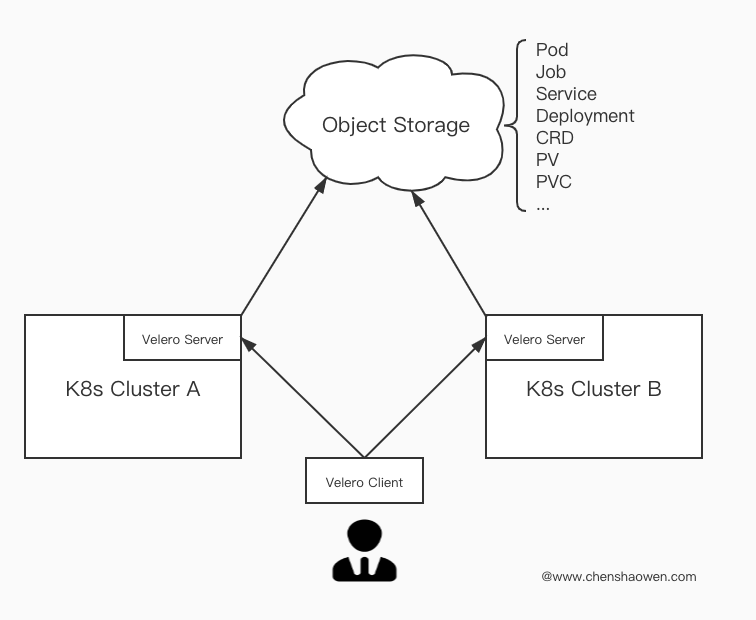
Velero is installed on every cluster, and operators send backup and restore requests from the Velero client to the Velero server. The Velero server pulls the data of the specified Kubernetes objects. That data is compressed and stored in JSON format in the object storage service.
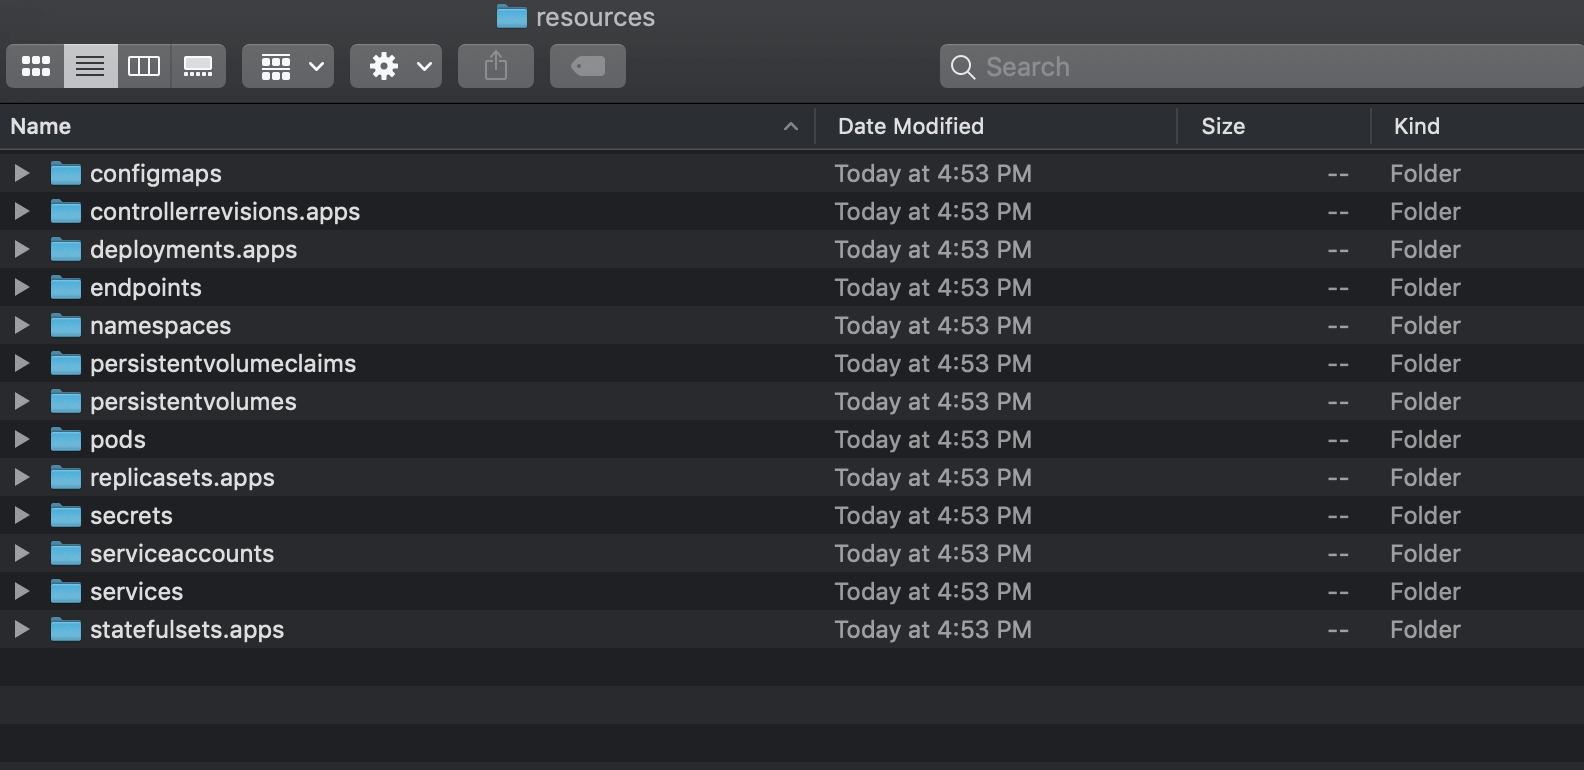
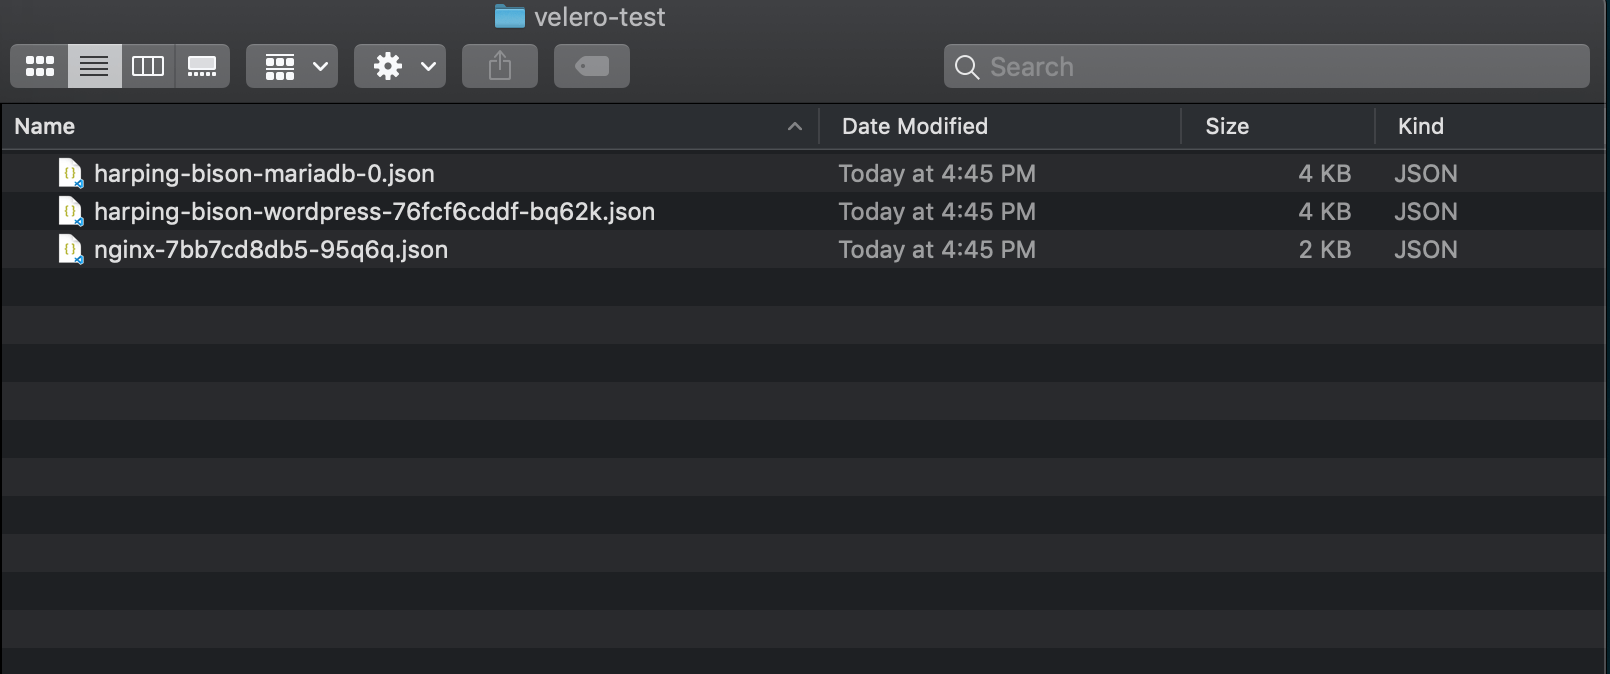
The directory structure of the backup data is shown below:
3. Installing Velero
3.1 Downloading the Files
Binary download location: Github.
The example below uses CentOS and Velero 1.1.0:
Download the binary, then copy it into the /user/local/bin directory.
- Download the tarball
1
2
| wget https://github.com/vmware-tanzu/velero/releases/download/v1.1.0/velero-v1.1.0-linux-amd64.tar.gz
tar xvf velero-v1.1.0-linux-amd64.tar.gz
|
- Inspect the directory structure
 1
 2
 3
 4
 5
 6
 7
 8
 9
10
11
12
13
14
| cd velero-v1.1.0-linux-amd64
tree .
.
|-- examples
| |-- minio
| | `-- 00-minio-deployment.yaml
| |-- nginx-app
| | |-- base.yaml
| | |-- README.md
| | `-- with-pv.yaml
| `-- README.md
|-- LICENSE
`-- velero
|
3.2 Configuring the Object Storage Service
Since a directly usable object storage service may not be available, this article uses the minio manifest shipped with Velero to stand one up. On a public cloud service, the minio deployment step here can be skipped — you only need to create the credentials-velero file.
- Create the minio service
1
| sed -i "/type: /s#ClusterIP#NodePort#" examples/minio/00-minio-deployment.yaml
|
1
| kubectl apply -f examples/minio/00-minio-deployment.yaml
|
1
2
3
4
| kubectl get svc -n velero
NAME TYPE CLUSTER-IP EXTERNAL-IP PORT(S) AGE
minio NodePort 10.233.34.181 <none> 9000:31489/TCP 60s
|
The service at {minio_service_ip}:31489 will be used to store Velero’s backup data.
- Create the minio access key file credentials-velero
1
2
3
4
5
| cat <<'EOF' > credentials-velero
[default]
aws_access_key_id = minio
aws_secret_access_key = minio123
EOF
|
1
2
3
| ls
credentials-velero examples LICENSE velero
|
3.3 Installing the Velero Client
Copy the velero executable
1
| cp velero /usr/local/bin/
|
3.4 Installing the Velero Server
Run the install command
 1
 2
 3
 4
 5
 6
 7
 8
 9
10
11
12
13
14
15
16
17
| velero install \
--image velero/velero:v1.1.0 \
--provider aws \
--bucket velero \
--namespace velero \
--secret-file ./credentials-velero \
--velero-pod-cpu-request 200m \
--velero-pod-mem-request 200Mi \
--velero-pod-cpu-limit 1000m \
--velero-pod-mem-limit 1000Mi \
--use-volume-snapshots=false \
--use-restic \
--restic-pod-cpu-request 200m \
--restic-pod-mem-request 200Mi \
--restic-pod-cpu-limit 1000m \
--restic-pod-mem-limit 1000Mi \
--backup-location-config region=minio,s3ForcePathStyle="true",s3Url=http://{minio_service_ip}:31489
|
For version 1.2.0, add the --plugins velero/velero-plugin-for-aws:v1.0.0 parameter.
The parameters are described in the official documentation; note that use-restic enables support for PV backups.
Running the install command prints log output. Now let’s look at the resources it created:
 1
 2
 3
 4
 5
 6
 7
 8
 9
10
11
12
13
14
| kubectl get crd|grep velero
NAME CREATED AT
backups.velero.io 2019-12-24T01:39:51Z
backupstoragelocations.velero.io 2019-12-24T01:39:51Z
deletebackuprequests.velero.io 2019-12-24T01:39:51Z
downloadrequests.velero.io 2019-12-24T01:39:51Z
podvolumebackups.velero.io 2019-12-24T01:39:51Z
podvolumerestores.velero.io 2019-12-24T01:39:51Z
resticrepositories.velero.io 2019-12-24T01:39:51Z
restores.velero.io 2019-12-24T01:39:51Z
schedules.velero.io 2019-12-24T01:39:51Z
serverstatusrequests.velero.io 2019-12-24T01:39:51Z
volumesnapshotlocations.velero.io 2019-12-24T01:39:51Z
|
 1
 2
 3
 4
 5
 6
 7
 8
 9
10
11
12
13
14
15
16
17
18
19
20
21
22
23
24
25
26
| kubectl get all -n velero
NAME READY STATUS RESTARTS AGE
pod/minio-fdd868c5-bl2gl 1/1 Running 0 13h
pod/minio-setup-sm2jb 0/1 Completed 2 13h
pod/restic-997lt 1/1 Running 0 4m40s
pod/restic-kg549 1/1 Running 0 4m40s
pod/restic-wjxvw 1/1 Running 0 4m40s
pod/velero-67c9ff9c66-llwqs 1/1 Running 0 4m41s
NAME TYPE CLUSTER-IP EXTERNAL-IP PORT(S) AGE
service/minio NodePort 10.233.34.181 <none> 9000:31639/TCP 13h
NAME DESIRED CURRENT READY UP-TO-DATE AVAILABLE NODE SELECTOR AGE
daemonset.apps/restic 3 3 3 3 3 <none> 4m40s
NAME READY UP-TO-DATE AVAILABLE AGE
deployment.apps/minio 1/1 1 1 13h
deployment.apps/velero 1/1 1 1 4m41s
NAME DESIRED CURRENT READY AGE
replicaset.apps/minio-fdd868c5 1 1 1 13h
replicaset.apps/velero-67c9ff9c66 1 1 1 4m41s
NAME COMPLETIONS DURATION AGE
job.batch/minio-setup 1/1 23s 13h
|
You can see that the services are running normally, the Job finished and exited cleanly, and a large number of CRDs were created.
4. Testing It Out
4.1 Backup — Cluster A
- Create a workload without a PV
1
2
| kubectl create ns velero-test
kubectl run nginx --image=nginx -n velero-test
|
- Create a workload with a PV
1
2
3
4
5
| helm install stable/wordpress \
--namespace velero-test \
--set service.type=NodePort \
--set wordpressUsername=admin \
--set wordpressPassword=Pass@Word
|
Get the service ports
1
2
3
4
5
| kubectl get svc -n velero-test
NAME TYPE CLUSTER-IP EXTERNAL-IP PORT(S) AGE
harping-bison-mariadb ClusterIP 10.233.17.43 <none> 3306/TCP 2m36s
harping-bison-wordpress NodePort 10.233.15.158 <none> 80:30979/TCP,443:30561/TCP 2m36s
|
Open http://{cluster_a_ip}:30979, log into Wordpress with the credentials set during installation, and do something simple such as publishing a post, to verify PV migration.
Backing up PVs requires restic. But restic does not support hostPath, requires Kubernetes v1.10.0 or later, and requires the pod to be annotated in advance. Here is the annotation command template:
1
| kubectl -n YOUR_POD_NAMESPACE annotate pod/YOUR_POD_NAME backup.velero.io/backup-volumes=YOUR_VOLUME_NAME_1,YOUR_VOLUME_NAME_2,...
|
Find the Wordpress-related Pods — there are two here; only the Volumes portion is excerpted below:
 1
 2
 3
 4
 5
 6
 7
 8
 9
10
11
12
13
14
15
16
17
18
19
20
21
22
23
24
25
26
27
| kubectl describe pod -n velero-test
Name: harping-bison-mariadb-0
Volumes:
data:
Type: PersistentVolumeClaim (a reference to a PersistentVolumeClaim in the same namespace)
ClaimName: data-harping-bison-mariadb-0
ReadOnly: false
config:
Type: ConfigMap (a volume populated by a ConfigMap)
Name: harping-bison-mariadb
Optional: false
default-token-t6zvv:
Type: Secret (a volume populated by a Secret)
SecretName: default-token-t6zvv
Optional: false
Name: harping-bison-wordpress-76fcf6cddf-bq62k
Volumes:
wordpress-data:
Type: PersistentVolumeClaim (a reference to a PersistentVolumeClaim in the same namespace)
ClaimName: harping-bison-wordpress
ReadOnly: false
default-token-t6zvv:
Type: Secret (a volume populated by a Secret)
SecretName: default-token-t6zvv
Optional: false
|
Annotate them:
1
2
| kubectl -n velero-test annotate pod harping-bison-mariadb-0 backup.velero.io/backup-volumes=data,config
kubectl -n velero-test annotate pod harping-bison-wordpress-76fcf6cddf-bq62k backup.velero.io/backup-volumes=wordpress-data
|
Back up specific namespaces
1
| velero backup create test-1 --include-namespaces velero-test
|
Back up all namespaces
1
| velero backup create all
|
Once the backup completes, you can see the corresponding data directories in the minio UI, as shown below:
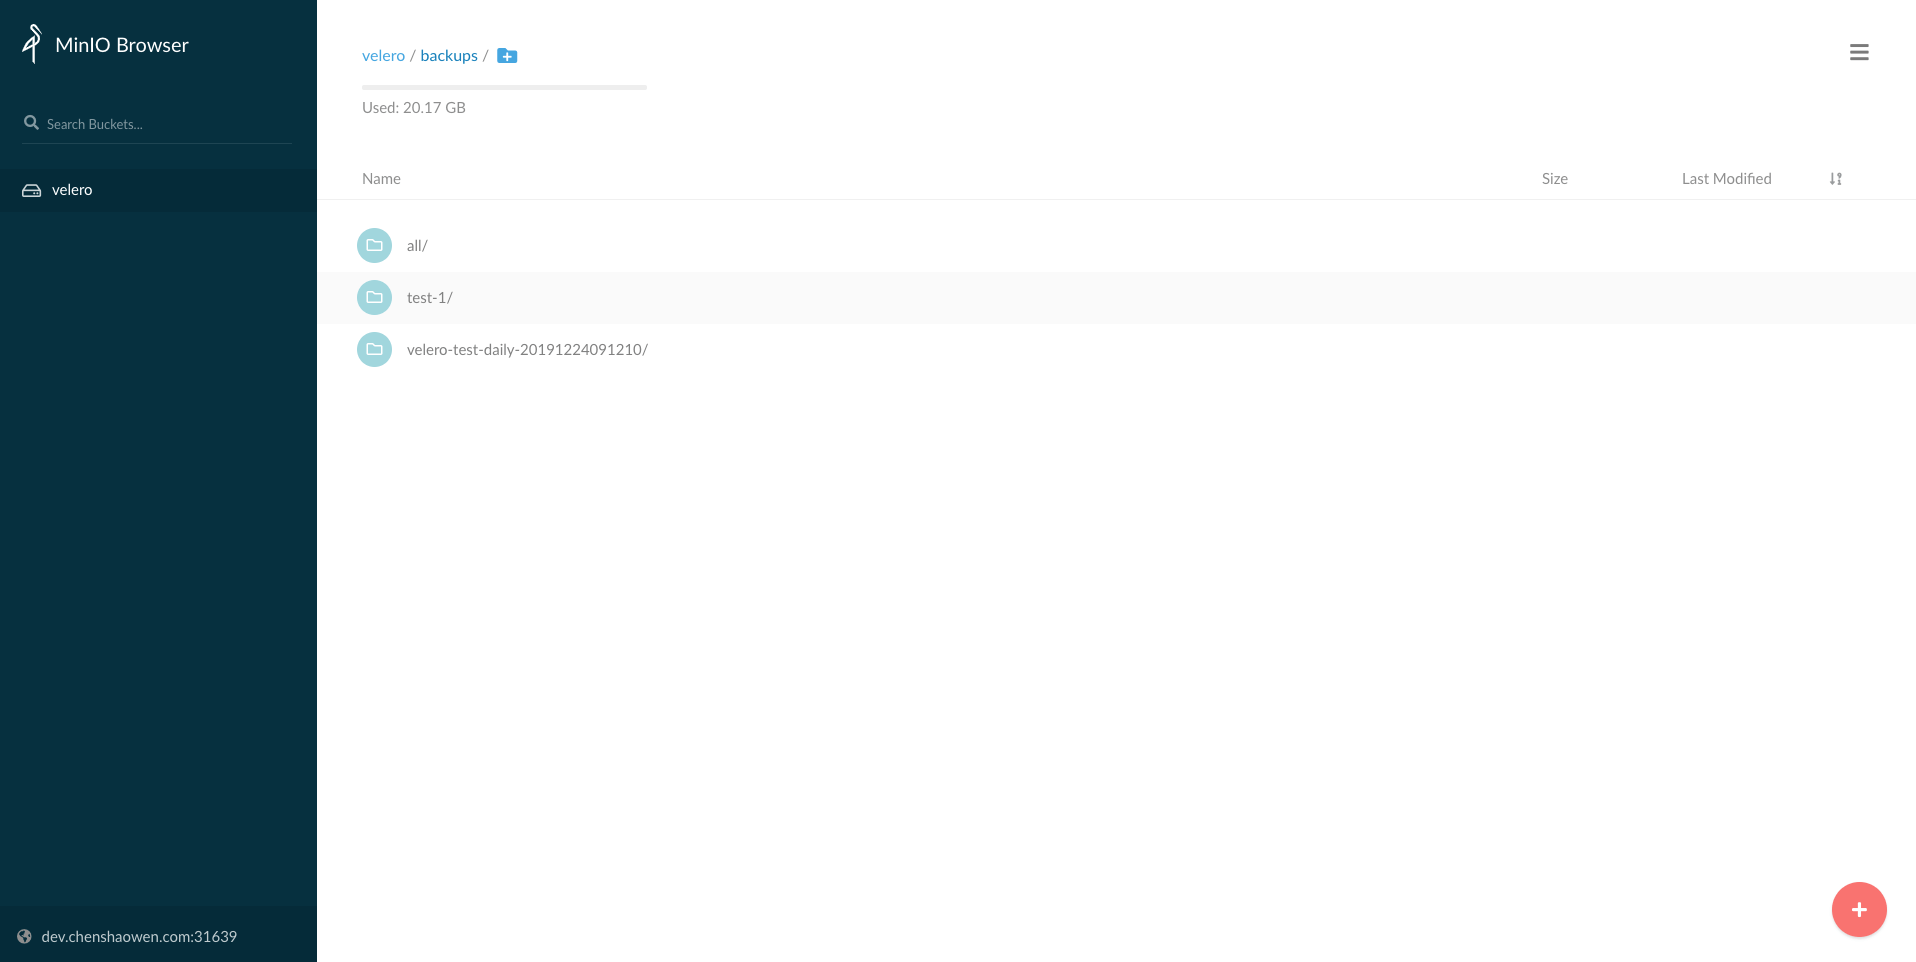
PV data is backed up under the restic directory of the bucket, which the screenshot above does not show.
1
2
3
4
5
| velero backup get
NAME STATUS CREATED EXPIRES STORAGE LOCATION SELECTOR
all Completed 2019-12-24 16:22:13 +0800 CST 29d default <none>
test-1 Completed 2019-12-24 16:19:49 +0800 CST 29d default <none>
|
A status of Completed means the backup is done. You can also use the velero backup describe test-1 --details command to view the detailed inventory of backed-up data.
 1
 2
 3
 4
 5
 6
 7
 8
 9
10
11
12
13
14
15
16
17
18
19
20
21
22
23
24
25
26
27
28
29
30
31
32
33
34
35
36
37
38
39
40
41
42
43
44
45
46
47
48
49
50
| Resource List:
apps/v1/ControllerRevision:
- velero-test/harping-bison-mariadb-8bb76d5
apps/v1/Deployment:
- velero-test/harping-bison-wordpress
- velero-test/nginx
apps/v1/ReplicaSet:
- velero-test/harping-bison-wordpress-76fcf6cddf
- velero-test/nginx-7bb7cd8db5
apps/v1/StatefulSet:
- velero-test/harping-bison-mariadb
v1/ConfigMap:
- velero-test/harping-bison-mariadb
- velero-test/harping-bison-mariadb-tests
v1/Endpoints:
- velero-test/harping-bison-mariadb
- velero-test/harping-bison-wordpress
v1/Namespace:
- velero-test
v1/PersistentVolume:
- pvc-04be4971-5afc-4310-bc78-6f3f206d3f71
- pvc-997763be-956f-4814-81f0-0f9373731694
- pvc-a893e92b-32da-41c3-9059-abe6a043a864
- pvc-dc9124b8-f6f6-4e6c-a31a-b279b802e313
v1/PersistentVolumeClaim:
- velero-test/data-deadly-gnat-mariadb-0
- velero-test/data-harping-bison-mariadb-0
- velero-test/data-wordpress-mariadb-0
- velero-test/harping-bison-wordpress
v1/Pod:
- velero-test/harping-bison-mariadb-0
- velero-test/harping-bison-wordpress-76fcf6cddf-bq62k
- velero-test/nginx-7bb7cd8db5-95q6q
v1/Secret:
- velero-test/default-token-t6zvv
- velero-test/harping-bison-mariadb
- velero-test/harping-bison-wordpress
- velero-test/istio.default
v1/Service:
- velero-test/harping-bison-mariadb
- velero-test/harping-bison-wordpress
v1/ServiceAccount:
- velero-test/default
Persistent Volumes: <none included>
Restic Backups:
Completed:
velero-test/harping-bison-mariadb-0: config, data
velero-test/harping-bison-wordpress-76fcf6cddf-bq62k: wordpress-data
|
4.2 Restore — Cluster B
1
| velero restore create --from-backup test-1
|
1
2
3
4
| velero restore get
NAME BACKUP STATUS WARNINGS ERRORS CREATED SELECTOR
test-1-20191224162109 test-1 Completed 0 0 2019-12-24 16:21:09 +0800 CST <none>
|
- View the restore logs and description
1
2
| velero restore logs test-1-20191224162109
velero restore describe test-1-20191224162109
|
1
2
3
4
5
6
| kubectl get pod -n velero-test
NAME READY STATUS RESTARTS AGE
harping-bison-mariadb-0 1/1 Running 0 4m50s
harping-bison-wordpress-76fcf6cddf-bq62k 1/1 Running 0 4m50s
nginx-7bb7cd8db5-95q6q 1/1 Running 0 4m50s
|
1
2
3
4
5
| kubectl get svc -n velero-test
NAME TYPE CLUSTER-IP EXTERNAL-IP PORT(S) AGE
harping-bison-mariadb ClusterIP 10.233.51.16 <none> 3306/TCP 23m
harping-bison-wordpress NodePort 10.233.27.43 <none> 80:31193/TCP,443:31828/TCP 23m
|
Open http://{cluster_b_ip}:31193 and you will see the modified Wordpress page, confirming that the PV data was restored correctly.
5. Scheduled Backups
Velero supports cron expressions for scheduled backups.
1
| velero schedule create velero-test-daily --schedule="0 1 * * *" --include-namespaces velero-test
|
6. References
