1. Comparing a Few Common Gateways
- Nginx, a reverse proxy with a modular design, written in C
- OpenResty, a web development platform built around Nginx that can parse and execute Lua scripts
- Kong, an application on top of OpenResty, an API gateway with API management and request proxying, using PostgreSQL for storage
- APISIX, which replaces Kong’s PostgreSQL with Etcd and is built on Nginx’s core libraries
APISIX’s advantage lies in the API management and extensibility it provides, so the gateway no longer merely forwards traffic to services but can be configured and customized. Compared with Nginx, APISIX uses dynamic routing, avoiding the risk introduced by a reload after configuration changes. At the same time, APISIX supports more protocols such as HTTP(S), HTTP2, Dubbo, QUIC, MQTT, and TCP/UDP, giving it a better ecosystem.
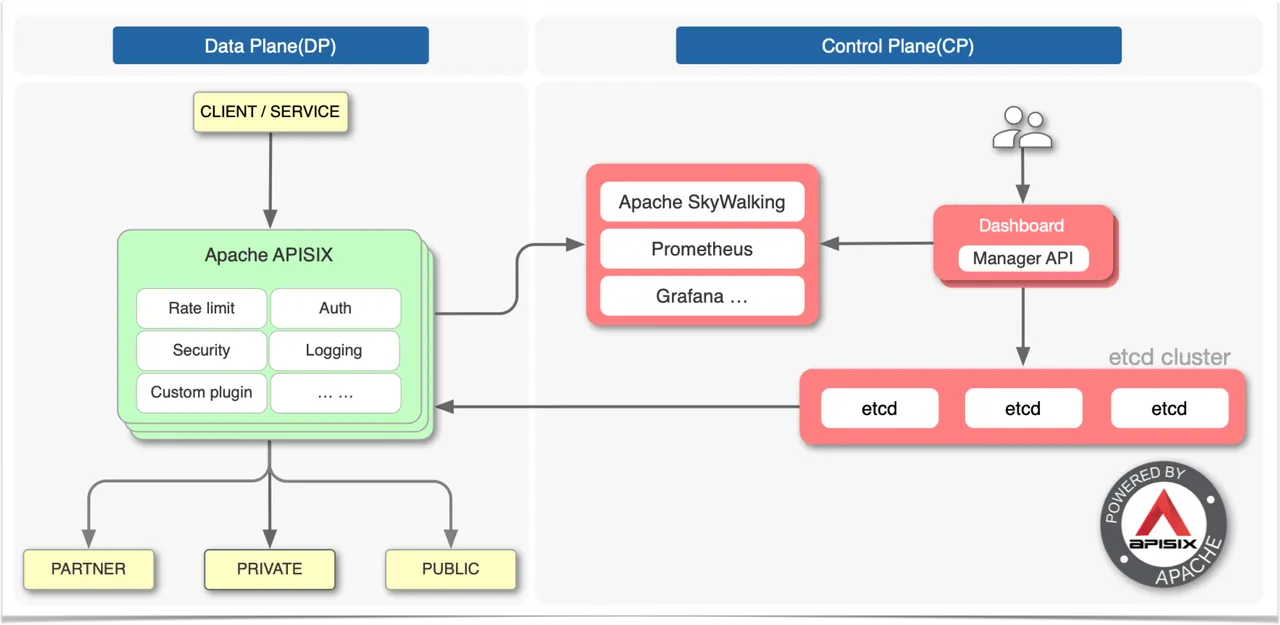
The above is the architecture diagram of APISIX: the data plane handles client requests, and the control plane manages routes.
2. What Problems APISIX Solves
- Edge routing
The number of IP addresses a data center exposes for inbound access is usually very small, yet it backs many services. For example, the IP being accessed is 1.2.3.4, but it serves both a.domain.com and b.domain.com. This calls for edge routing: edge routing forwards requests for different domain names to different internal addresses.
There are three ways to register edge routes in APISIX: dashboard, ingress-controller, and admin api.
- Basic gateway capabilities
The role of a gateway is not limited to forwarding traffic; rate limiting, circuit breaking, and so on matter more.
APISIX ships with many built-in plugins providing APM, logging, circuit breaking, authentication, certificate management, fault injection, and more. It also supports dragging and combining new plugins, or developing new plugins, to meet business needs.
- Serverless
APISIX provides Serverless through plugins, and currently only supports Lua. But the combination of APIGateway + Serverless is full of possibilities.
Serverless can quickly expose serverless APIs externally, glue various services together, and also directly expose feature services externally.
- Canary release
Because control happens at the gateway layer, APISIX lets users control traffic forwarding behavior by configuring weights, which can be used for canary releases.
3. Installing APISIX on Kubernetes
3.1 Adding the Helm Repository
- Add the Helm repository
| |
- Find the Chart package
| |
3.2 Installing APISIX
- Install APISIX
| |
- Check the entry address
| |
The entry address here is the entry address of the backend service. In a production environment, you should use the address provided by a LoadBalancer.
- Check the apisix-admin interface key
| |
The first key is for admin, and the second is for the viewer. These keys can be used to configure APISIX through the admin api, providing an entry point for other systems to integrate with APISIX.
3.3 Installing the Dashboard
- Install the Dashboard
| |
- Set the Dashboard to NodePort access
| |
The default account is: admin
The default password is: admin
- Check the Dashboard entry point
| |
3.4 Installing the ingress-controller
- Install the ingress-controller
| |
Here you need to set the admin key obtained above. In fact, the ingress-controller also configures routes by calling the admin api.
4. Creating a Service to Test
As mentioned earlier, APISIX configures routes through the admin api, and there are three ways to operate it. Here we mainly verify two of them: using the Dashboard and using Ingress.
- Create a service
| |
- Expose the service
| |
- Check the service
| |
4.1 Configuring a Route in the Dashboard
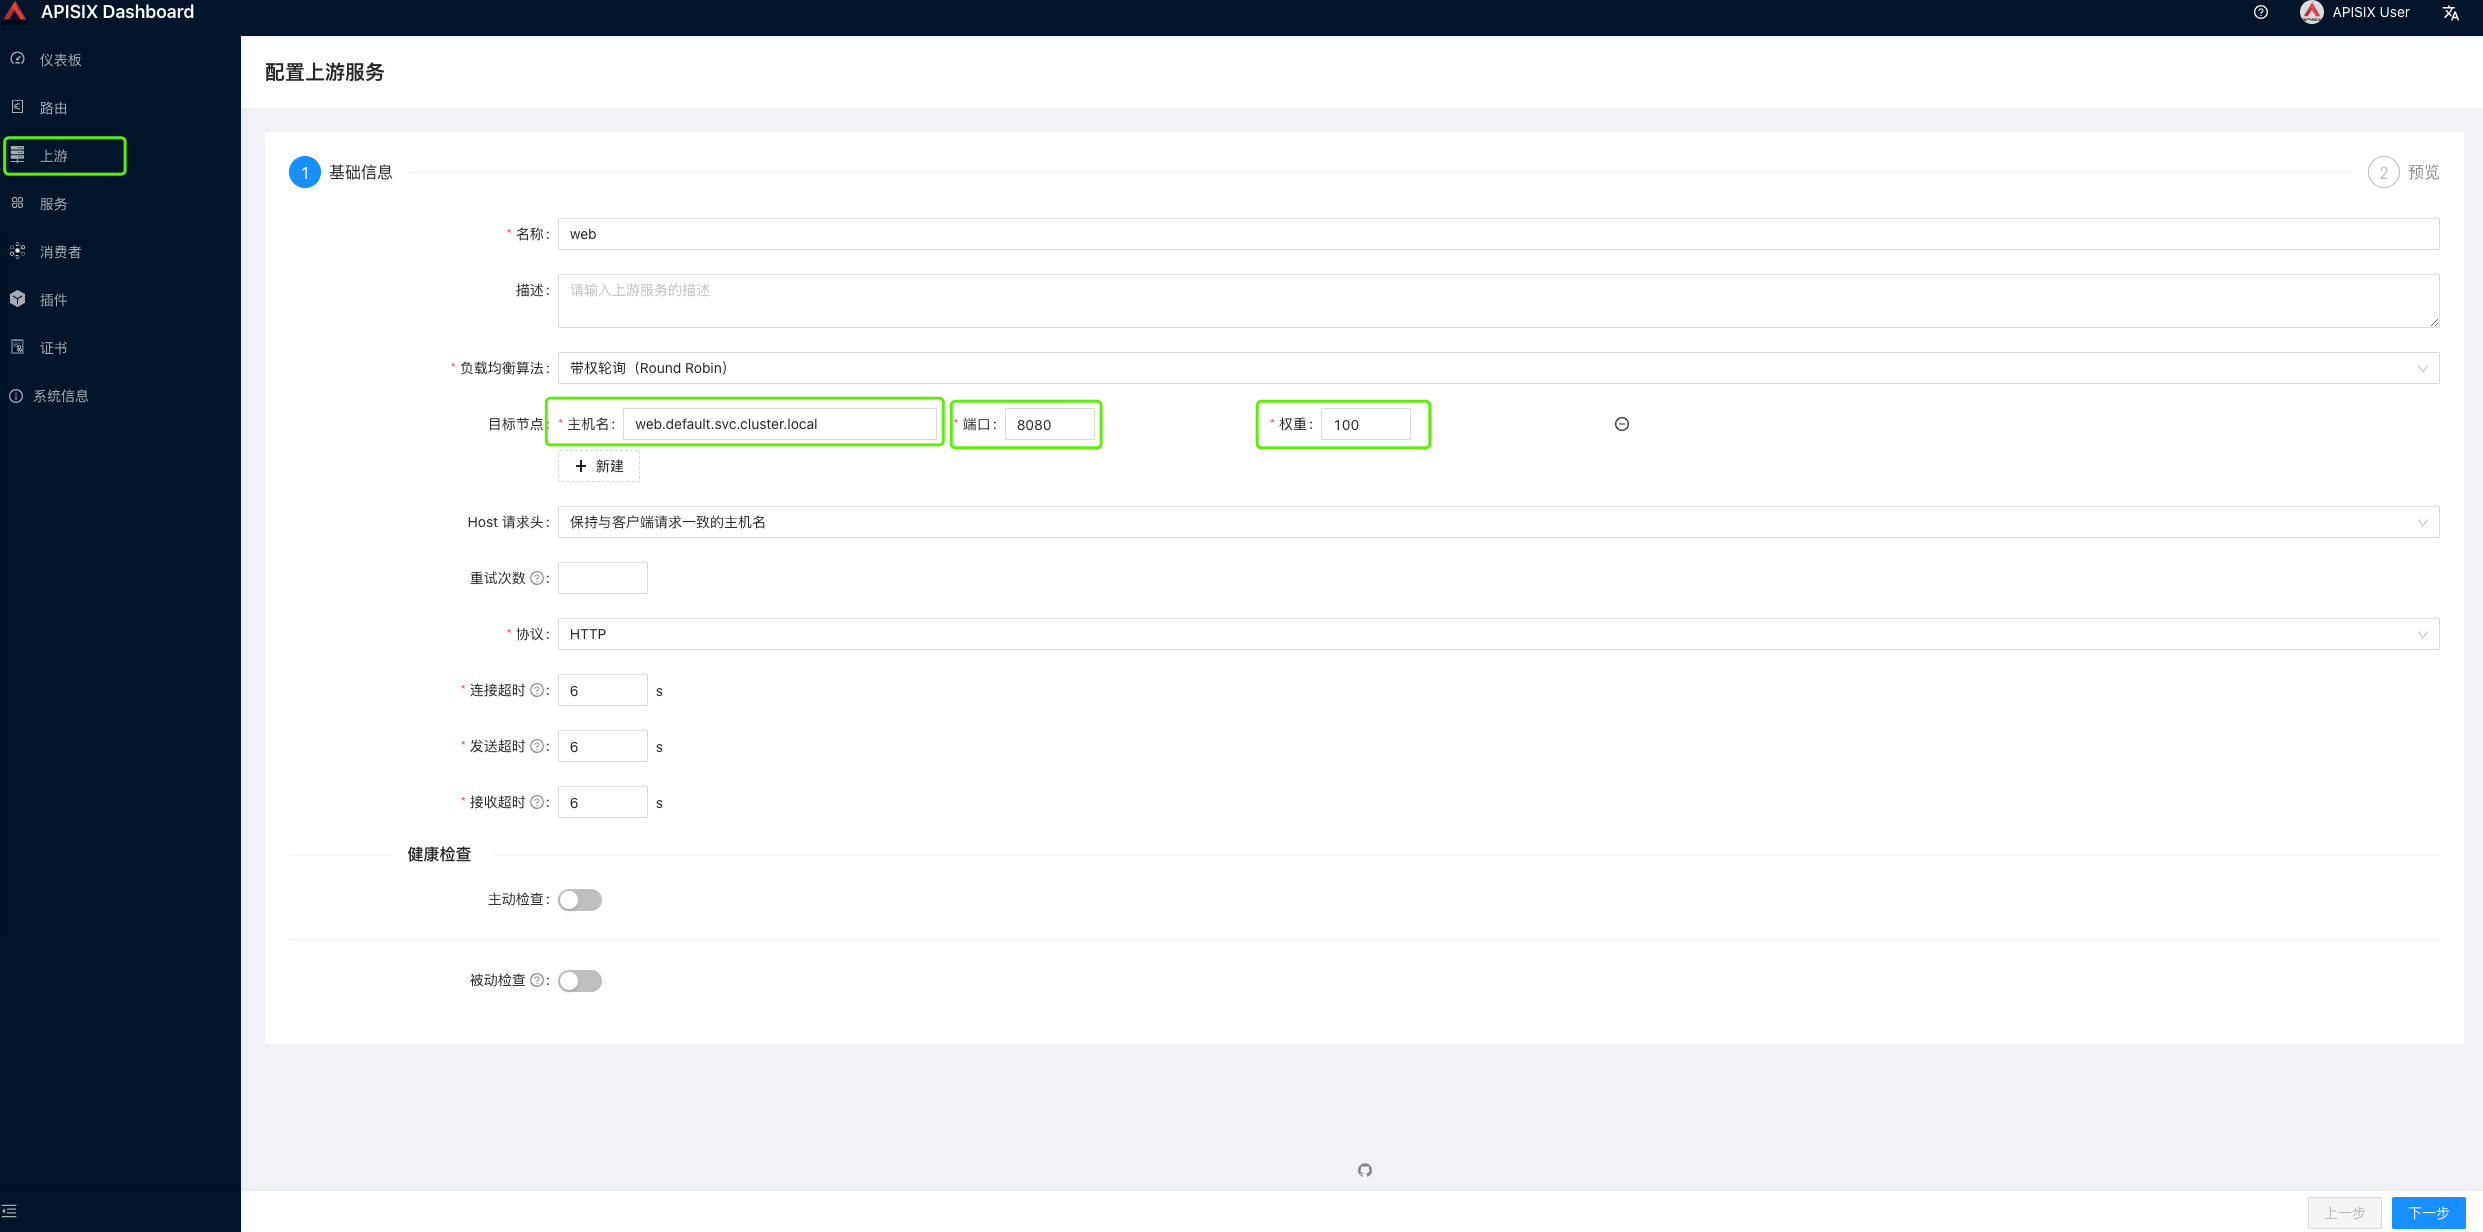
- Create an upstream service
Here you need to fill in the cluster access address created above: web.default.svc.cluster.local
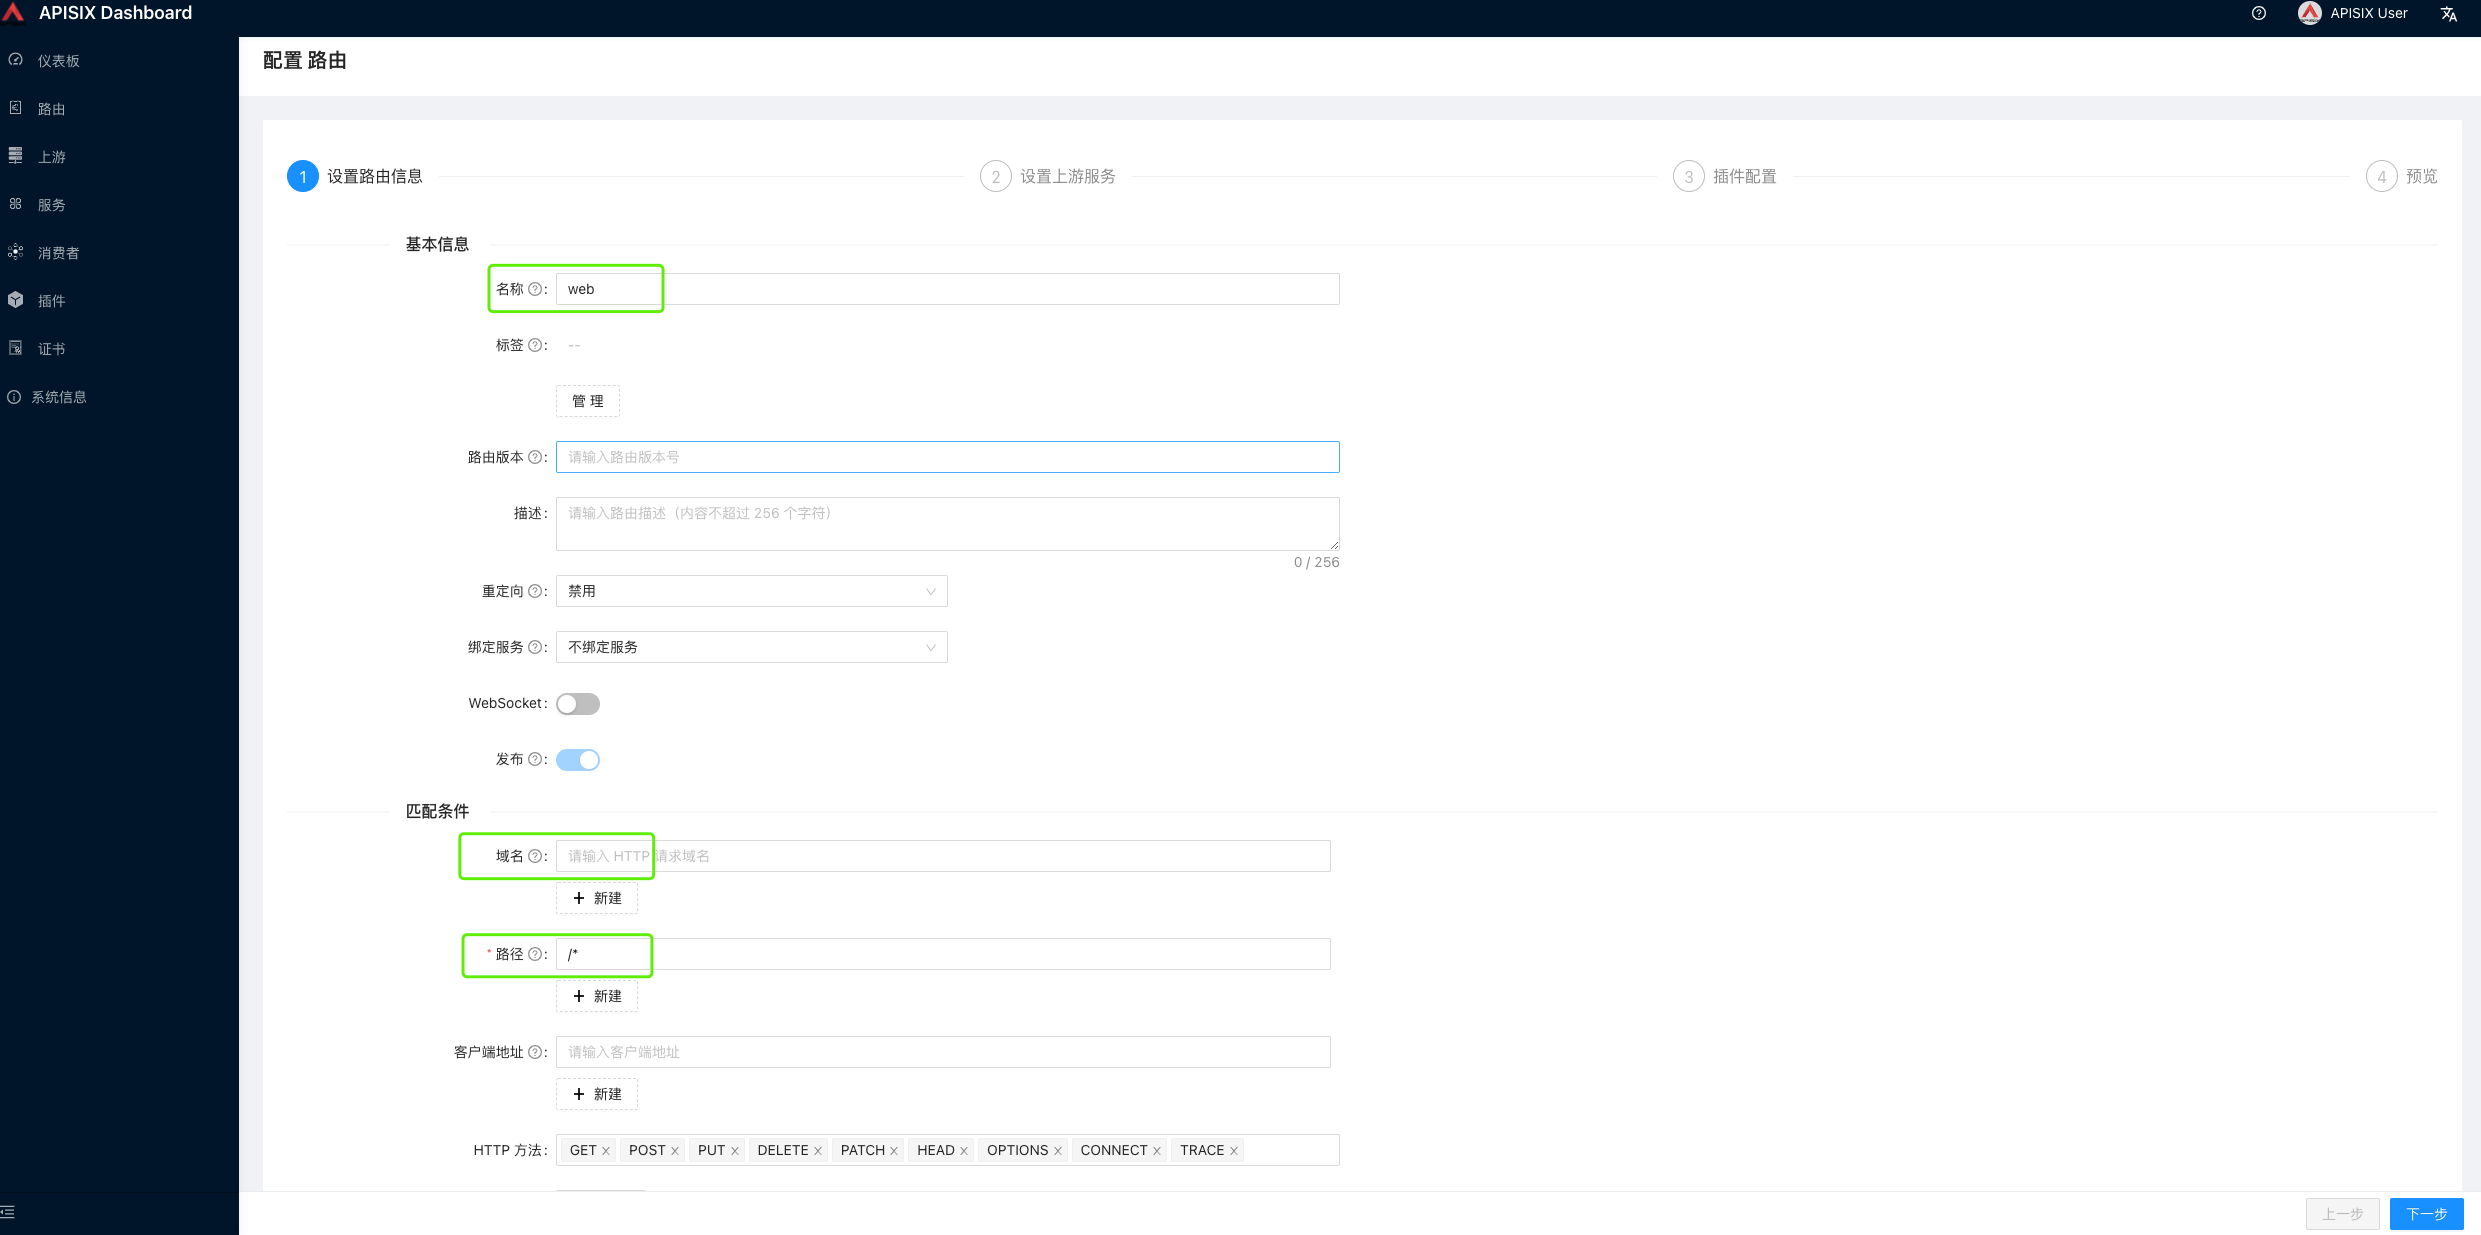
- Create a route
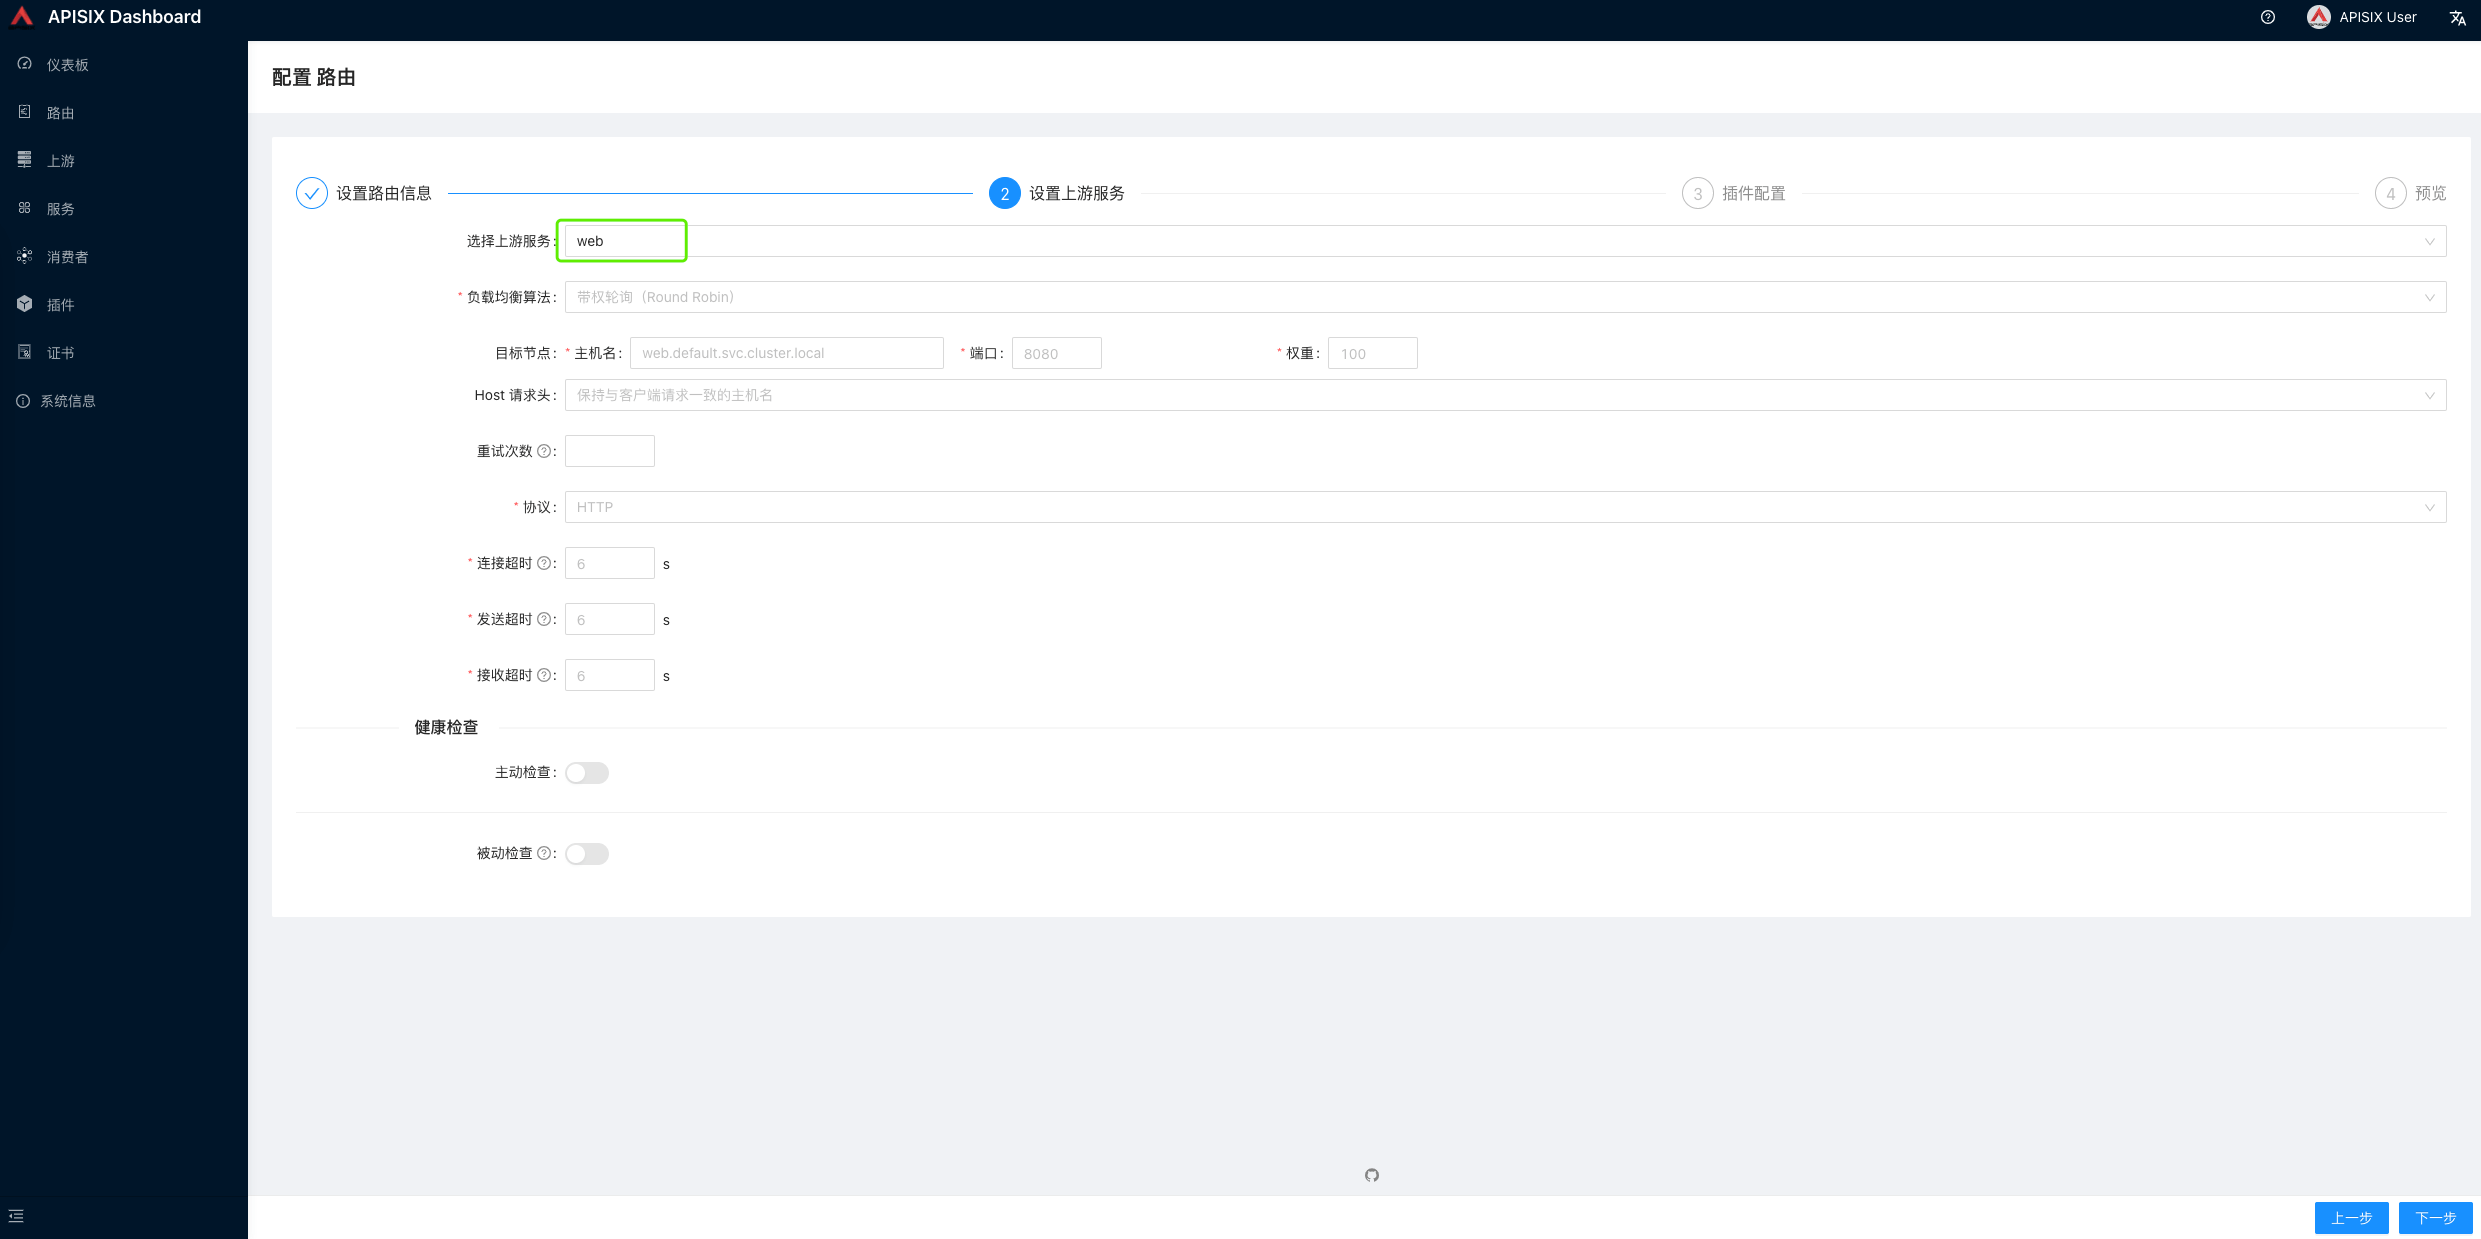
After clicking next, select the service web created above, and the related parameters will be filled in automatically.
- Access test
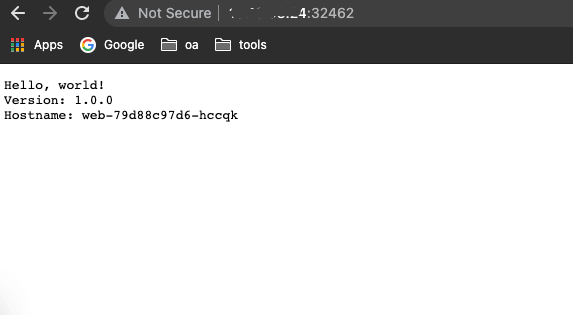
4.2 Configuring a Route with Ingress
- Create an ApisixRoute route
Although the component deployed here is the ingress-controller, what you create when using it is an ApisixRoute object.
| |
- Access test
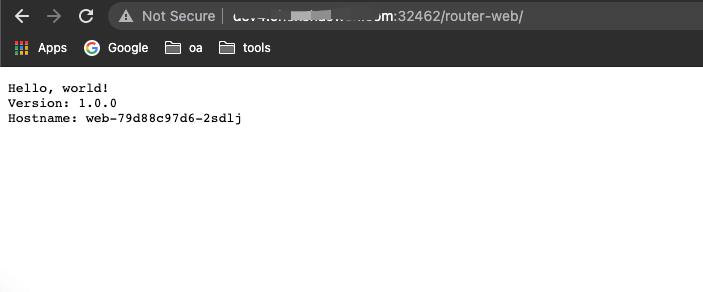
- Check the created route
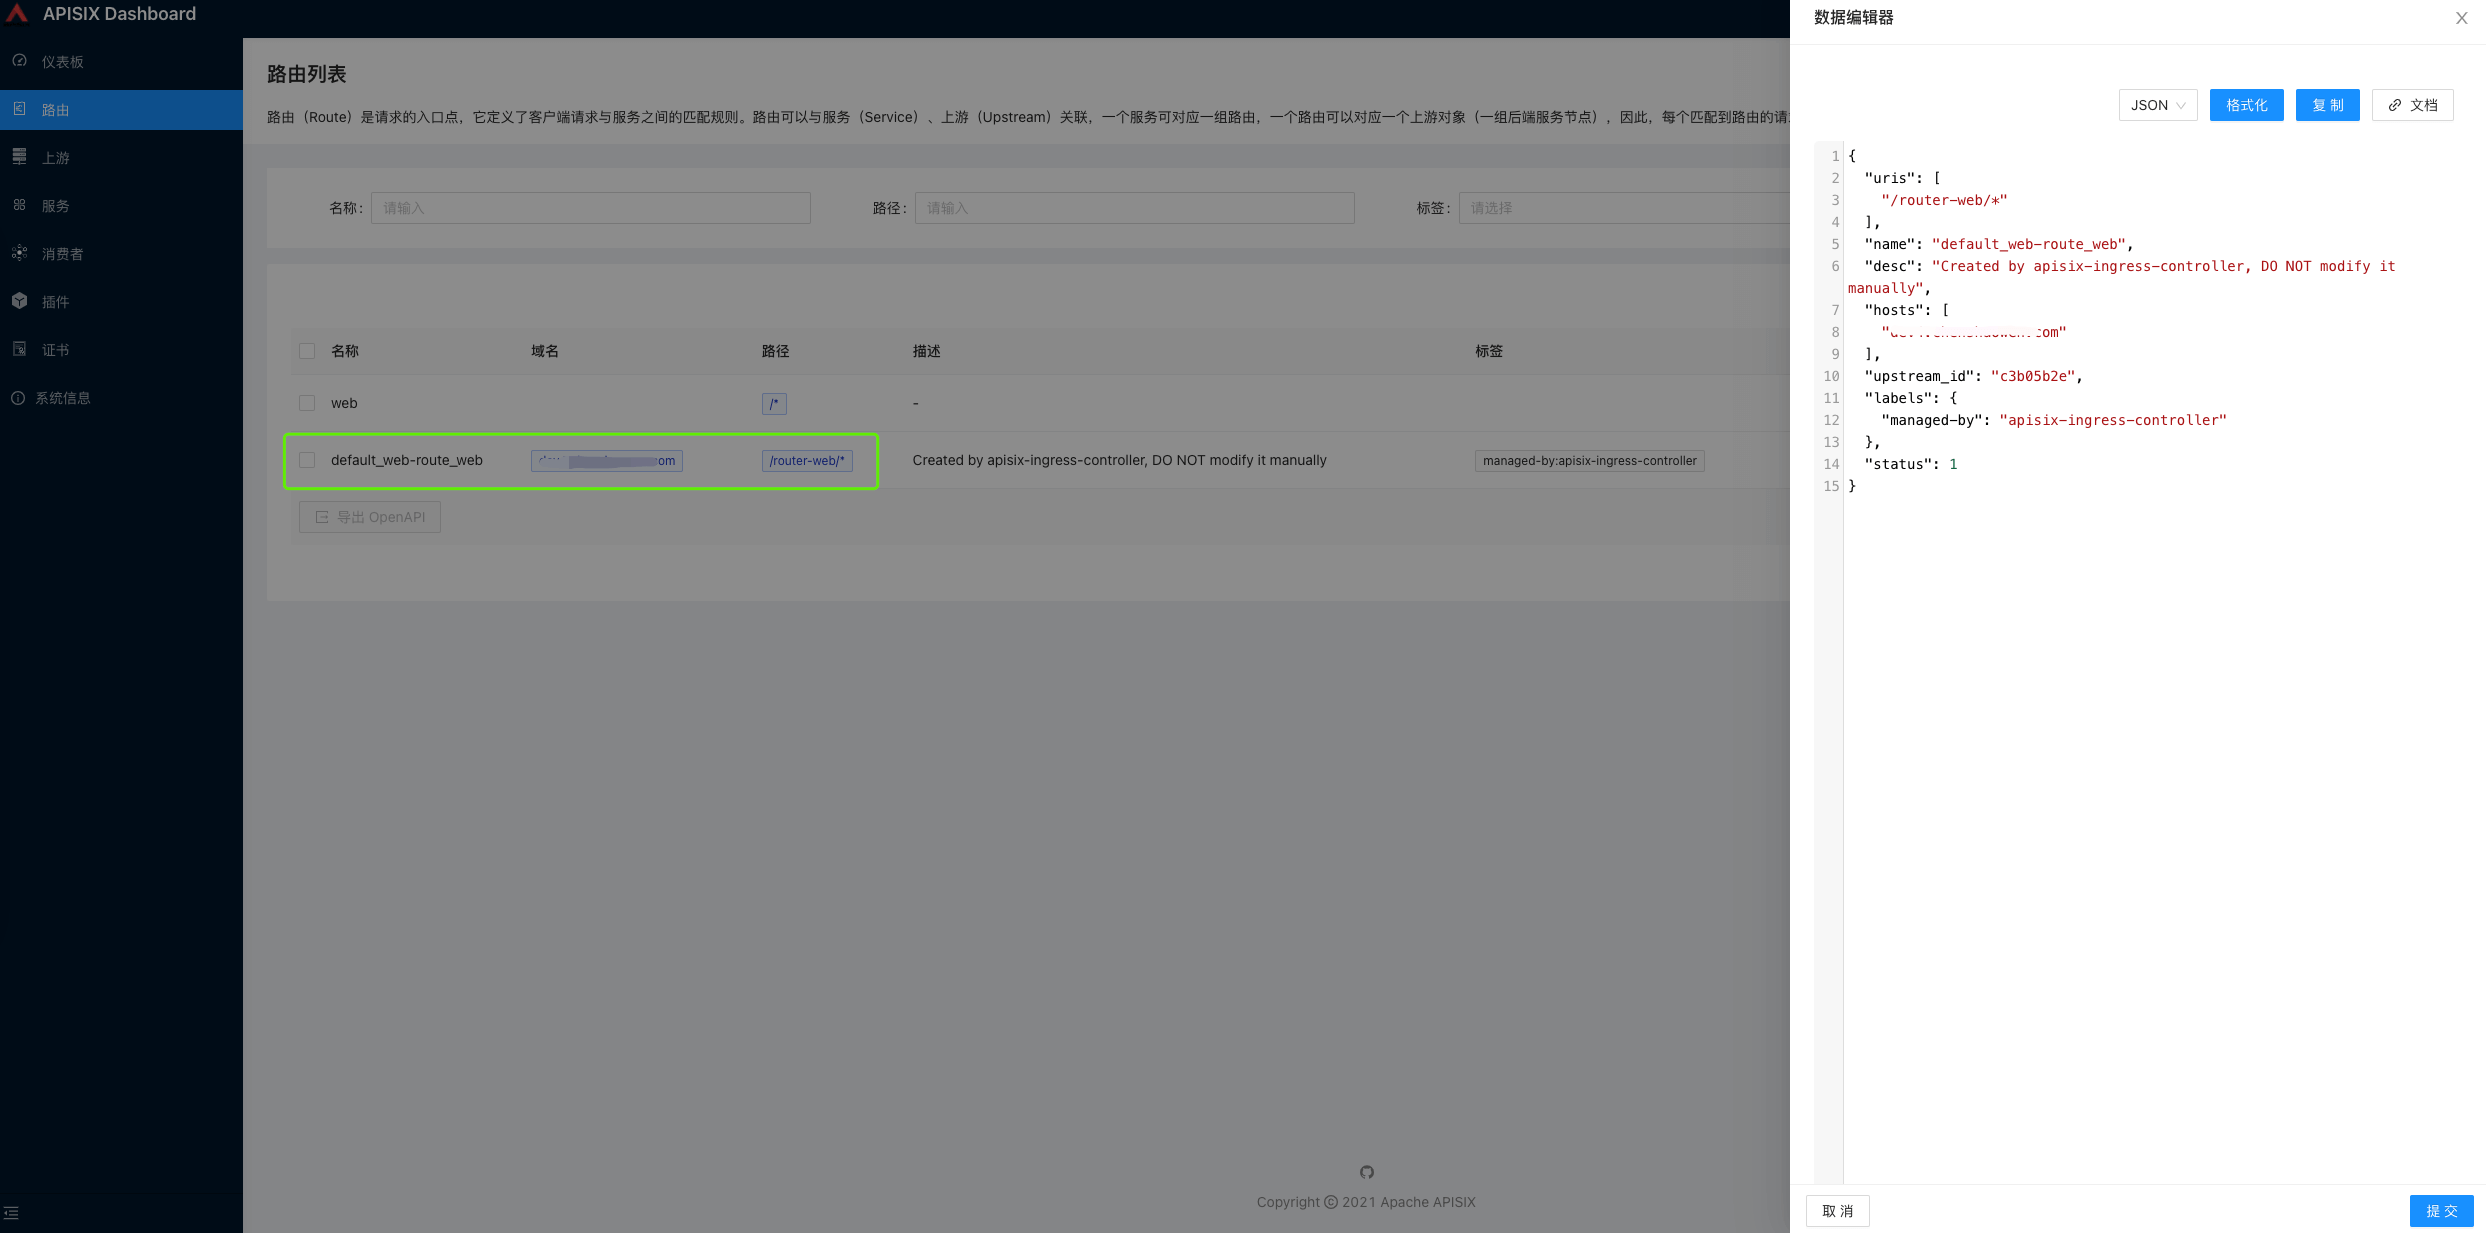
You can see that the route is managed by the ingress-controller, so do not edit it by hand.
- Check the service
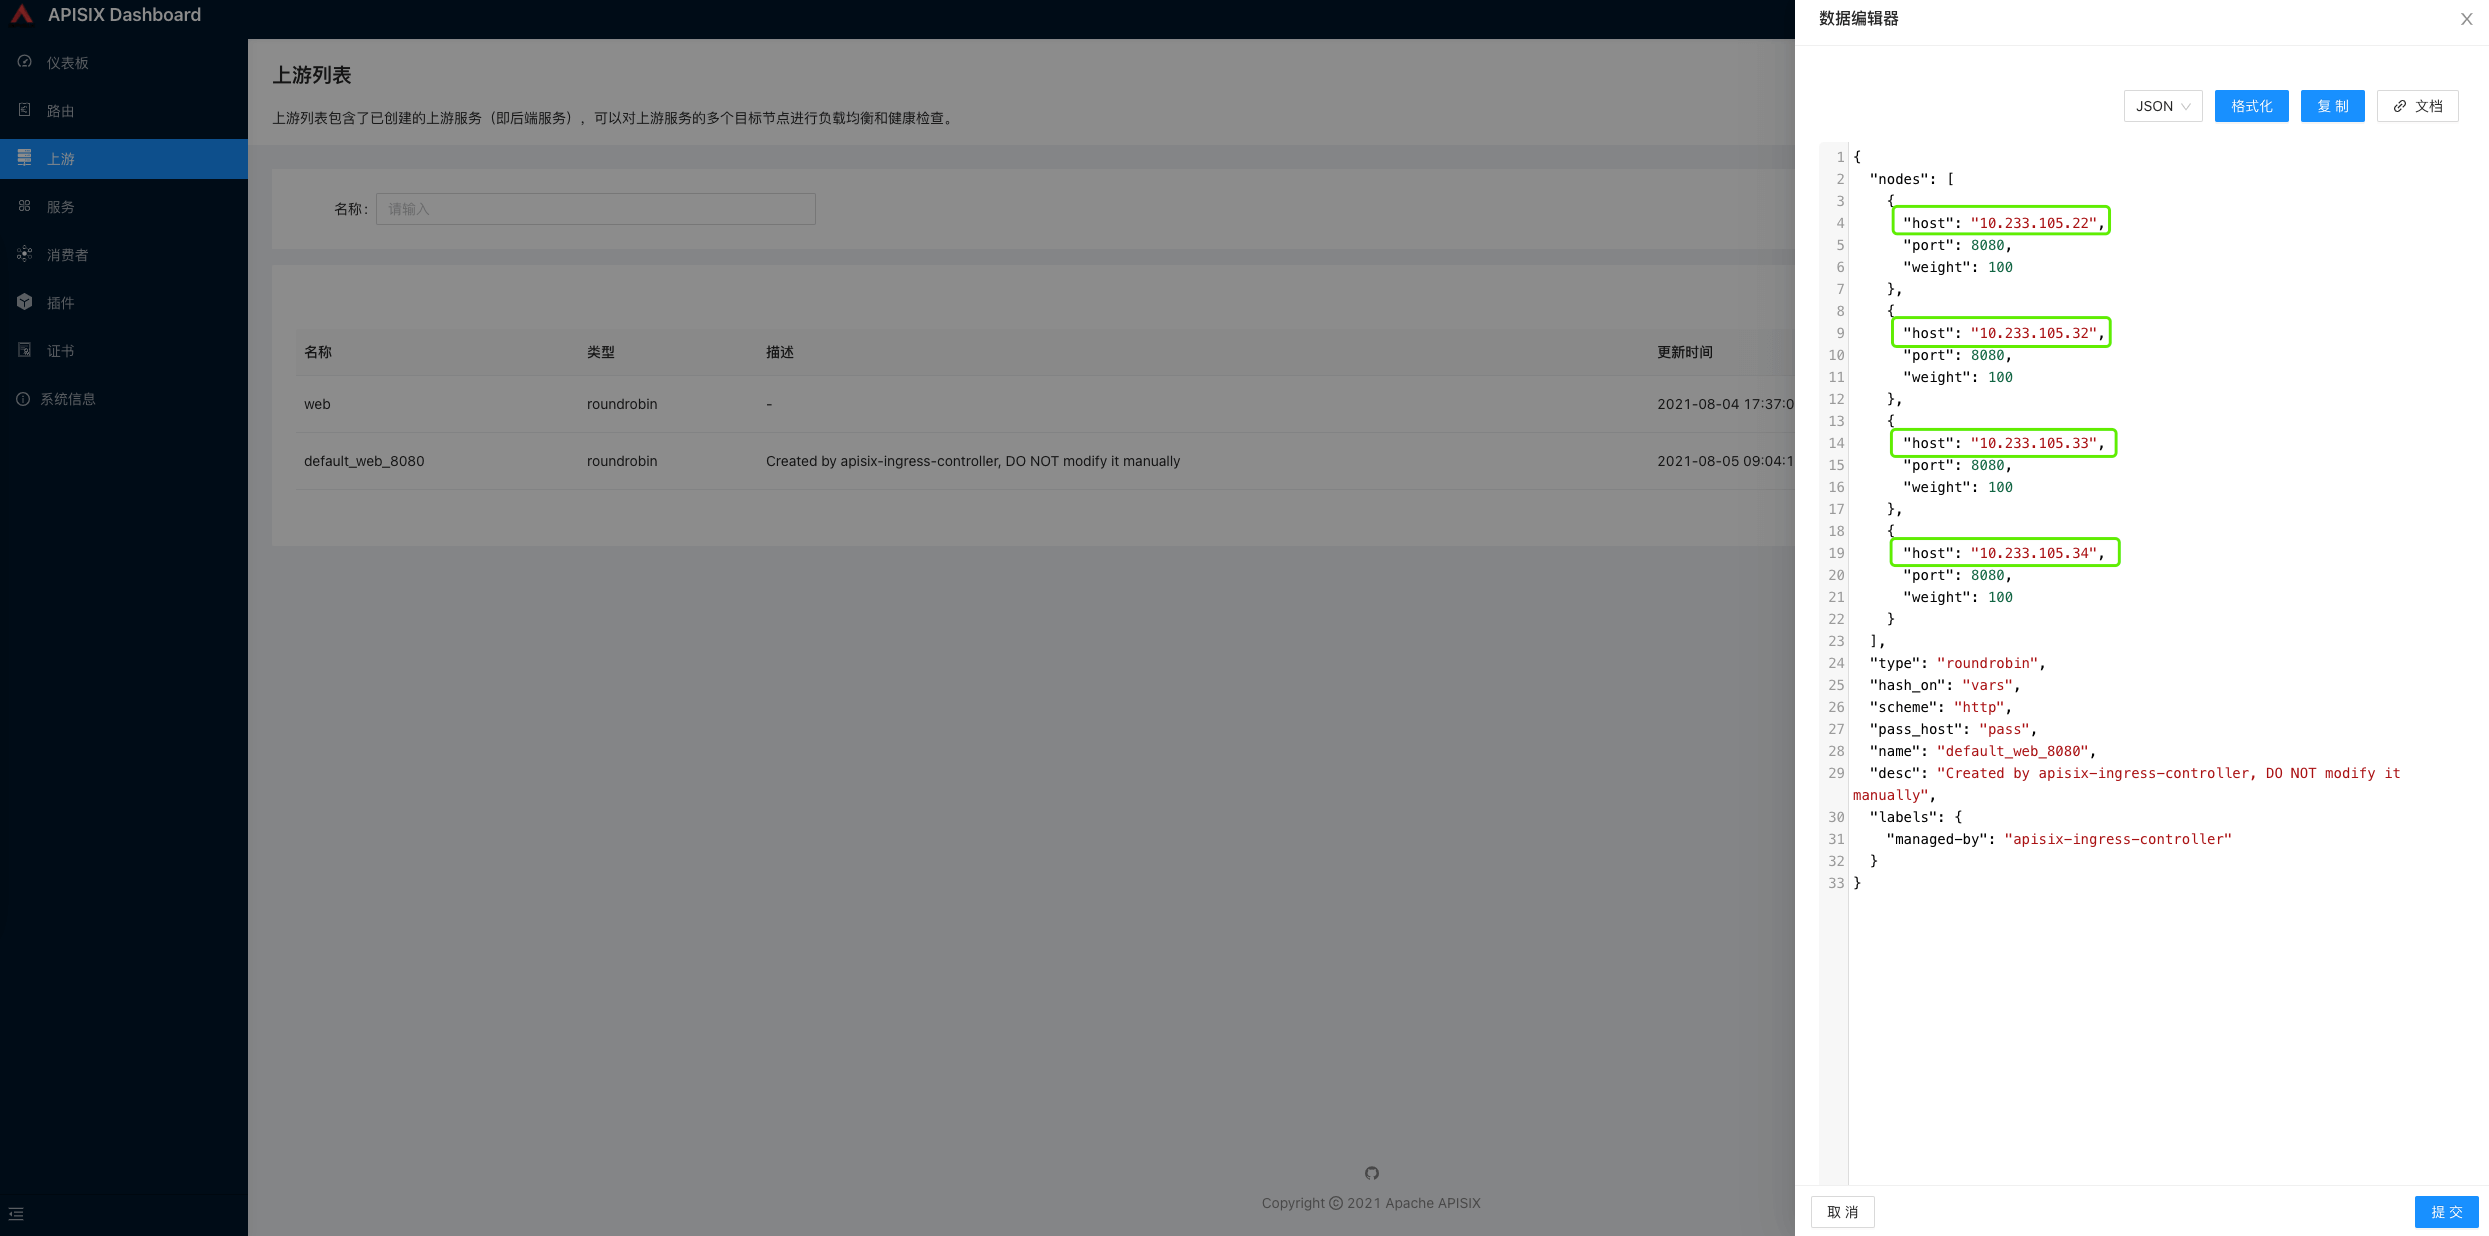
You can see that the service is mainly provided by four backends.
- Check the IPs of the service Pods
| |
APISIX uses the Pod’s IP address directly as the traffic backend, without going through Service forwarding, which differs from Kubernetes’ service forwarding and load balancing mechanisms.
5. Summary
This article briefly describes the differences between several gateways, considers what problems APISIX can mainly help us solve, and finally puts it into practice on Kubernetes. The content is as follows:
- APISIX is an API gateway application built on Nginx’s network libraries, using Etcd as its storage backend
- APISIX can be used as edge routing, and its dynamic nature avoids the jitter caused by Nginx reload
- APISIX provides an admin api to manage routes, and there are three ways to configure it
- Under Kubernetes, APISIX skips the Kubernetes Service and forwards traffic directly to Pod IPs
