前面写过一篇文档,如何在 CentOS 安装 GPU 驱动 ,这篇就来看看怎么利用 Docker 运行 Tensorflow 。
1. 检查当前 CPU 支持的 Tensorflow 版本
在不支持 AVX 指令的 CPU 上,运行 Tensorflow > 1.15 版本时,会报错,Illegal instruction (core dumped)。
执行检测命令:
1
2
3
| cat /proc/cpuinfo | grep avx
flags : fpu vme de pse tsc msr pae mce cx8 apic sep mtrr pge mca cmov pat pse36 clflush mmx fxsr sse sse2 syscall nx rdtscp lm constant_tsc rep_good nopl xtopology eagerfpu pni pclmulqdq ssse3 fma cx16 pcid sse4_1 sse4_2 x2apic movbe popcnt tsc_deadline_timer aes xsave avx f16c rdrand hypervisor lahf_lm abm 3dnowprefetch fsgsbase bmi1 hle avx2 smep bmi2 erms invpcid rtm rdseed adx smap xsaveopt arat
|
如果有查询结果,说明支持。常见的 CPU 体系结构 SandyBridge, IvyBridge, Haswell, Broadwell, Skylake, CasecadeLake 都支持 AVX 指令,除了 Westmere 。
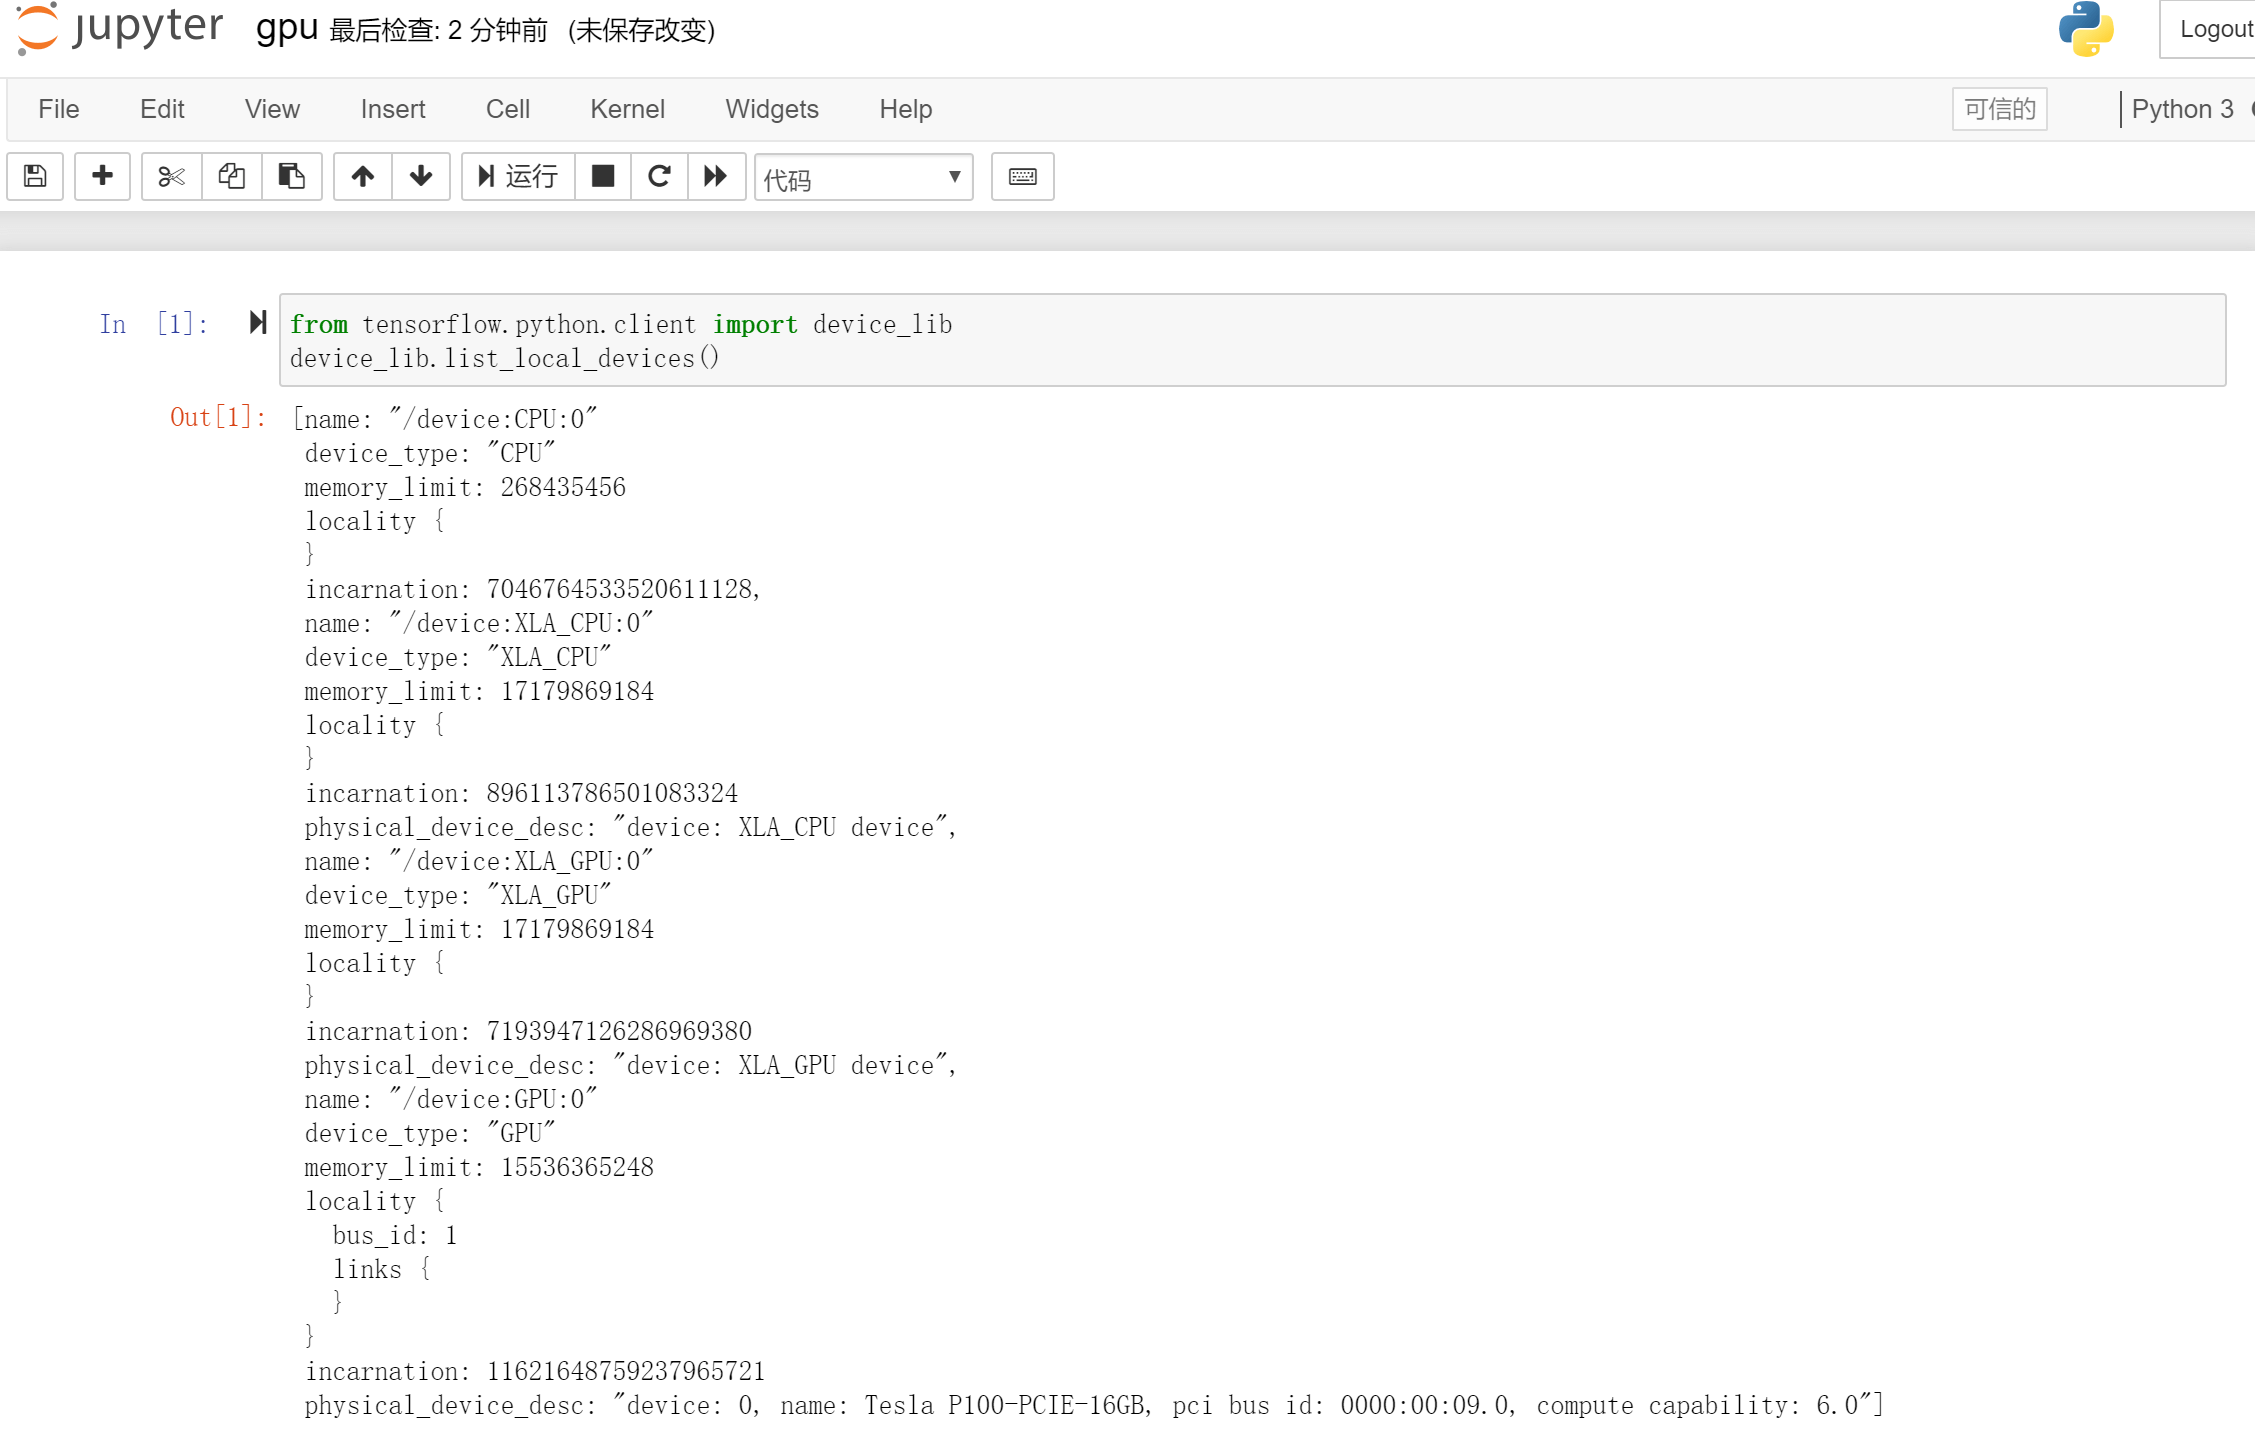
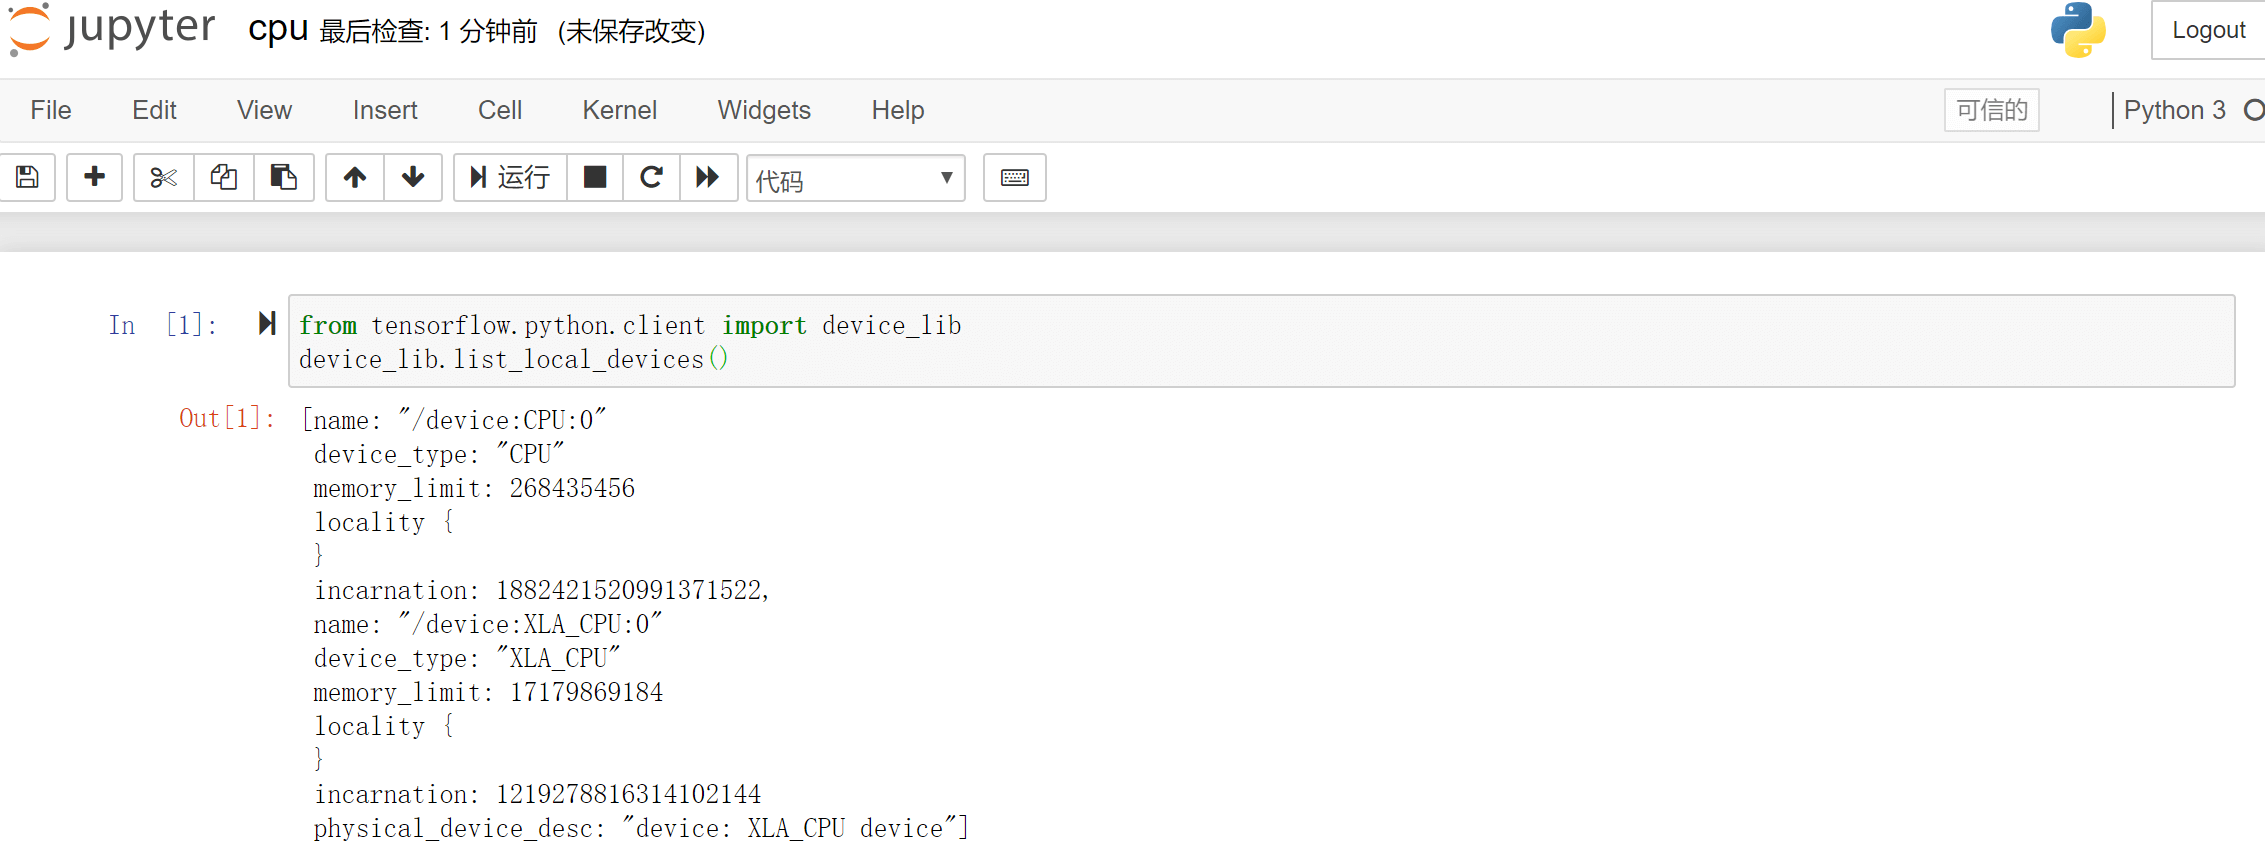
2. GPU\CPU 模式运行
使用如下脚本查看运行环境中的设备:
1
2
| from tensorflow.python.client import device_lib
device_lib.list_local_devices()
|
分别起两个版本的 Jupyter 。
1
2
| mkdir ~/notebooks
docker run --security-opt apparmor=unconfined --security-opt seccomp=unconfined --name tf-gpu -d --runtime=nvidia --rm -it -v $(realpath ~/notebooks):/tf/notebooks -p 8881:8888 tensorflow/tensorflow:latest-gpu-jupyter
|
查看登录秘钥,返回的 token 值为登录秘钥。
1
2
3
4
5
6
7
8
9
| docker exec -it tf-gpu cat /root/.local/share/jupyter/runtime/nbserver-1-open.html
<!DOCTYPE html>
<p>
This page should redirect you to Jupyter Notebook. If it doesn't,
<a href="http://0.0.0.0:8888/tree?token={{token}}">click here to go to Jupyter</a>.
</p>
</body>
|
1
2
| mkdir ~/notebooks
docker run --security-opt apparmor=unconfined --security-opt seccomp=unconfined --name tf-cpu -d --rm -it -v $(realpath ~/notebooks):/tf/notebooks -p 8882:8888 tensorflow/tensorflow:latest-jupyter
|
查看登录秘钥,返回的 token 值为登录秘钥。
1
2
3
4
5
6
7
8
9
| docker exec -it tf-cpu cat /root/.local/share/jupyter/runtime/nbserver-1-open.html
<!DOCTYPE html>
<p>
This page should redirect you to Jupyter Notebook. If it doesn't,
<a href="http://0.0.0.0:8888/tree?token={{token}}">click here to go to Jupyter</a>.
</p>
</body>
|
3. 参考链接
