1. Selenium 简介
Selenium 是一个 Thoughtworks 公司的集成测试工具。Selenium 的核心 Selenium Core 基于
JSUnit,完全由 JavaScript 编写,可以运行于任何支持 JavaScript 的浏览器上。
1.1 主要功能和特点
- 开源、免费。
- 多浏览器支持:Firefox、Chrome、IE、Opera,可以用于兼容性测试。
- 多平台支持:Linux、Windows、Mac OS。
- 多语言支持:Java、Python、Ruby、PHP、C#、JavaScript。
- 支持录制用例:自动生成测试脚本,用于回归功能测试。
- 支持分布式测试用例执行。
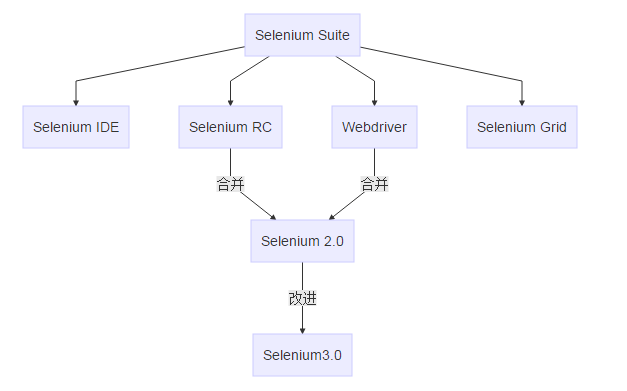
1.2 组成部分
- Selenium IDE
Selenium IDE 是 Firefox 浏览器的一个插件,用于录制和回放 Selenium 测试脚本。
- WebDriver、RC
WebDriver、RC 提供了各种编程语言 API 的支持,例如 Java、Python、Ruby、PHP、.NET 等,能够与不同的浏览器进行交互,驱动浏览器进行自动化测试。
- Grid
Grid 提供了分布式测试和并行测试的能力,能够大幅地减少测试的执行时间。
Selenium 2.0 集成了 RC、Webdriver 来提供 Web UI 级自动化测试能力。
Selenium 3.0 新增了对 Edge 和 Safari 的原生驱动支持。
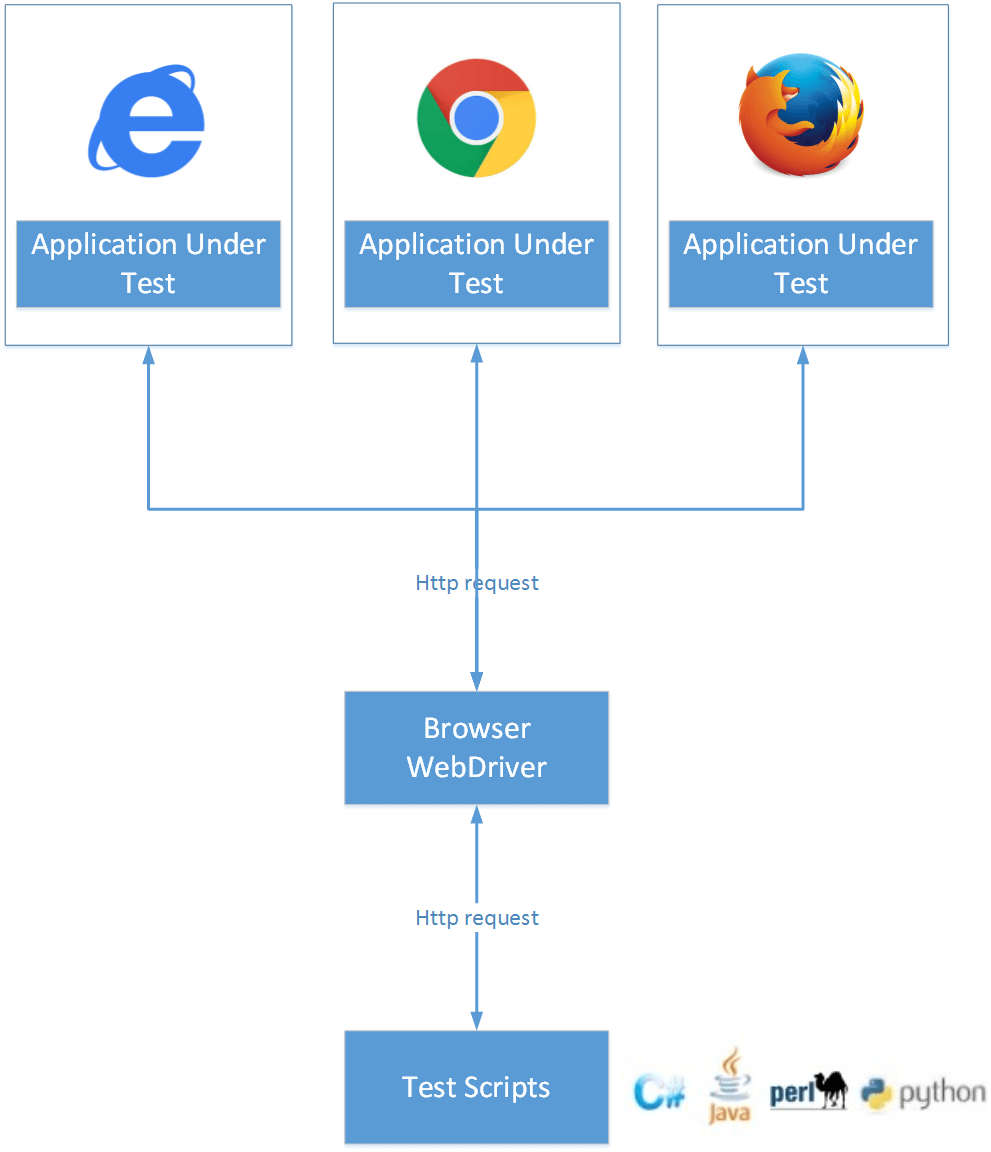
2. 原理介绍
WebDriver 是按照 Server–Client 的模式设计的。
Server 端就是 Remote Server,可以是任意的浏览器。使用脚本启动浏览器后,这个浏览器就是 Remote Server,它的职责就是等待 Client 发送请求,并做出相应。
Client 端就是 Test Script 测试代码。在测试代码中定义一些行为,比如打开浏览器,转跳到特定的 URL 等操作。这些操作是以 HTTP 请求的方式发送给 Remote Server(也就是被测试的浏览器)。Remote Server 接受请求,并执行相应操作,并在 Response 中返回执行状态、返回值等信息。
Webdriver的工作原理:
启动浏览器后,Selenium-Webdriver 会将目标浏览器绑定到特定的端口,启动后的浏览器则作为Webdriver 的 Remote Server。
Client端 (也就是测试脚本),借助 ComandExecutor 发送 HTTP 请求 Json 数据给 Sever 端。告诉 Selenium ,Client 端希望浏览器做什么。Sever 端需要依赖原生的浏览器组件,转化 Web Service 的命令为浏览器 Native 的调用来完成操作。
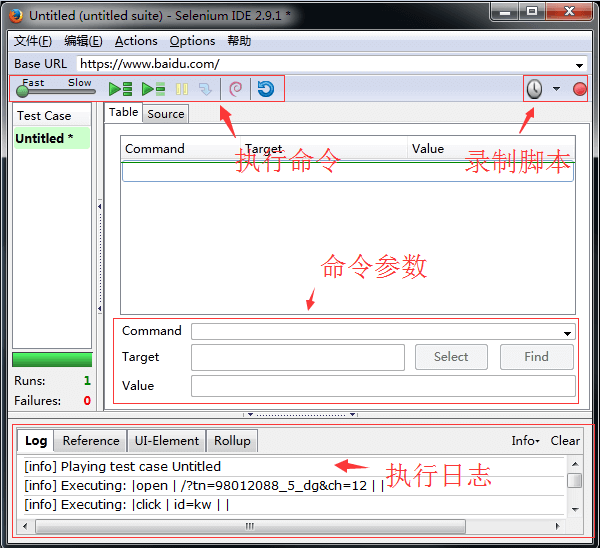
3. 用 Selenium IDE 录制和导出脚本
Selenium IDE 是 Firefox 浏览器的一个插件,用于记录用户对 Firefox 的操作,并且可以回放用户的操作。
3.1 安装 Selenium IDE
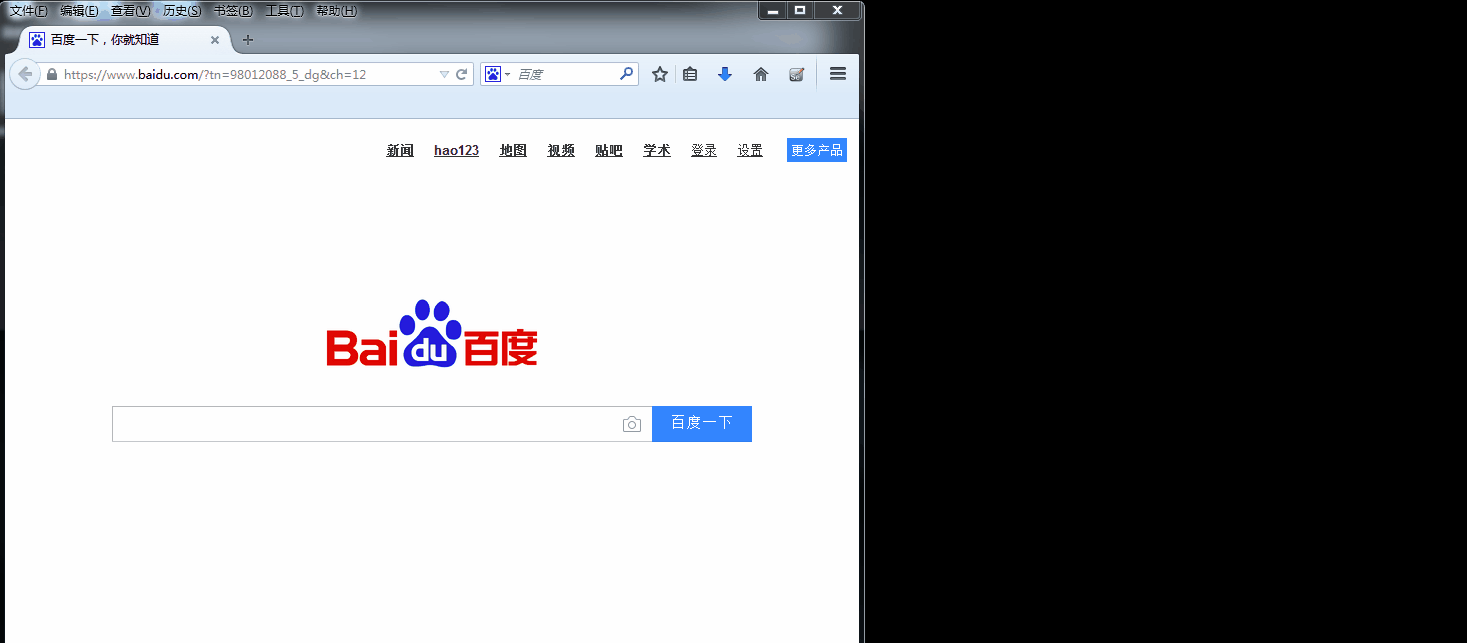
下载安装 Firefox,在浏览器中打开,https://addons.mozilla.org/en-US/firefox/addon/selenium-ide/,安装 selenium-ide。
需要提醒的是,selenium-ide 并不支持全部版本的 Firefox。如果打开 Firefox 工具栏的 【工具】- 【Selenium IDE】,提示报错,很有可能是版本不兼容问题。这时,需要在 selenium-ide 的安装页面,找到其支持的 Firefox 版本,安装兼容的 Firefox 版本即可。
3.2 基本构成
每个脚本都是由若干条 Action (行为)组成,而每个 Action 又由 Command,Target,Value 三者组成。
- Command,命令
有几类的命令:Action动作,包含 click、open、type 等、 Assertion 断言、Element Locators 指定元素、 Patterns 模式匹配 - Target
Web 中的某个对象,比如:文字,输入框等 - Value
使用 Xpath 指定某个对象
3.3 录制脚本
打开 Firefox, 在工具栏找到 【工具】-【Selenium IDE】,点击打开,默认开始录制脚本。
录制完毕后,点击录制停止按钮。在左侧的执行命令面板中,可以选择连接执行命令或者单步执行命令。
3.4 导出 Python 脚本

导出 Python 脚本之后,默认是使用的 Firefox()浏览器进行测试,这里修改为 Chrome()。需要安装 chromedriver 才能执行脚本。
导出的脚本内容如下:
| |
4. Selenium + Python 自动测试
4.1 安装 Selenium
| |
4.2 编写测试脚本
test.py
| |
4.3 执行测试
| |
如果报错,提示:
| |
那么需要下载geckodriver ,并将其存放路径,加入系统的环境变量 PATH 中。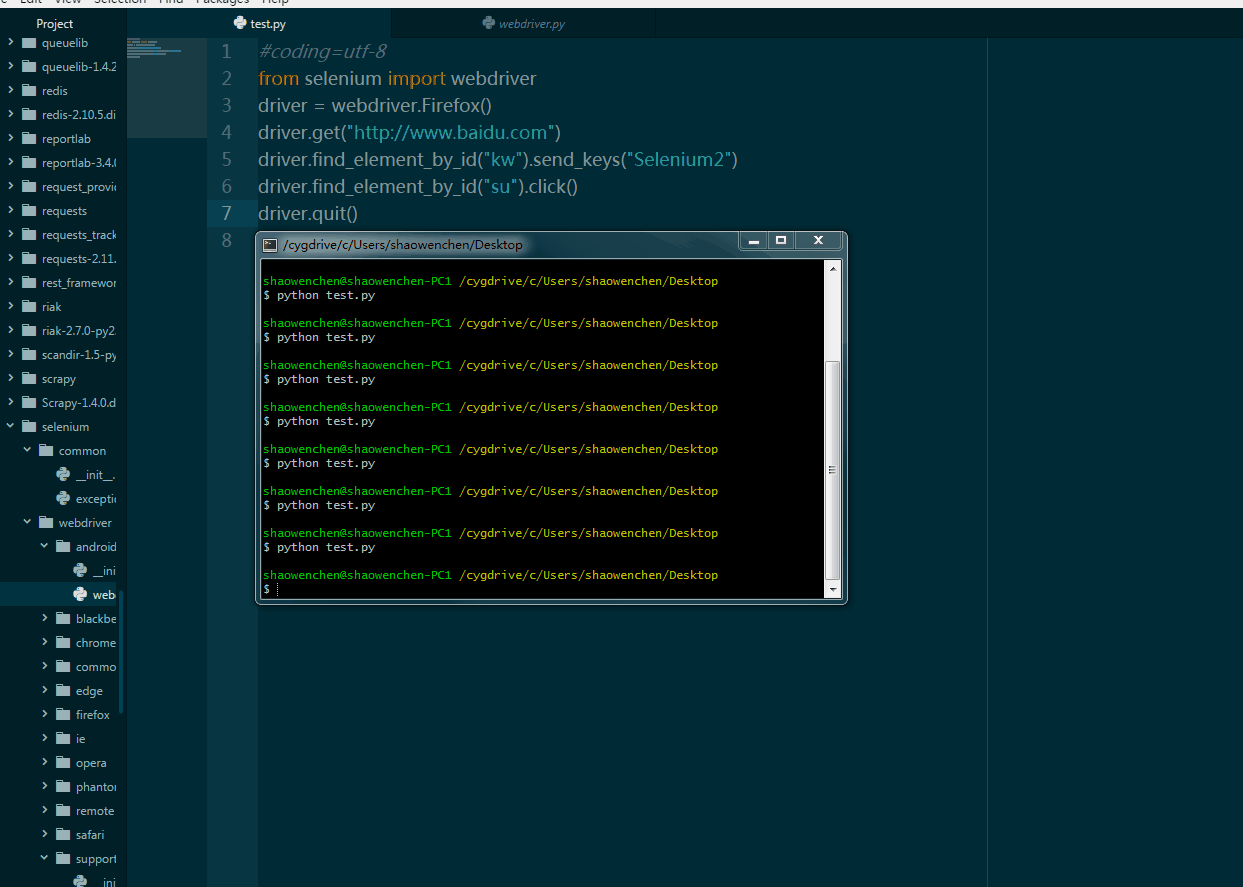
如果希望支持 IE、Chrome 需要下载相应的驱动,http://www.seleniumhq.org/download/ 下载IEDriverServer、chromedriver,并将其存放路径,加入系统的环境变量 PATH 中。
| |
5. 参考
- https://www.ibm.com/developerworks/cn/web/1209_caimin_seleniumweb/
- https://www.ibm.com/developerworks/cn/web/1303_luoxs_webdrivertvt/index.html
